Woodsmoke - Woodlanders Bushcraft Course
Woodsmoke - Woodlanders Bushcraft Course
What is Bushcraft?
The first time I’ve ever heard of Bushcraft was a few years back when googling about living in the wild. Some people may have misconception of what Bushcraft really is about, as it was easily confused with the stuff that Bear Grylls does on TV. I am sure we all got a little excited when watching Bear grylls eating bugs, sleeping rough and teaching techniques on how to stay hydrated and fed. To make a clear distinction, Bear Grylls’ does what is called survival training. How to get out of a situation if you are exposed to the natural environment and no communication to civilization. To be able to survive and get yourself back to civilisation as quick as possible.
Bushcraft on other hand goes beyond that! It is not about survival, but about sustainability and living comfortably within natural environments. Taking our time to be part of the natural world and enjoying it. With Bushcraft, learning a range of skills from fire lighting with sparks and by friction, cooking an open fire, shelter building, plant identification, animal tracking and trailing, fishing techniques, cord making and making your own tools and equipment, and much more.
Summary
This was my first time bushcrafting, an absolute newbie and not knowing what to expect! When researching for the right company to do the course with, I wanted to choose one that has a comprehensive selection of courses, reputable and also exhibitions I can participate in the future. It came down with woodsmoke winning my vote, as it was easy enough for myself to commute and they had a good range of interesting courses to keep me busy for some time! Their exhibitions looks superb giving me more motivation to work towards it.
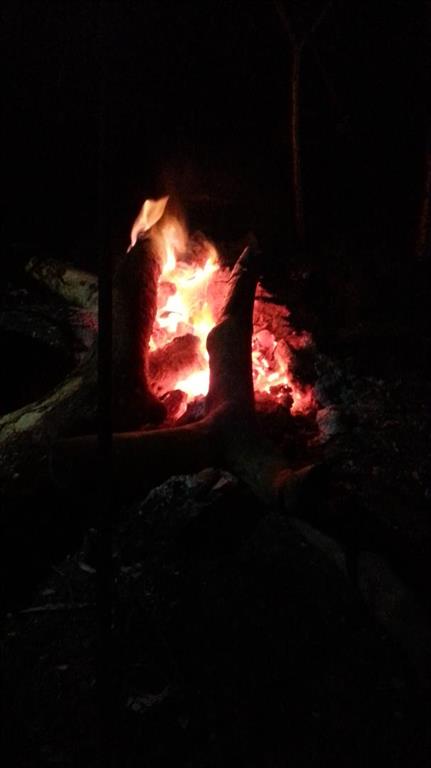
The evening flames
I am glad to have taken the first step of many. Bushcrafting is such a great way of escaping the cities and spend time with nature. Once you have mastered the basic skills, it doesn’t cost much to take a weekend off to go Wales, Lake District, Scotland or any other country sides. I like Bushcraft because everything you need, nature has provided. Sitting by the warm open fire, carving my spoon, relaxing, chatting, laughing, life never felt so simple. I’ve felt at ease. What I felt made the experience better was probably the people within our group. We all bonded so well, none were competitive against another, but assisted and accomplished each challenge as a team. I felt very comfortable around them, it was like my very own Bushcraft family.
In this course we have learned to make fire using several methods such as the bowdrill, my favorite because I was getting good with it! Several fishing techniques and how to prepare and cook our own fish over an open fire. Cooking pigeon pie in a makeshift oven using two different size pots. Carving wood to make tools such as a spoon. Tearing nettles from the ground with our bare hands then stripping them and turning it into cordage, you should see their faces in the video. Useful knowledge of trees, fungies, plant life and their uses. Methodology to identify animals from their tracks. Building shelters with the resources around. Water purification. Building traps and more!
Big congratulations to Michael, the star of our group for having achieved a distinction award on the final day’s challenge! Well done, we are so proud of you!
By the end of the week, I was exhausted. It felt like a crash course. By blogging, it made me realise just how much we have accomplished in a week.
It took 3 days for the smell of fish to fade from my skin even after numerous baths. The steam would lift the smell to my nose every time. It was nice to be home in clean clothes, but it isn’t the same as the warmth of sitting around an open fire as you stare into it. That feeling of nothingness, just you and the moment.
My thoughts would now go to study about herbal medicines both European and Chinese. I may also come up with some infusion ideas for Chinese cooking recipes with the outdoor cooking techniques. I wonder what kind of abomination I could create!
Big thank you
I would like to thank my group for the wonderful time and memories of this adventure. Elly, Dan, Michael, Stu, Rob, Anna, Raj, Darryll, Keith, Fi, Will, Steve, Hannah, Barney, Ross, Lisa and Sue. I was hoping to be able to meet Ben, but I am sure I will get to meet him in the next course and hear some of his stories!
Will I do this again?
Absolutely! I am planning to do ‘The Native Bushman Course’, ‘The Blade’, ‘The Axe Workshop’, ‘The Bowyer’ and ‘The Coastal Forager’ plus all the exhibitions at some point!
Feeling adventurous? Then join us! Keep posted of the next adventure on the events page!
You can find more information on the Bushcraft school and courses at: http://www.woodsmoke.uk.com
My kit list
To survive 7 days out in the wild, I’ve decided to pack the following:
Clothing List
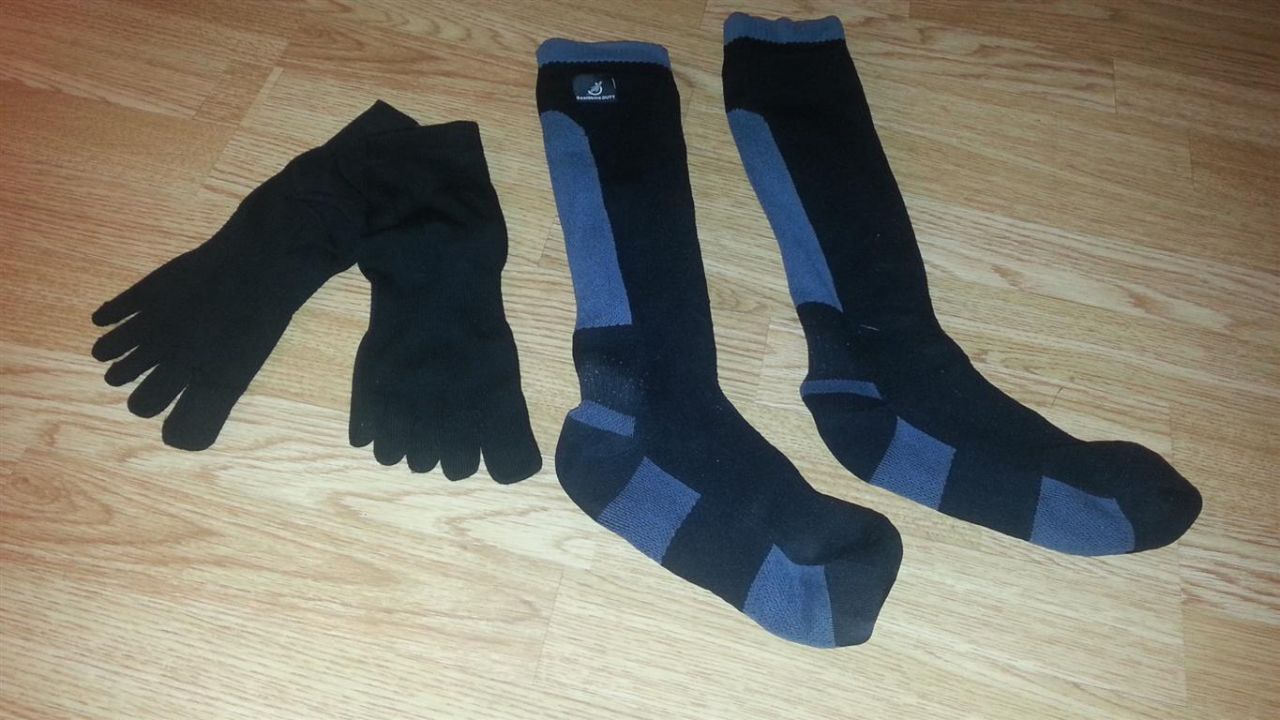
- 7 x Finger Socks
- 3 x Underwear
- 1 x Sleeping T-shirts and PJ bottoms
- 3 x Vests/T-shirts
- 2 x Long sleeve tops (Red/White)
- 1 x Comfy Footwear
- 1 x Swim Wear
- 1 x Hiking Shoes
- 1 x Waterproof Hiking Socks (Sealskinz Knee high)
- 1 x Woolly Hat
- 1 x Gloves
- 1 x Neck Scarf
- 1 x Under-layers (Tops & Bottoms)
- 2 x Craghoppers Trousers (Long and Convertible)
- 1 x Inner and Outer shell Winter Jackets
Toiletries (Bag)
- Toothbrush
- Toothpaste
- Face Wash
- Moisturiser
- Shaver
- Floss
- Lip Balm/Carmex
- Shower Gel
- Shower Sponge/Scrubber
- Towels
- Wet wipes
Other Equipments
- Mp3 headset
- Spare headphones
- Chinese Tea
- Gopro kit
- Tripod
- Mask & Snorkels
Hiking/Camping Equipments
- KarrimorSF Sabre 60-100 + 2 PLCE side pouch and yoke system
- First Aid Kit
- Bushcraft Kit
- Skin Protection Kit
- Lunch Box and cutlery set
- Binoculars
- 100ft Paracord
- Drybags
- Wild Country Lite 2XL Tent and Footprint
- Sleeping bag
- Foam Mat
- Torch/Lamp
With an overloaded rucksack that ended up weighing 21kg, it’s off to Windermere I go!
Day 1
Leaving BirminghamThe train
From Birmingham I had to take the train from New Street Station (Birmingham) to Oxenholme Station (Lake District). I then had to change at Oxenholme (Lake District) to Windermere (Lake District).
First friend
Upon changing trains at Oxenholme, stepping into the same carriage was this bloke in his 30’s, shorter than me for once. He was carrying a rucksack as big as mine, all dressed up in army camo outfit and looking to be on a serious mission. This is Stu, turns out he was also participating in the same course. Stu was also from Birmingham and works as a solicitor for a law firm. We chit chatted for the rest of the 40 minutes journey discovering we both have the same branded bags, same town, and passion for the outdoors. Later we will discover that Stu and I had more in common than we thought….
Arrival
When we arrived at Windermere, we had over an hour to kill. We stopped at a local cafe and relaxed as the downpour of rain started to pick up. Looking outside, it looked terribly gloomy as we talked about how the weather will play out to be more challenging for us. Of all the weeks in mid summer, a hurricane decides to blow a storm over Britain that will last for some time…
Will-i-am
Back at the station we met Will, one of the instructors for this course. First impression he was a very talkative, enthusiastic and happy chap… Also at the station there were a few other students;
Raj from Barcelona, who is a father of 2 boys and runs an Indian Restaurant. He plans to take his boys outdoor in the future.
Daryl from Blackpool. Self employed running some sort of gambling business.
Rob from Bradford, arrived late due to the train delays so we punished him by putting him at the back of the Landrover with all the baggage. Rob works for a charity that runs outdoor activity projects. His purpose of learning bushcraft was to integrate some of those skills into his projects.
In the old Cumbrian language, the breakdown of the word “Winder” is the actualy name part, and “mere” meaning lake. So calling it “Lake Windermere” would translate to “Lake Winder Lake”. Calling it just “Windermere” would actually be the correct term!
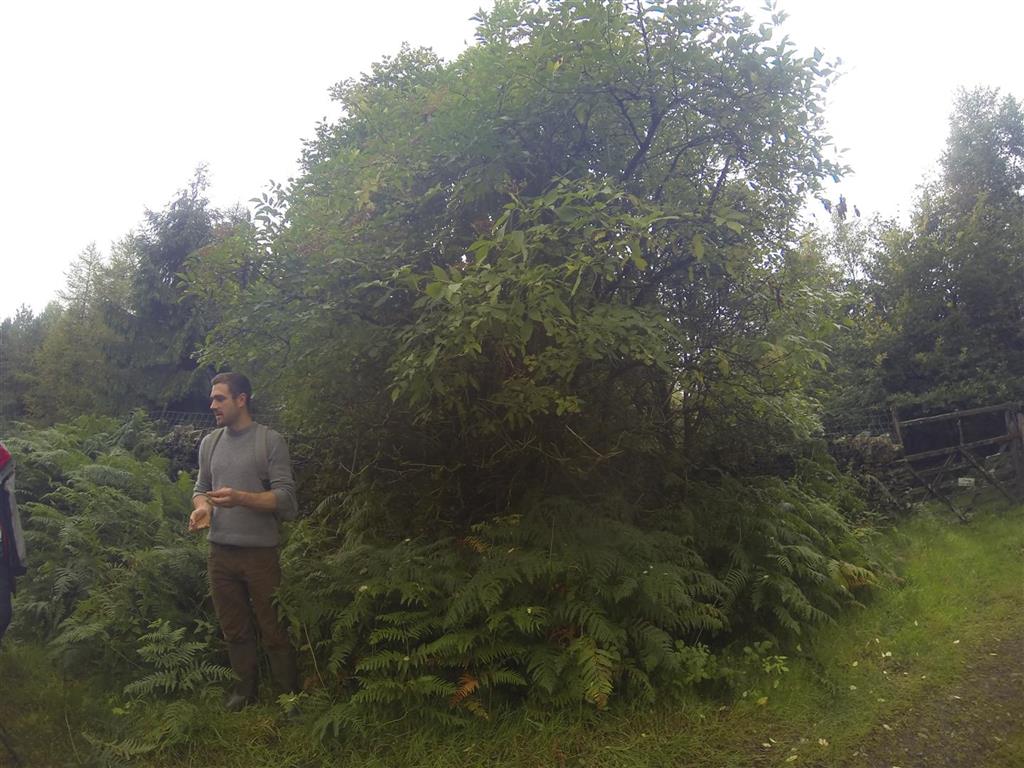
To base camp
We drove and to the pub meeting point to meet the rest of the group. Along the way we came across a tow boat bridge where we’ll have to drive the landrover onto the boat and it gets towed to the other side.
Time was against us as the sun was going down. From the pub, we had to walk about 15mins to the base camp that will be our home for the next 7 days.
Setting up camp
Setting up my tent was challenging! It had gone dark, raining and cold, so trying to decipher the manual was somewhat impossible in this condition.
Try out new equipment at home or in the local park before taking it on any expeditions!
Luckily for me, Stu also has the same tent but the one man version so the set up was all the same! So now we’ve just added another item to our in common list!
By the time I’ve got my tent up, I was already soaked and had bloodied my hands with two deep cuts on my index and middle finger from the poor quality of bending pins that hold parts of the tent and had to borrow some better pegs from an instructor.
The others
In the late evening, we gathered around the main canopy by the fire for some bread and soup. This is where the others in the group introduced themselves and we got to meet the instructors and helpers on this course.
Anna, part polish from Sheffield and works as a yoga instructor.
Michael from Scotland who works with children as an Outdoor leader.
Dan & Elle from London, also known to me as the “Couple”. Dan is a software developer who works in banking software, loves skydiving and spending time with nature. Elle plans to run her own business in Graphic Design, she’s very sociable and likes to chat.
Keith, a retired English literature teacher from Brighton. I have a lot of respect for this man, even at his age he’s still out there to learn and go on adventures!
Fion also known as Ffi is Welsh and our instructor for the next few days. Shes working with woodsmoke to work towards becoming a fully certified outdoor instructor.
Steve, tall, dark and handsome. He’s very passionate about trees, tracking and mushrooms. Heard he mades his own canoe and lives in a wooden home that he had built himself in Scotland!
Hannah, made amazing grub that you wouldn’t think you’d get to eat when out in the wild! With cooking skills like that, she’ll make a good wife.
Barney… I haven’t had the chance to get to know Barney other than he likes to play the guitar!
The last time slept in the wild was at 17 years of age, a drunken night at Lancashire University. After a hard night of clubbing, my friend disappeared and I was dragged back by two kind Asian fellow students. Those two never had a clue which room I was in and I was in such a bad comatose state, they left me on the grassland outside the student halls. I remember opening my eyes, a clear night sky just starring at the stars for a good while. By morning, I could feel the warmth of the sun. I awoken with the freshest ever feeling. The smell of flowers and grass. The birds singing, bees buzzing and wild rabbits hopping around. A moment never to be forgotten.
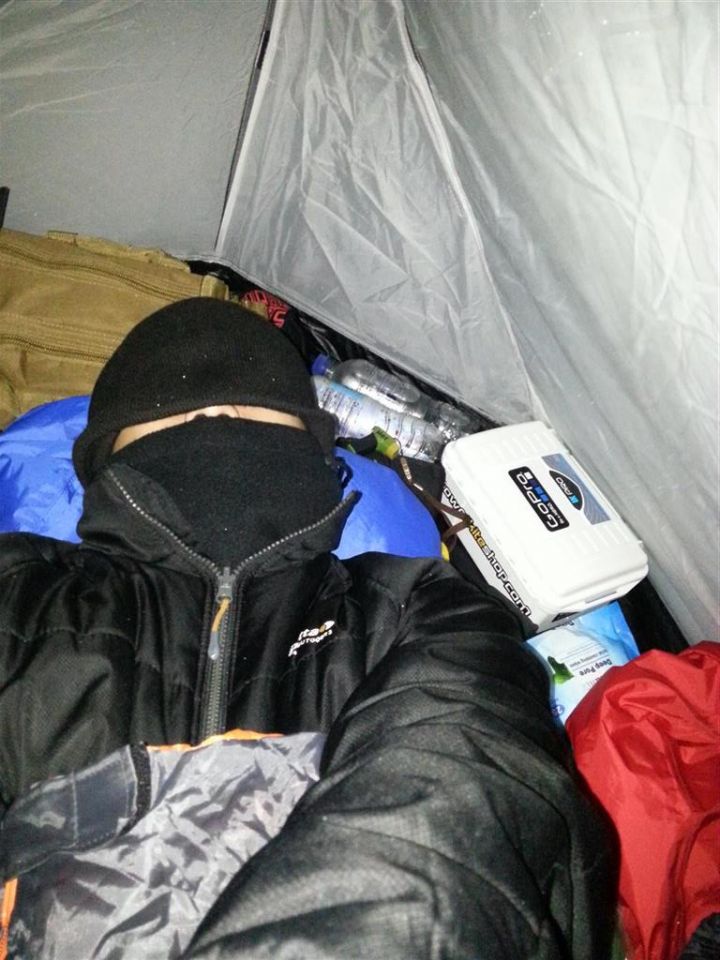
First night
Time to try and sleep. I could hear the rain pelting down on the tent, the wind howling and annoying buzzing insects between the inner and outer part of the tent. Scared of being bitten by mosquitoes, I spent a good 15 minutes dabbing wet tissue onto mossies and flies that followed me into my tent before I could zip seal it.
Awake
I ended up rolling around for 30 minutes, it was cold and loud from the rustling of leaves and branches… my sleeping bag was so pathetic and absolutely inadequate for the job. Buying equipments from groupon last year was a waste of money! Time to invest in a new four season sleeping bag for my next trip!
Wrapped upI had to put on another T-shirt, two jumpers, woolly hat, neck scarf, gloves as well as my inner shell jack and crawled back into bed. I now wished I’ve packed my under-layer bottom. To solve the noise problem, I’ve found some earplugs in my toiletry kit. Much, much better…
Day 2
Mine and Stu’s tent in the morning
First morning
After three toilet interruptions throughout the night, I slept like a baby and was snoring out loud as my neighbors pointed out. Fi had to wake me up as I was the last one and not hearing my alarms for obvious reasons!
For breakfast we had cereal and fruit. I already set my expectation that food would be no luxury restaurant. No thrills but fibrous, this isn’t a holiday! Busting out my new cutlery set, and then looking across to Stu to find him having the same set as me but in green! Another item in the common list! Also turns out Stu also got the titanium spork too… By now, everyone had thought we were buddies who came to this course together!
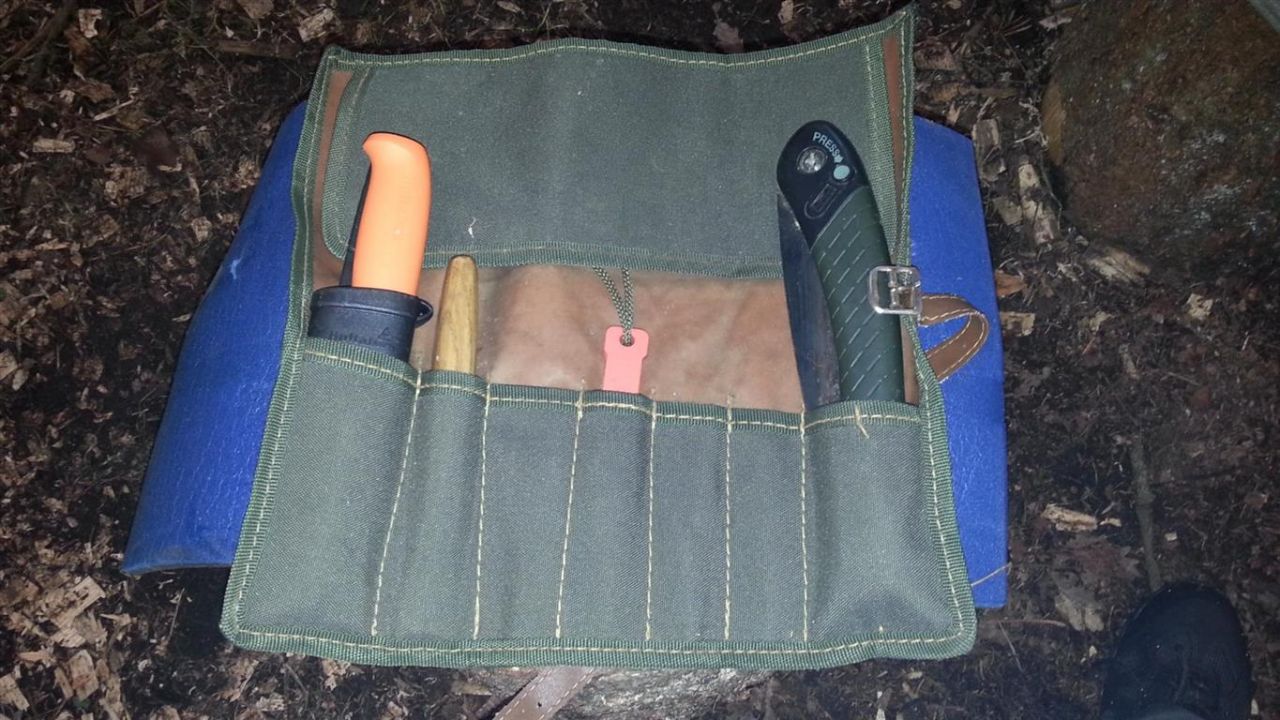
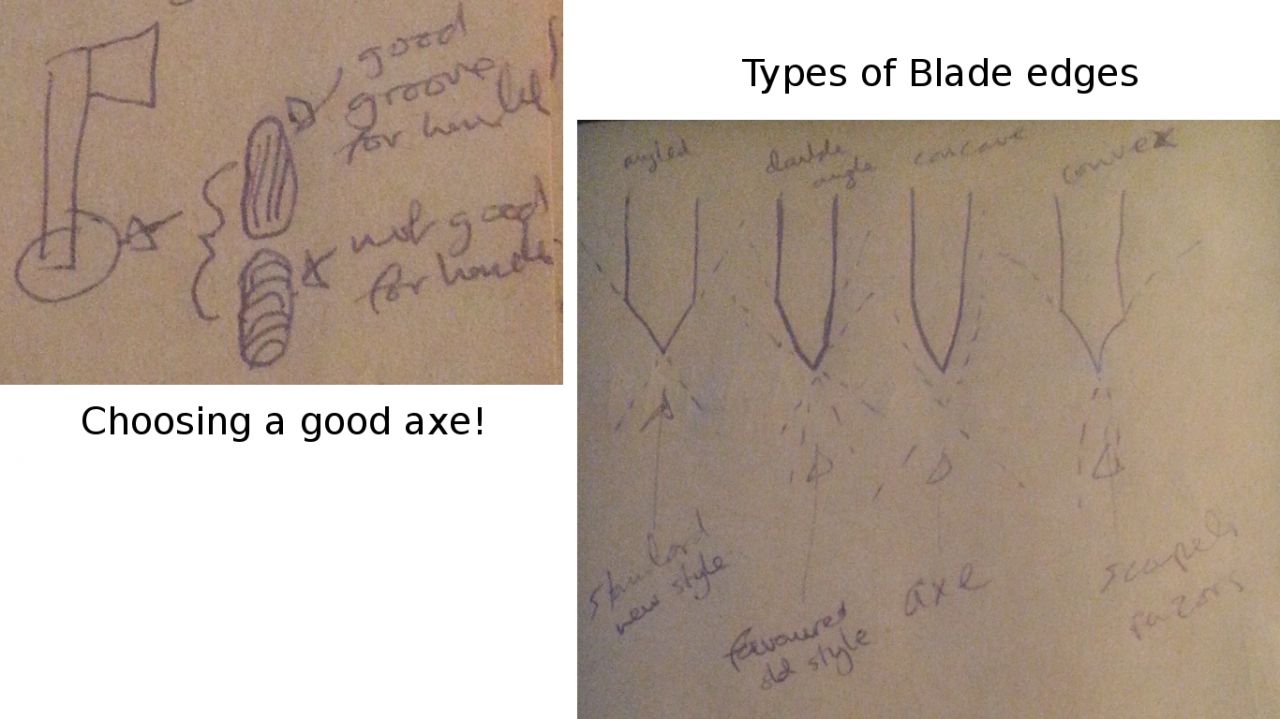
Basic Tools
Tool kit and knife to keep!The day started out learning about basic tools and how to choose the right tools.
Saws - they have different teeth marks. The symmetrical teething are better for dry wood. If the teeth has different lengths, they are generally better for cutting green wood (wet & fresh).
Axe - An important part to look out for when choosing an axe is the handle. So what makes a good handle? If you look at the bottom of the axe handle, the grooves should be verticle. If it is horizontal it means it will be weaker and more prone to snapping.
Knives - Always ensure they are Full Tang Blade, which means the blade runs through the entire handle. The knife we were given to use and keep is a Mora knife made from Carbon Steel. If by the sea, considering a stainless steel blade may be a good option as they are more rust resistant, harder to sharpen but the edge will last longer.
Obsidian is the only known substance that can be sharpen to 1µ (micron) and still in use for making tools such as surgical knives.
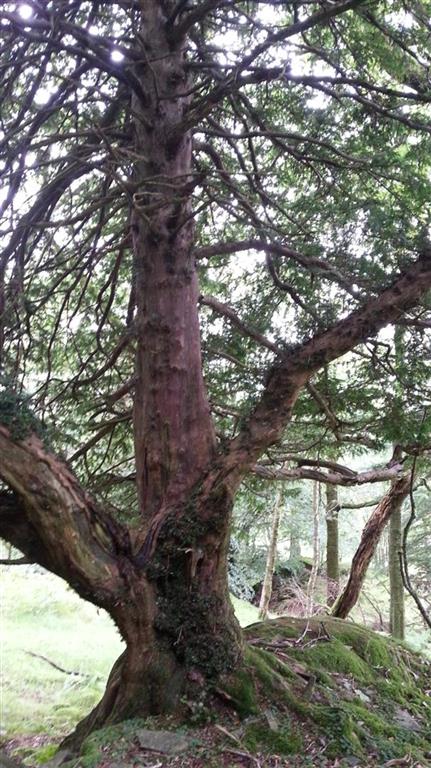
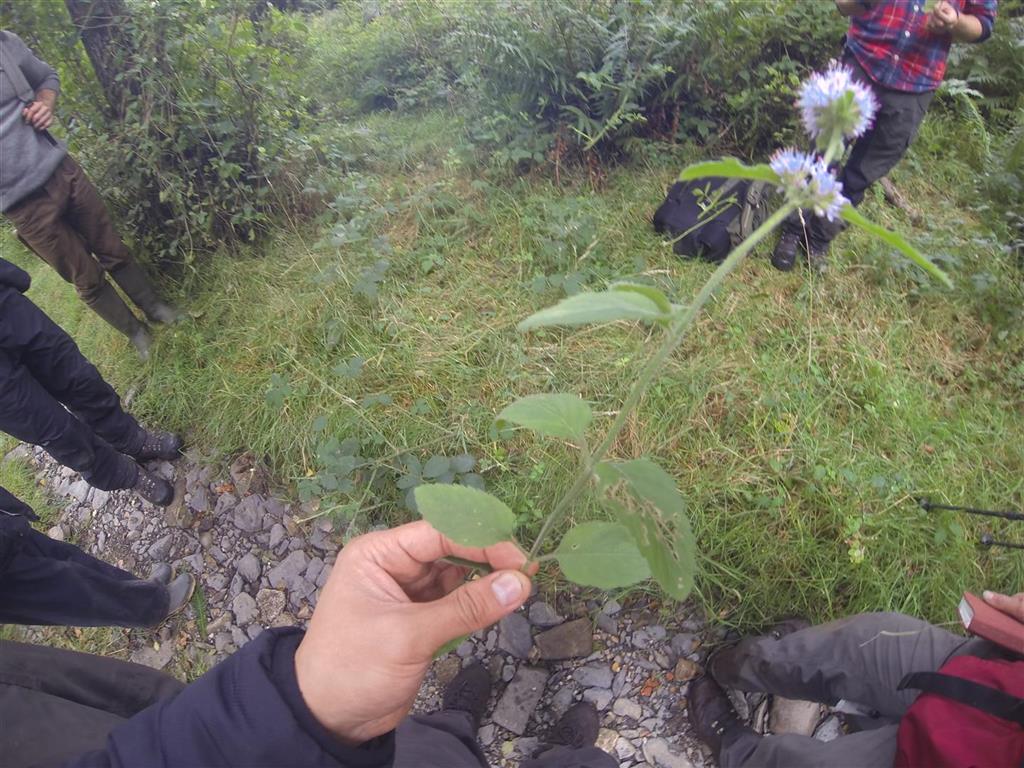
Plant life and Tree identification
Yew trees are shrub like growthThe afternoon started with walking around the woodlands stopping by different plants and trees. We learn about the properties that helps identify us them, where they flourish, leaf shapes, berries, flowers, shrubby or tree like. We also learned what they can be used for such as carving tools, medicinal properties, poisonous or not, anti-bacterial/viral, firewood, etc. I found remembering the English names already difficult and trying to remember their botanical names were impossible! The only ones I can remember is “Quercus Roba” which is Oak Tree. I need to invest in some books and spend some good time familiarising this subject!
Along route we’ve harvested some branches from Hazel tree because they have nice straight branches.
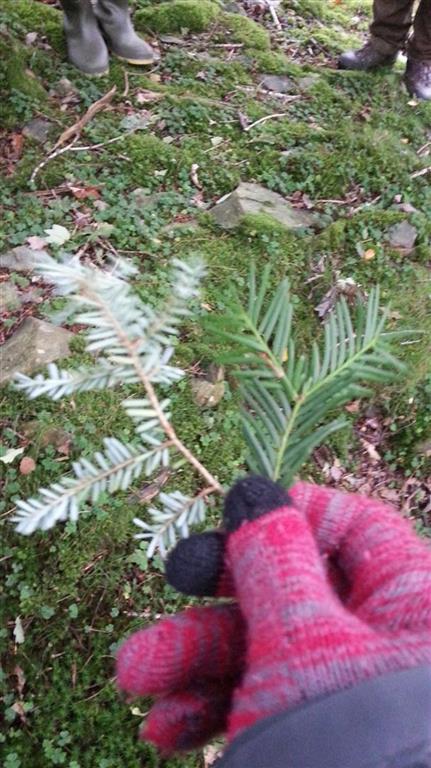
Leaves of a Yew tree
The Ash Tree were also known to the Vikings as “The world tree” of which they would have built their sturdy ships and their homes with it.
The most poisonous tree in the entire world is the Yew tree which grows in Britain and Europe! Every part of the plant are extremely toxic apart from the berries, however eating just 7 berries and you will know what sudden death is because the seed is poisonous. Not worth the risk!
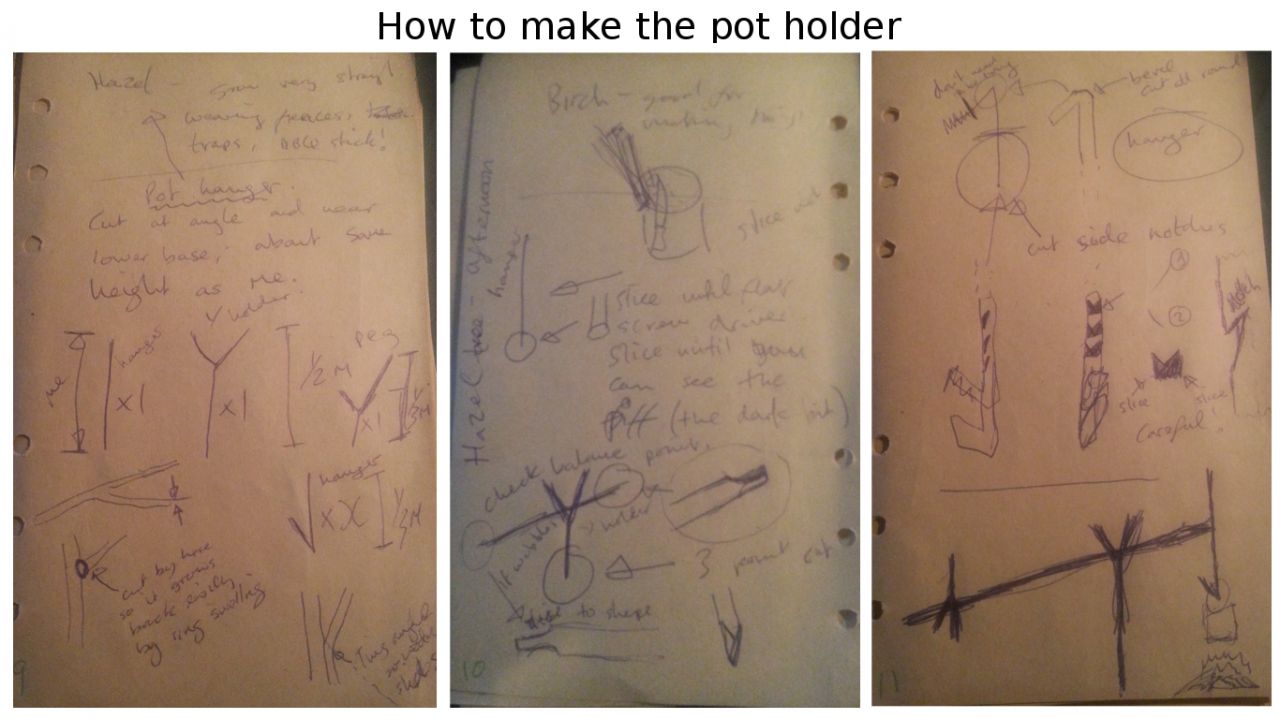
The pot hanger project
A pot hanger will allow us to boil water and remove it safety when boiling it over an open fire. Using the Hazel tree branches we’ve harvested, Fi demonstrated how to make the cuttings using our knife.
My finished pot hanger!
See my note images below on how to make the pot hanger!
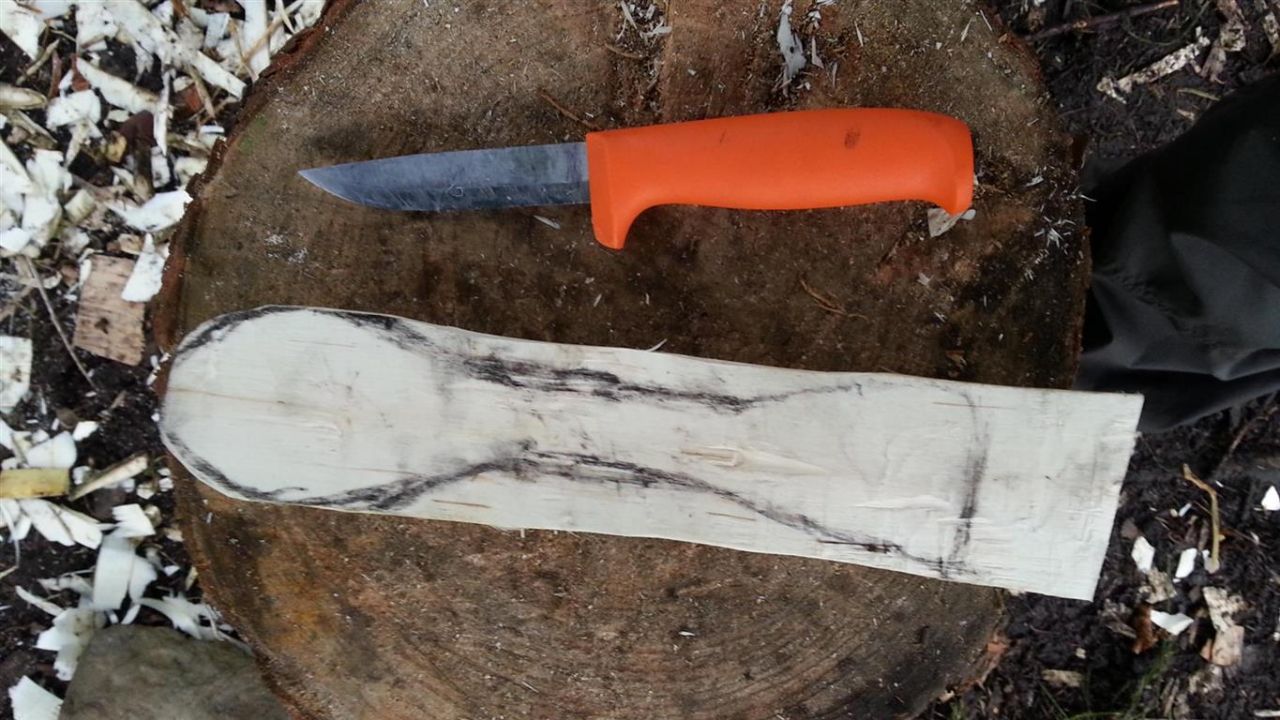
Spoon making project
Spoon outlined with charcoal
Using a piece of birch wood the length of our forearm, we had to carve out a spoon big enough to put in our mouth. We were shown knife techniques;
Sternum Grip - Push the wood against the chest and slice inwards towards yourself but safely pointing the blade angled outwards so our hand will hit our bodies before the knife could.
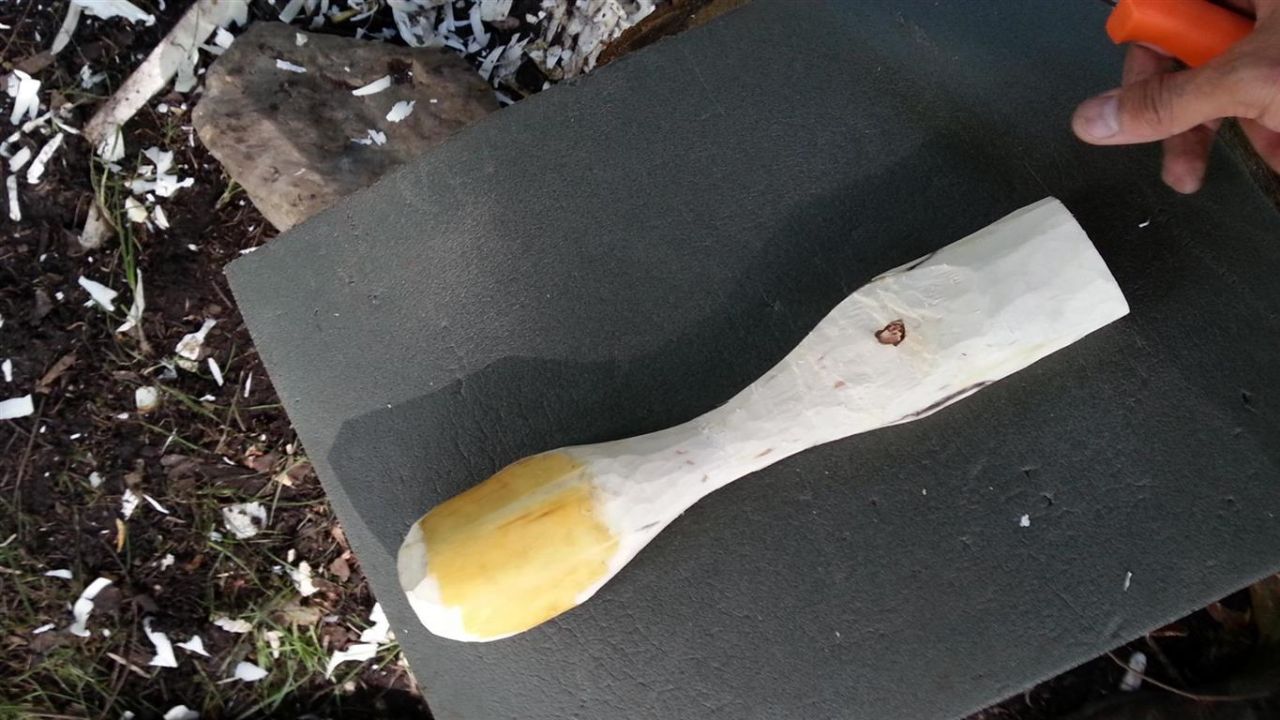
Shaping the spoon
Reverse Scissor grip - with both elbows tucked into our ribs, we would slice outwards using our shoulders and core muscle to do the work.
See my note images of how to make the spoon!
About fire
We learned and discussed the use of fire; light, warmth, cooking, sterilize, smelting, moral, signal, drying, smoking.
The three requirements for fire; heat, oxygen and fuel. We then looked at different ways to start a fire, different types of tinder and ignitions.
We were then given another project to make our own drill and bow using friction to start a fire. An hour every morning was allocated to work on the parts and also practicingthe bow and drill before the end of the course.
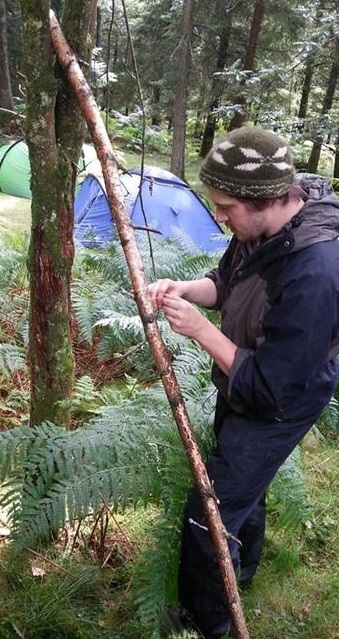
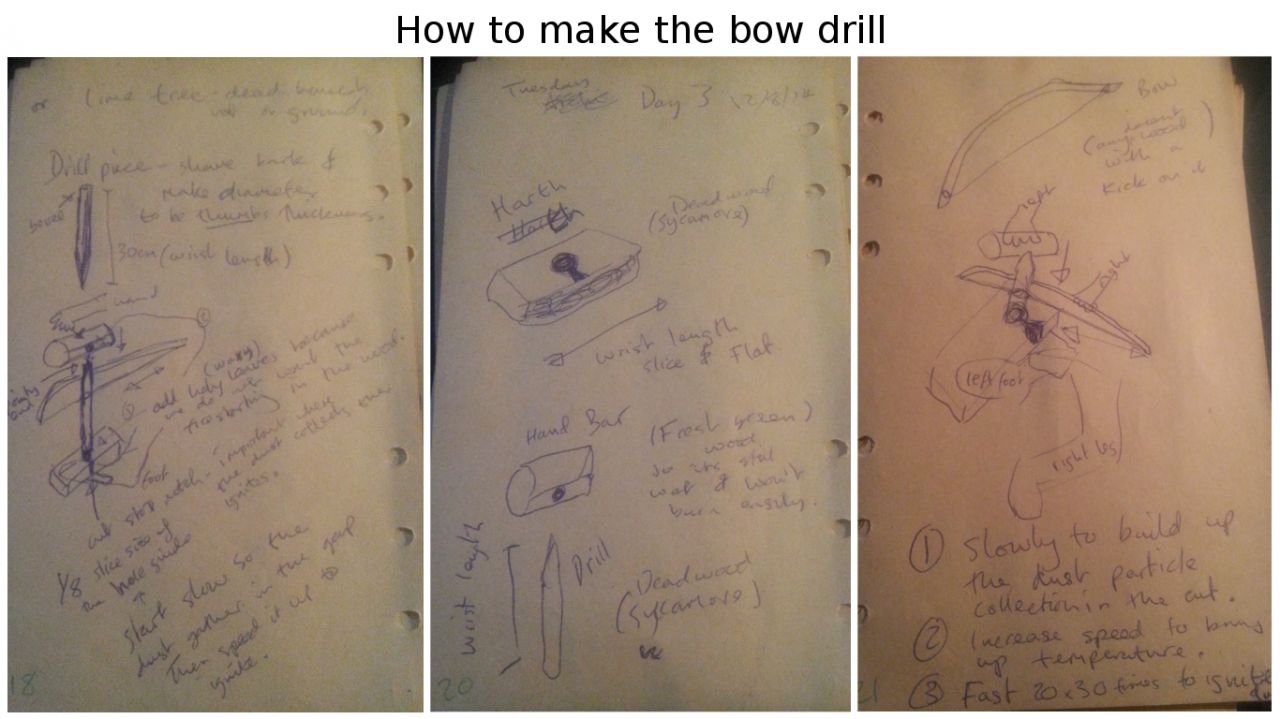
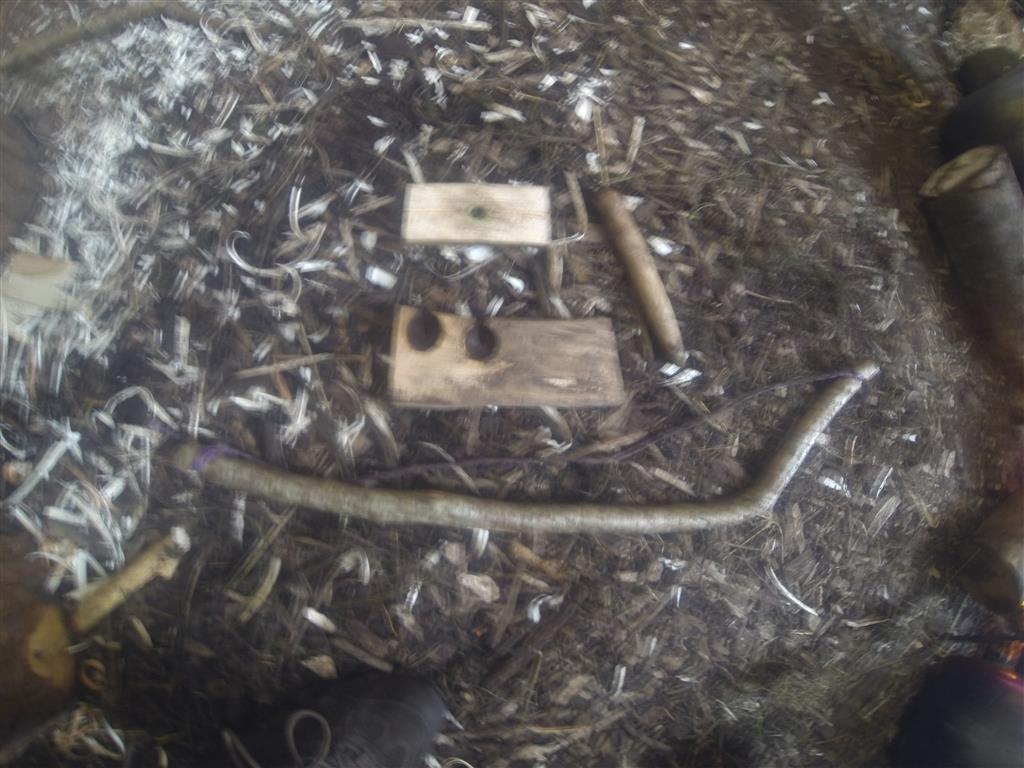
Bow drill project
This is a fire starting technique that uses friction to create an ember then transferring it onto straw tinder feeding enough air to allow it to grow before combustion into flames. Mastering this was not as simple as it looks!
To make this we’ll need 4 parts to this
Bow - long stick about chest to finger length with a kink on one end that allows paracord to be attached from end to end.
Drill - forearm length smooth rod slightly thicker than thumb size, only because I have small thumb and fingers! One end carved to a point and a blunt bevel on one end.
Harth - This is where we will produce fine dust particles and then creating the ember with it using intense friction from the drill.
Hand Bar - This is where the weight of our body will be applied to push the drill down and trying to balance the drill as we push and pull the bow back and forth.
The drill and harth should be made using dead Sycamore, Lime or Elder wood that isn’t found lying on the ground so it will be very dry. Use of green wood for the handbar so it won’t burn. The bow can also be green wood so it isn’t as brittle and break.
Making of the drill and bow can be found below in my note images.
The ideal posture
Place your left feet close to where the drill hole is and forward enough where the heel of the boots wedges the edge of the harth. The right leg should be far back so that we are in a long lunge position but tucked at an angle where the feet is pointing towards the left direction. With the left hand holding the hand bar, it should be twisting inwards while keeping the left arm as straight as possible and leaning it against the left leg for stability.
The right hand holding the bow should be at near the end of the non-kinked side but squeezing parts of the bow string to help keep its tension. A good drive will use at least 3/4 of the available bow string length back and forth. Ensure your right arm should be fully straight when reached the back, therefore remember to reposition the drill position within the paracord string if necessary.
The right technique
The best technique when trying to produce a decent ember size would be to think of driving the bow at 3 speed levels.
Level 1 - Slowly build up the dust particles by keeping a steady rhythm that won’t drain too much energy. Ensure you apply enough body weight by leaning forward so the loud squeaky noise disappears.
Level 2 - Increase speed, this will bring up the temperature at a steady rate. Total of 20 drives, 1 drive is back and forth. Count 1, 2, 3, 4, 5 / 1, 2, 3, 4, 5 / 1, 2, 3, 4, 5 / 1, 2, 3, 4, 5
Level 3 - The final push, all your strength! Total of 20 drives again. Count 1, 2, 3, 4, 5 / 1, 2, 3, 4, 5 / 1, 2, 3, 4, 5 / 1, 2, 3, 4, 5
By level 3 it should be smoking! Get the magic stick (just a small toothpick size stick) and gentle place it above the cut gap of the harth.
Do not push the ember down with the magic stick but instead lift off the harth while holding the magic stick above the gap.
Lift the sleeve that is holding the ember, and sprinkle the dust around it on top of the ember.
Gently wave your hands to feed air into the ember.
When the ember had grown to a pea size, place the straw tinder on top of the sleeve and turn them both upside down so the ember drops into the middle of the straw tinder.
Close your hands so the straw tinder covers the tinder leaving only an inch wide space.
Lift the straw tinder up head height and take long blow through the mouth into the inch wide space.
Move the hands down to the side and back up in a waving motion.
Blow into the inch wide space again when it reaches head height again.
Repeat the waving motion down to the side and back up but speed it up.
Eventually the straw tinder should bust into flames, that’s what we are hoping for!
Dinner time
It was quite a treat as I love spicy food and they’ve made fresh chicken fahitas with yogurt, avocado and salad! Exhausting long day it tasted even nicer.
Blade maintenance
No rest for the wicked, straight after dinner we had a quick session about taking care of our knives and keeping it sharp. There are several types of sharpening stone but the one we’ll be using is an oil based.
Coarse - Start with this and spray some WD40. If there are dinks on the blade, you may need to sharpen longer. if sharpened every day, then you can probably do about 20 strokes each side.
Fine - After this same again with the WD40 and 20 strokes each side of the blade.
Super fine / Leather - The final touch, with this you do not use any oil and with each stroke the blade will be reversed so it doesn’t cut into the material. 10-20 strokes back and forth alternate. Can be done quite quickly.
Waterproof matches
We were all given a box of matches and candle. Our job was to ensure the matches are usable by the end of the week. To do so, we had to waterproof them by coating the matches in wax. To coat the while box, we had to layer the matches one row at a time and coat them, then add another row or matches and coat again with wax until we’ve done the whole box.
Safety matches are useless! If you are to bring matches with you, then use the non-safety ones that can ignite on any dry abrasive surface.
Bed time
I was shattered by the end of the day, and pretty much conked out immediately. Borrowed a blanket as it was feeling a little chilly tonight. Slept like a baby with earplugs on and made sure to not to drink too much liquid! zZz
Day 3
Feeling refreshed this morning, ate breakfast and I think it’s eventually time to try out the loo!
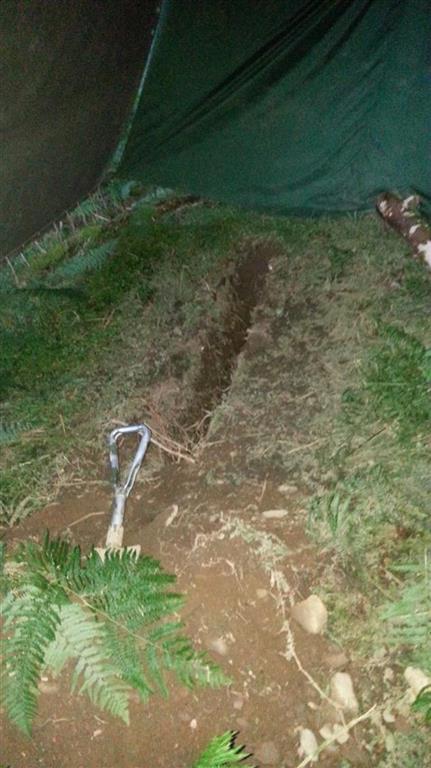
Time to bust one
The toiletMy body seems to be resisting this for many days, but eventually had to give in! Squatting in a small tent with a hole dug in the ground felt kind of chilly with my ass exposed to the cold air. The flies were distracting, wish I had a tail which could swing left and right to deter those buggers! Felt good after letting it out, certainly a few kilo’s lighter :)
Bow drill hour
Poor image of my bowdrill setStraight into making my drill and bow set. Luckily found the perfect piece for the drill part saving me loads of time having to carve it to the right diameter all round. By the end of the one hour, I’ve pretty much finished making my set!
Hypothermia
The British conditions is one place where it is likely to catch hypothermia. Even though I’ve previously learned about hypothermia, it was a good reminder and also picked up a few new signs and stages!
Early stage - The umbles and shivering. You can get this through loss of heat through conduction, convection, radiation, evaporation and respiration.
Second stage - Blue lips and nails, uncontrollable shivering, hallucination can occur and feeling lethargic.
Third stage - Feeling warm, not think straight, terminal burrowing, shivering stops, lose the will to keep warm and may start stripping their clothes off.
Final stage - Pupil dilates, organ fails, heat failure and eventually death!
How to deal with these stages
Early stage- Eat sugary food, psychological support, add clothing layers.
Stage 2/3 - As a group, lay person across the other’s leg in a tent. As a last resort if two people is to share body heat in sleeping bag. This is highly risky as you do not want to risk both getting hypothermia. The healthy one probably have more chance getting the help needed. Sometimes in an emergency, better to be able to save one then risk both.
Preventing hypothermia
Eat well, insulate correctly and be sheltered.
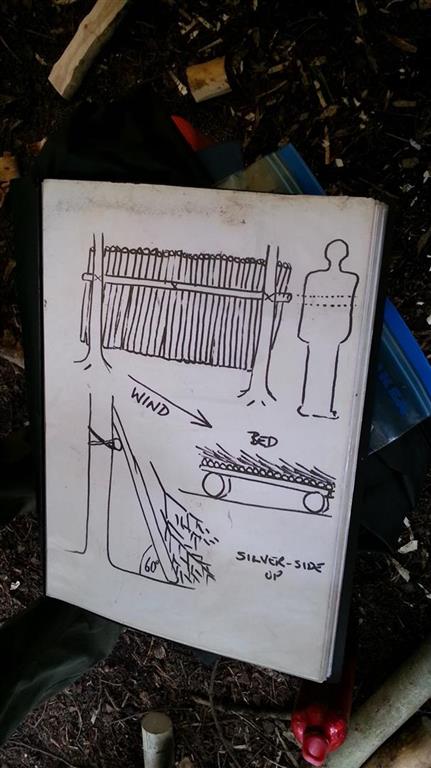
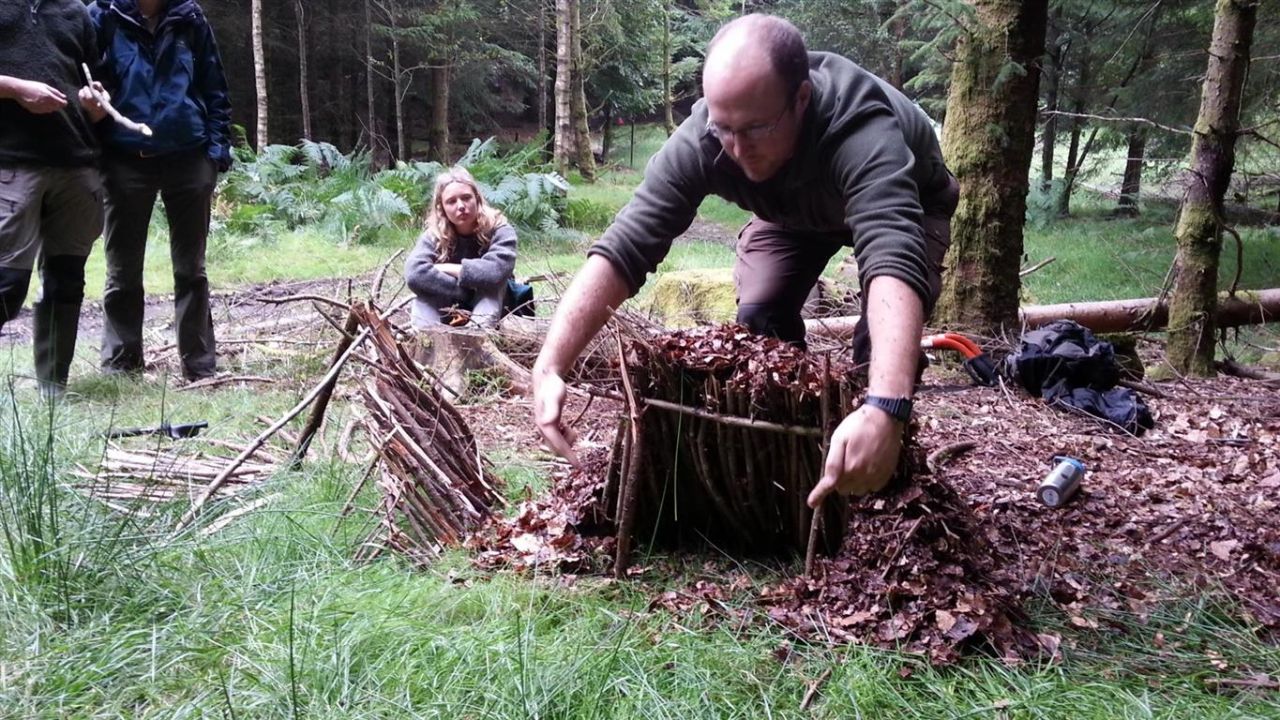
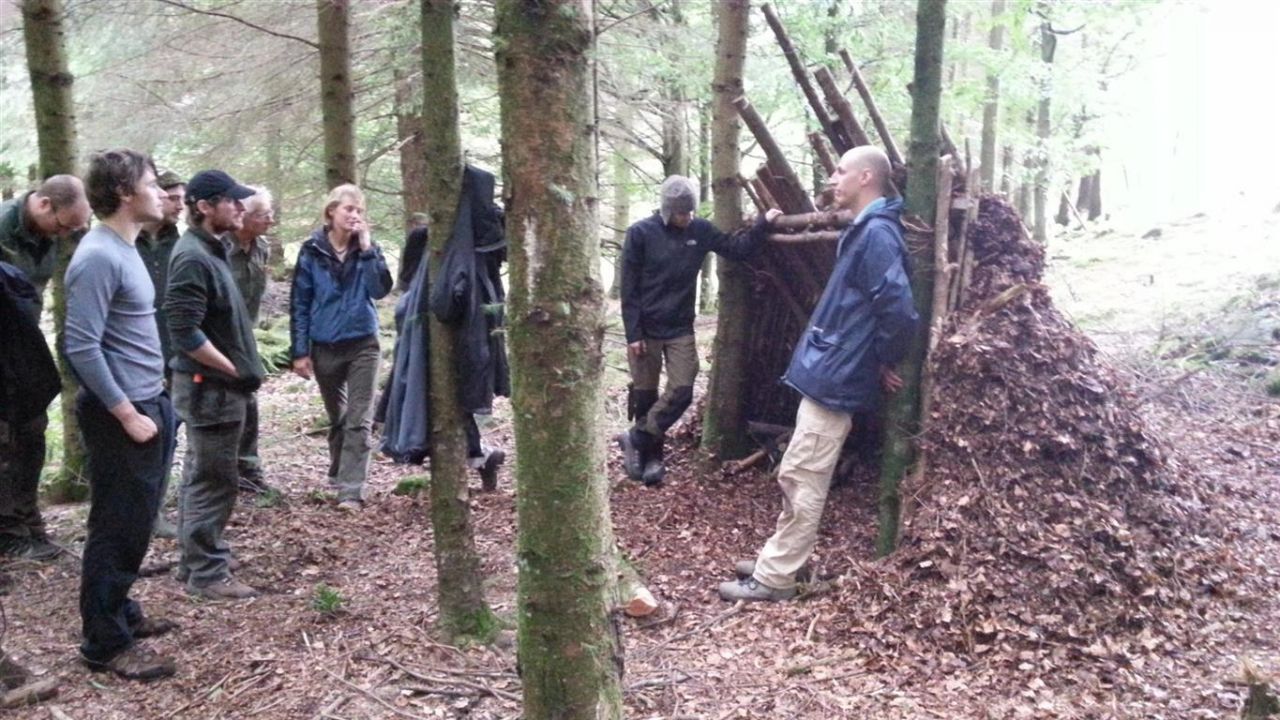
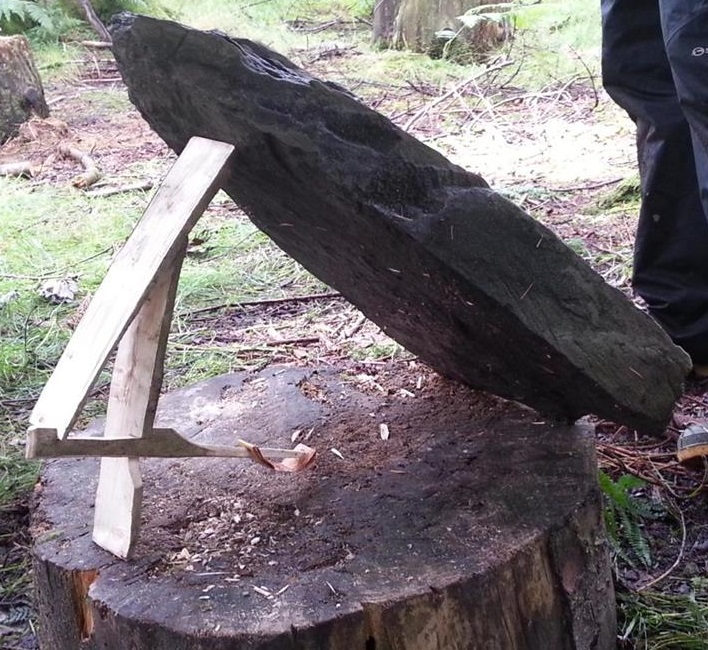
Shelter building introduction
Howto of a shelterIf out in the woods without a tent, hammock, tarp or bivi bag. Learning how to build a reliable shelter can proof in handy!
We were shown two types of shelters, one capable of having a fire next to it to keep warm throughout the night, the other is sturdier, takes longer but better if staying for more than a few days.
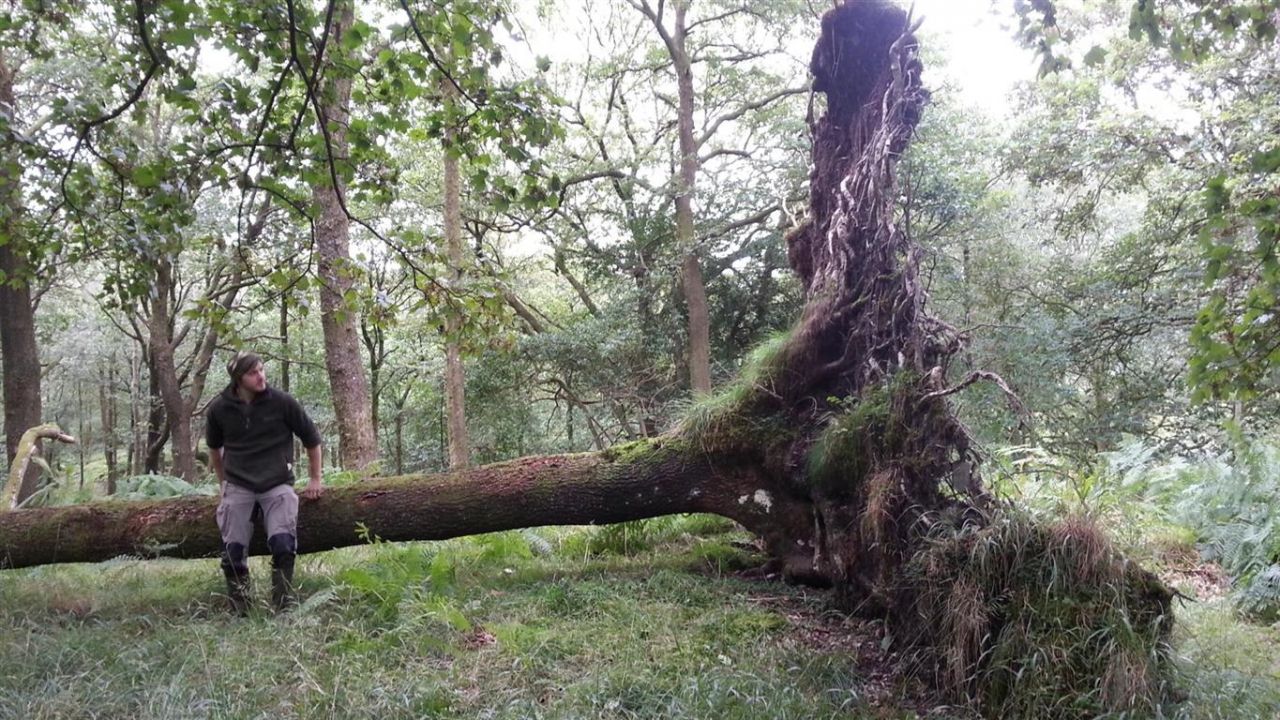
Uprooted tree
Never build or use uprooted tree as shelter! There have been cases where fallen trees reverted back into position. Sometimes the leaves or branches may came off lightening the top end and the roots and trunk weight pulls it back straight up as trees were grown to be upright to begin with!
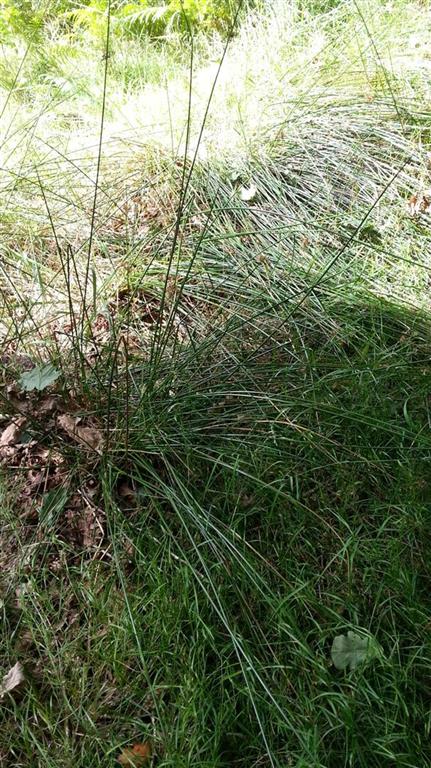
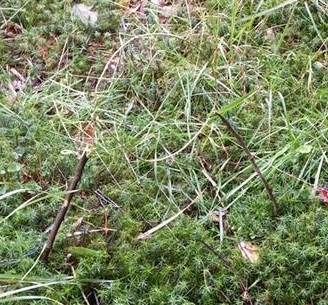
Softrush makes good bedding!Before going out to build some shelters, we were going to do some plant gathering. A stroll in the woods, we’ve spotted some plants called “Soft Rush” that would make very good bedding, candle wick and the spongy inside are edible that tasted like cucumber!
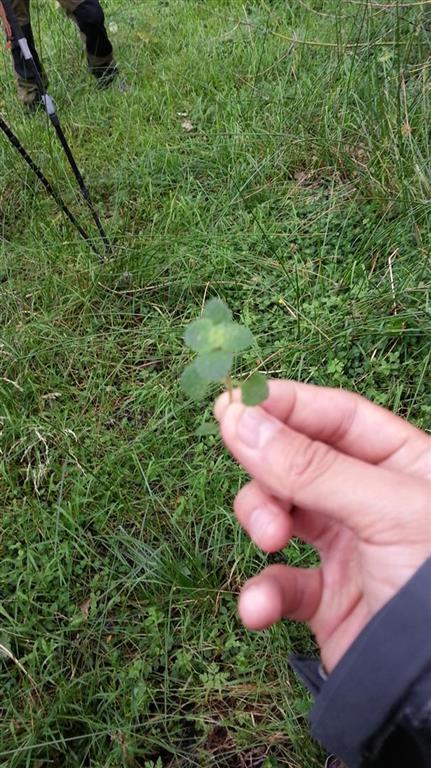
Opposite-leaved golden saxifragePassing a marshy area we found a small plant called “Opposite-leaved golden saxifrage” that makes very good tea and has a pleasant fresh green taste. Probably go well in a salad!
Arriving at what looked like a forest of nettles, we were informed of the great properties nettles have despite their stinging! Nettles are anti-inflammatory (why do I not believe this bit), full of iron, folic acid and apparently good for arthritis. They make great tea and can be fried to make crisps. Their outer skin on the stems can also be made into cordage.
Project 5 meter nettle cordage
Michael being a hero had gathered 100 nettles within the same period of time. All hail the Nettle King! But what he didn’t know yet was he had to process all the nettles into cordage. Bet he regrets gathering so many now. LOL
Having a phobia for nettles, we were instructed to hand pull and strip at least 35 nettle plants! Seeing everyone so enthusiastically loving the stinging pain of harvesting the nettles, I had to overcome this fear! Being last to gather all 35, but frankly quite proud of myself for doing it barehanded. I now feel like a true wild man, though the throbbing pain on both hands ended up lasting a few days! I really think they should swap the ice bucket challenge with the nettle challenge.
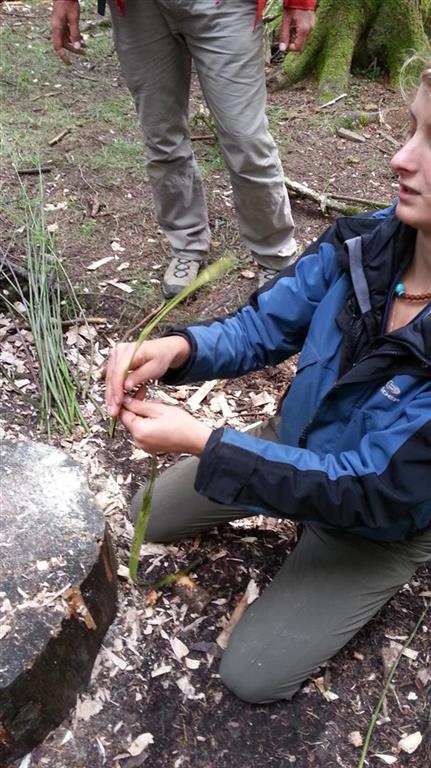
Processing to nettle bark
Tap the nettle stem to soften itTo process the nettle stem ready to make cordage, the piff (hard bits inside) had to be removed. To do so, you tap the whole step across using the knife handle while holding the blade, or I preferred using is a small log of wood. Don’t hit it too hard otherwise you end up demolishing the skin entirely! Once the whole stem been beaten and feels soft, the technique which I found most effective in removing the pip is by bending the middle of a section so the piff flakes off and gentle peeling it back until the next section. Repeat until each section of piff have been removed. Remove the piffs from all 35 nettle would take some hours, so I continued this in the evening…
Nettle bark to cordage
Peel back the piffs to remove itTo turn the flexible bark of nettles into cordage, you first get a piece of processed bark, and fold it in two with one length longer than the other. Now twist them until it kinks. hold the kink with the left thumb, and Roll one end with the right hand using the thumb and forefinger. Once rolled, push that end clockwise so it twists with the other end and which should be in your right hand thumb and forefinger. Roll that end and twist round again and keep repeating. When one end is running out of nettle bark, just attach a new piece to the end by overlapping it and continue with the same method. Making cordage can be very therapeutic and takes no concentration! Once you learn to do it a few times, it’s pretty much ingrained into muscle memory.
Shelters building time
Tired by evening, I did little of processing the nettles and thought I’d leave it for the next day and just chilled out by the fire for the rest of the evening. Rob comes back to telling the group he found three ticks on him and went back to his tent with the tick remover. The rest of us got paranoid and started to check each others back! Dan checked my back and saw what looked like a tick. For the next 10 minutes others was just there starring at this tick like thing and trying to remove it with tweezers. Eventually they gave up using the tweezers and Will decided to use his thumb. Squeezing this tick looking thing, it popped with white puss. All that commotion turns out to be just a black head! Everyone just laughed and chuckled since most of us have never seen or removed a tick before. Lucky Rob :)
This was a really fun activity. The group was split into two teams of five, and we had to build one of the shelters demonstrated by Will’s ant size version. Our team chose to build the bigger and more challenging of the shelter. Finding the “Y” shape was difficult, but eventually Raj saved the day with a suitable one. Keith was able to find some fine roots to use as cordage and tie up the upright posts forming a tripod. Constructing the skeleton wasn’t so difficult and that put together within the hour. Gathering leaves and foliage took a lot more time and resources! It became very scarce as we’ve pretty much used all the ones within the surrounding vicinity. We’ve just managed to cover the skeleton to the top without it sagging! Finally finished the shelter with a mini paper flag. Well done team! It was a good experience, I could imagine it would take many hours for one or two person to build such a simple shelter.
Will’s Ant size demonstration of shelters
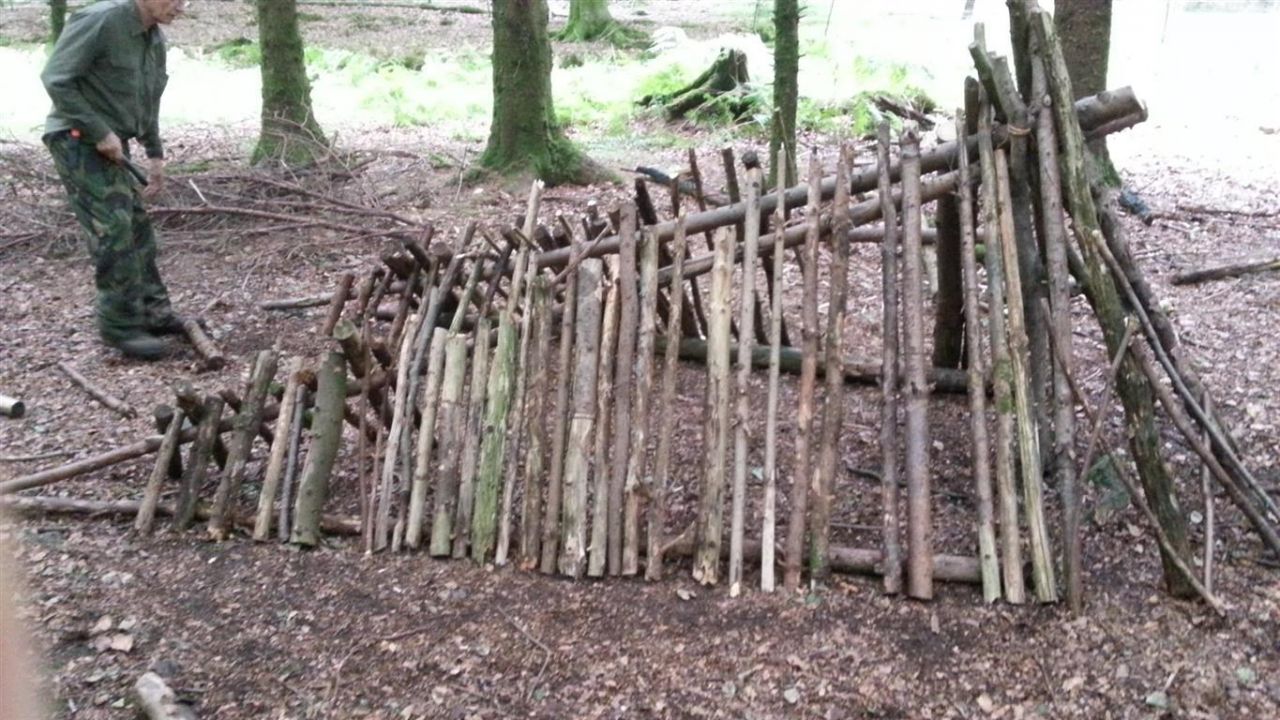
The support poles
Skeleton complete!
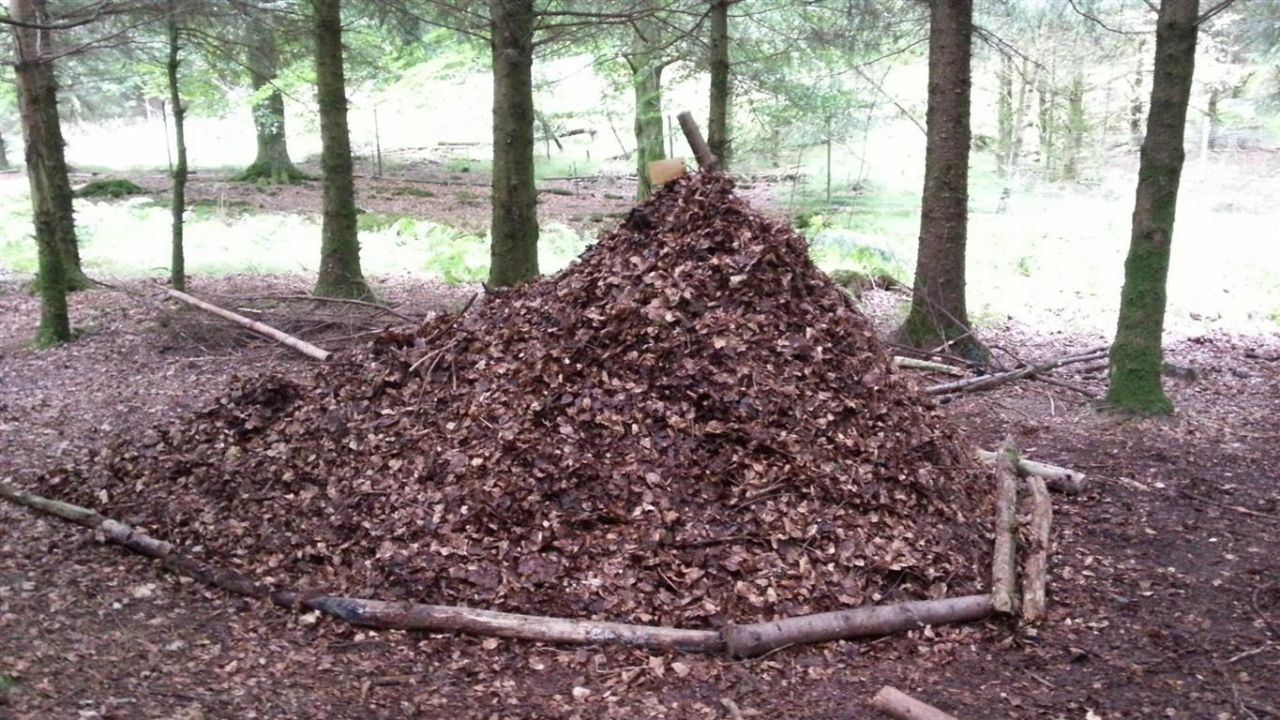
Covered in dead leaves or foliage
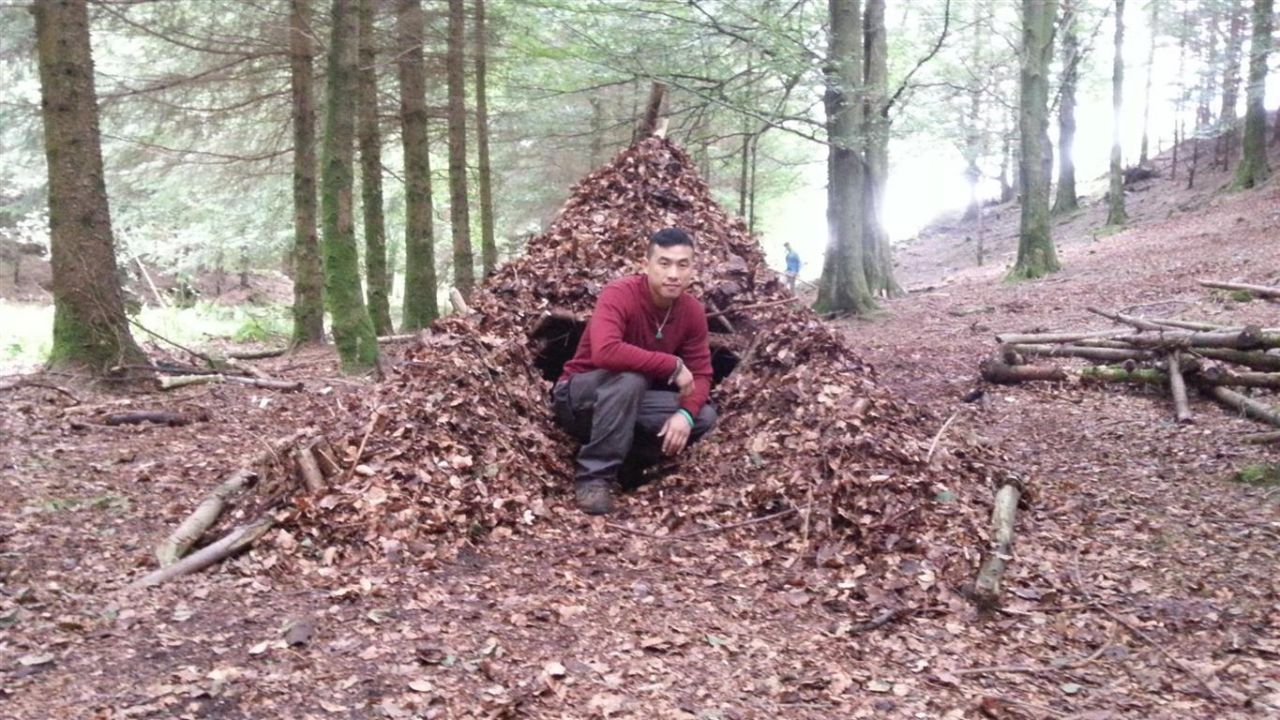
Finished shelter!
Inside the shelter
The other team’s shelter
The other team’s shelter rear
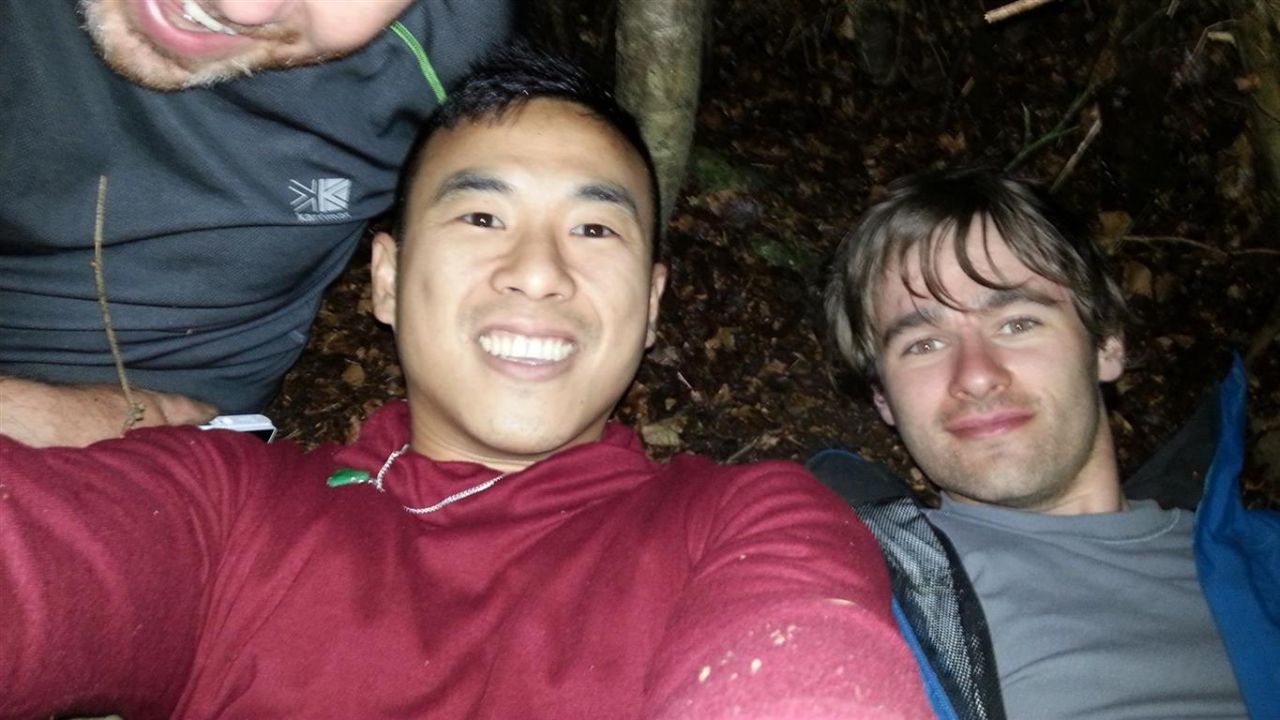
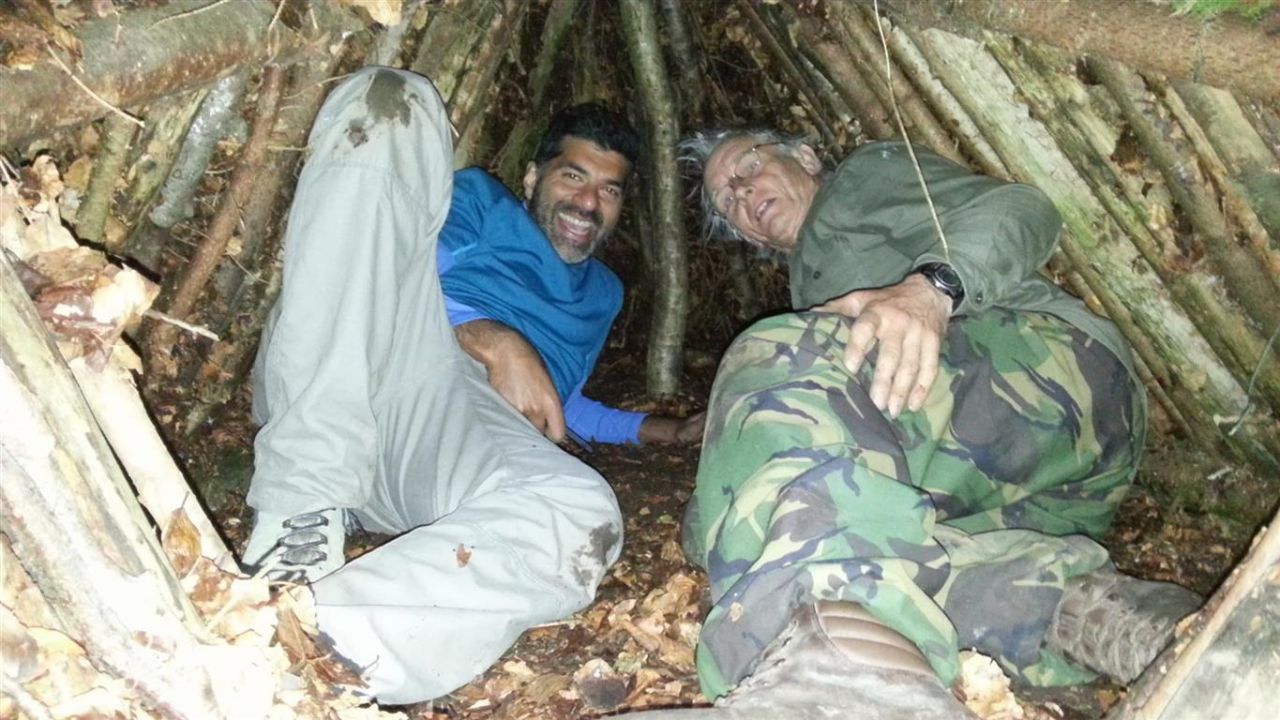
Overnight at the Shelters
Some brave souls slept overnight at the shelters. The smell of decomposed leaves and every time a strong wind blew, dirt would fall on their faces! I would have tried it too, but unfortunately my sleeping bag were not adequate. Those who stayed there said it was actually very warm inside the shelter, even without a fire. Didn’t want to take the chance of catching a cold!
Raj and Keith having a great time together
Wrapped up like a mummy
Borrowed another blanket to lay under my foam mat to give that extra insulation and thought I’d try out a bivvy bag! Unbelievably toasty in my tent now!
Day 4
Rise and shine
Woke up late today, getting used to sleeping outdoors so my body catching up on it’s beauty sleep.
Bow drill hour
Waking up late didn’t leave me much time to practice bow drill technique. However, I was able to catch Michael already making fire with his bowdrill!
Importance of water
The morning class we discussed the importance of water and why it is necessary to have access to it when bushcrafting.
Use of water
Hydration, navigation, transport
Lack of water
Short term effects: can cause bad moods, not thinking straight, lack of concentration, body temperature regulation not as efficient, hand swell, dry eyes, elasticity in skin, urine.
Long term effects: digestive, neurological, joints, deterioration in eyes, hallucination, eye bags, constipation.
In British type climate, the average water consumption a day should be 2.5L. At climates where the temperature are at 43°C, on average 19L of water are recommended a day. On average, a person should have three full bladder a day.
What happens if you lose too much water in your body
Losing 3% water, you will start losing muscular control.
Losing 4% water, you start getting headache.
Losing 6% water, your heart will start racing, temperature control fails and you stop sweating.
Losing 7% water, you have a high chance of collapsing.
Prevention is simple, drink more water!
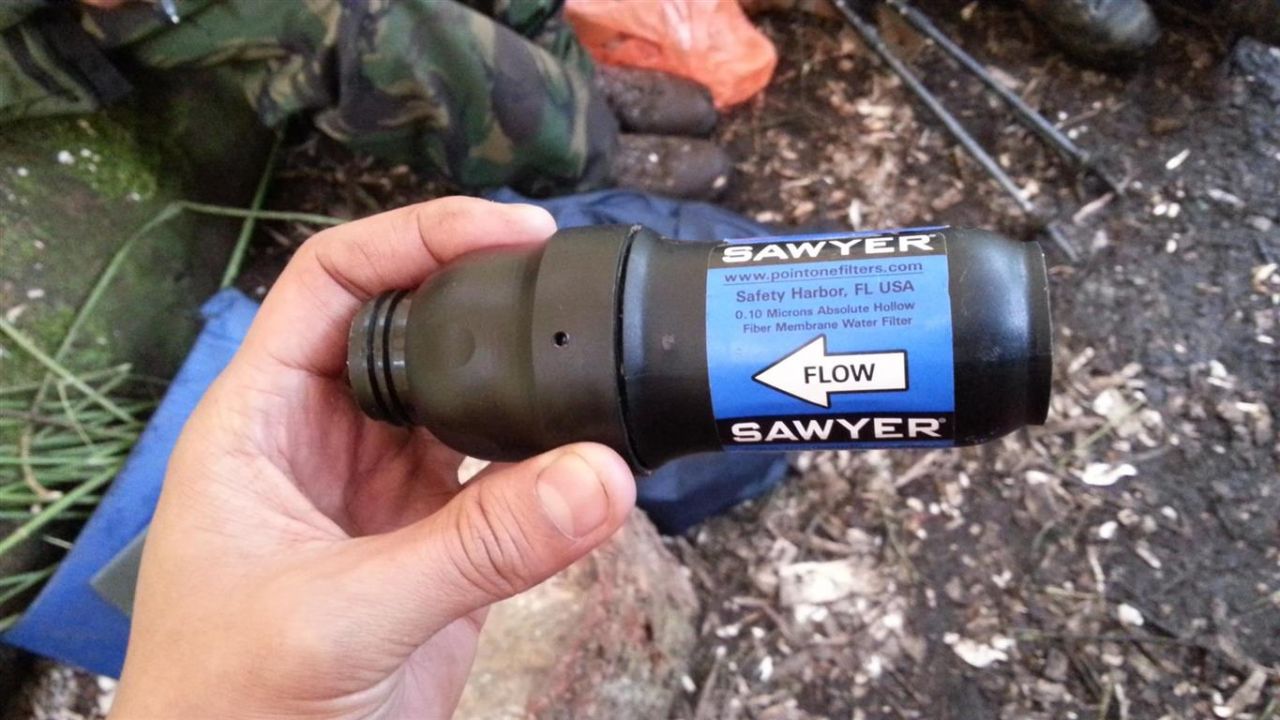
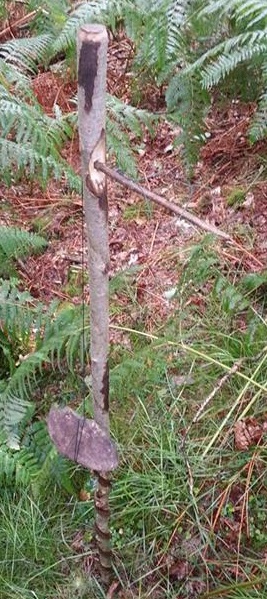
While explaining all of this, and assembling one of Ben’s water filtration system he once took on an expedition. Fi told us a funny story about Ben and this water filtration system. As he was finished assembling the filter system together for use, they were interrupted by armed men who pointed rifles at them. No idea what Ben was thinking under such circumstances, he placed his full assembled water filtration system that now looks like a bazooka over his shoulder and pointed it back at the men. The arm men smiled and backed away and left. To this day, it’s still a mystery whether those men thought he was a complete fool or they really thought Ben had the bigger gun. who knows…?
Ways to collect water
Condensation, rain (clean), ice, wells, rivers.
To collect rain water you can use pots, tarp with weight in middle, large leaves, etc.
If by a swamp, dig a hole 1ft wide and 2ft deep from the downhill side. it should start filling up with water. Always throw away by scooping out the first fill of water.
Other ways to collect water is by cutting into Birch tree, but this takes too long.
Always treat all water collected as contaminated! Always!
Signs of water
Watching animals, deer tracks, swifts, swans, birds. Marshland plants also a good sign of water around.
Making water safe to drink - Filter, heat, treat
Millbank bag, handpump filter, Premac, do not use potassium manganate, Steripen, boil water at least 3 minutes to kill pathogens (longer in altitude). I would actually boil for 5 minutes to be safe! (Big bubbles no trouble).
Iodine tablets - do not take/use if under 12, pregnant or having Thyroid problems.
Chlorine tablets - bottle has to be clean and it is PH and UV sensitive to work. So using a dark bottle is recommended.
With the tablets the tastes will change, adding multi-vitamin tablets can help improve taste. Put the tablet into a cup and pour decontaminated water into it instead of directly into the water bottle. This can effect the tablets effectiveness the next time round.
Sawyer - one of the best water filtration systemThe daddy of all filters - Sawyer filter system. Unlimited usage that has a syringe to blow out & clean the filter. Will take out all contamination, bacterias and viruses.
Walk to the Lake House
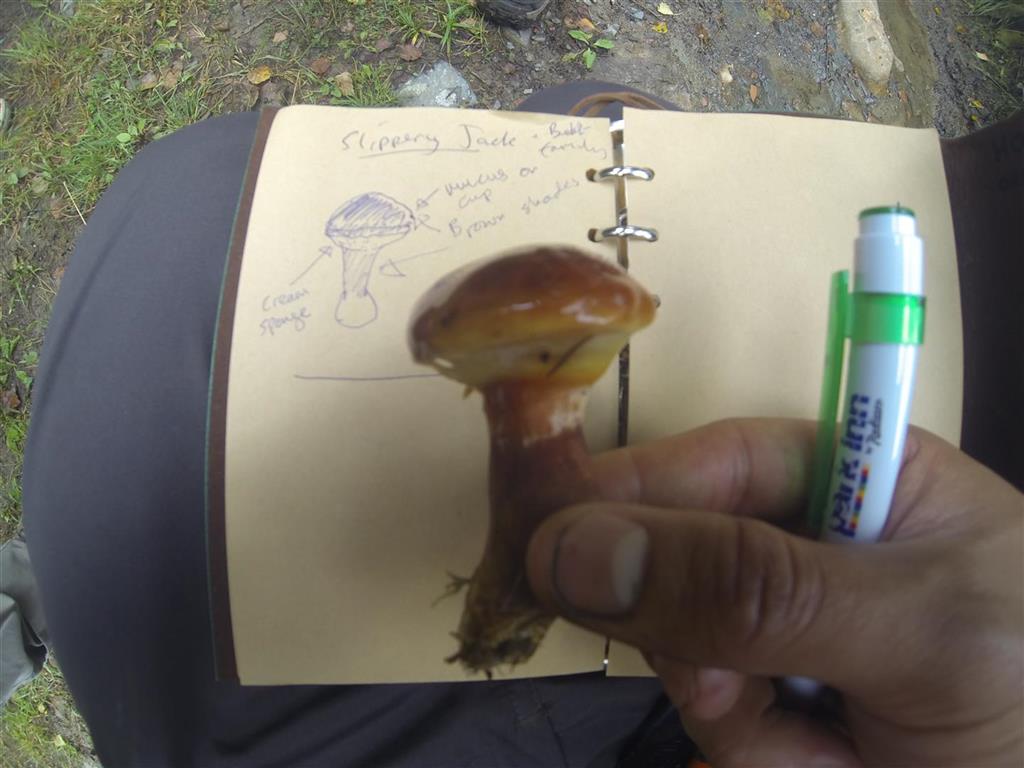
On the way to the lake house we stopped by a shrub like tree called the Hawthorns. We took small branches off these as they have spikes that are perfect for making fishing hooks. Along the way we also found the Fungi Penny Bun and Peppery Belin lying around. Peppery Belin tastes like it’s name, spicy! Nice!
Penny buns also known as Ceps and Porcini are part of the Boletus family. They are a delicacy and very expensive wild Fungi. Loaf color cap, white cream spongy pores instead of gills under the cap, thick fat white cream colour stem.
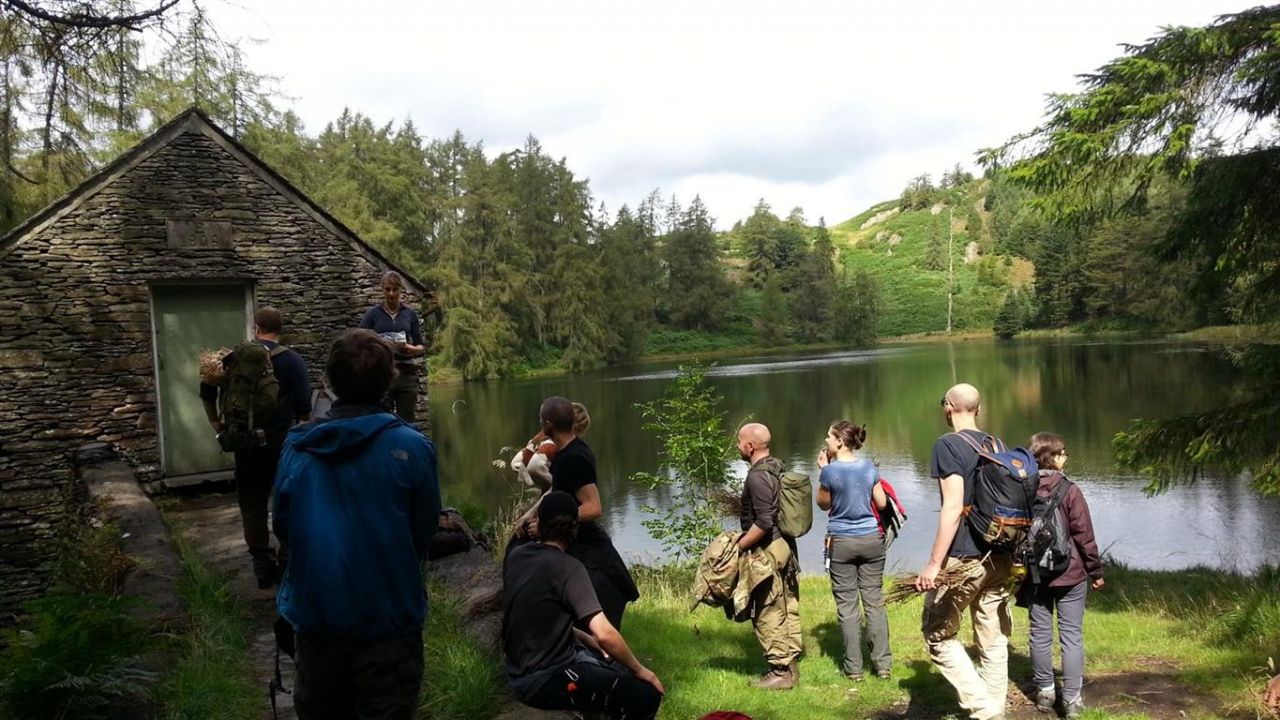
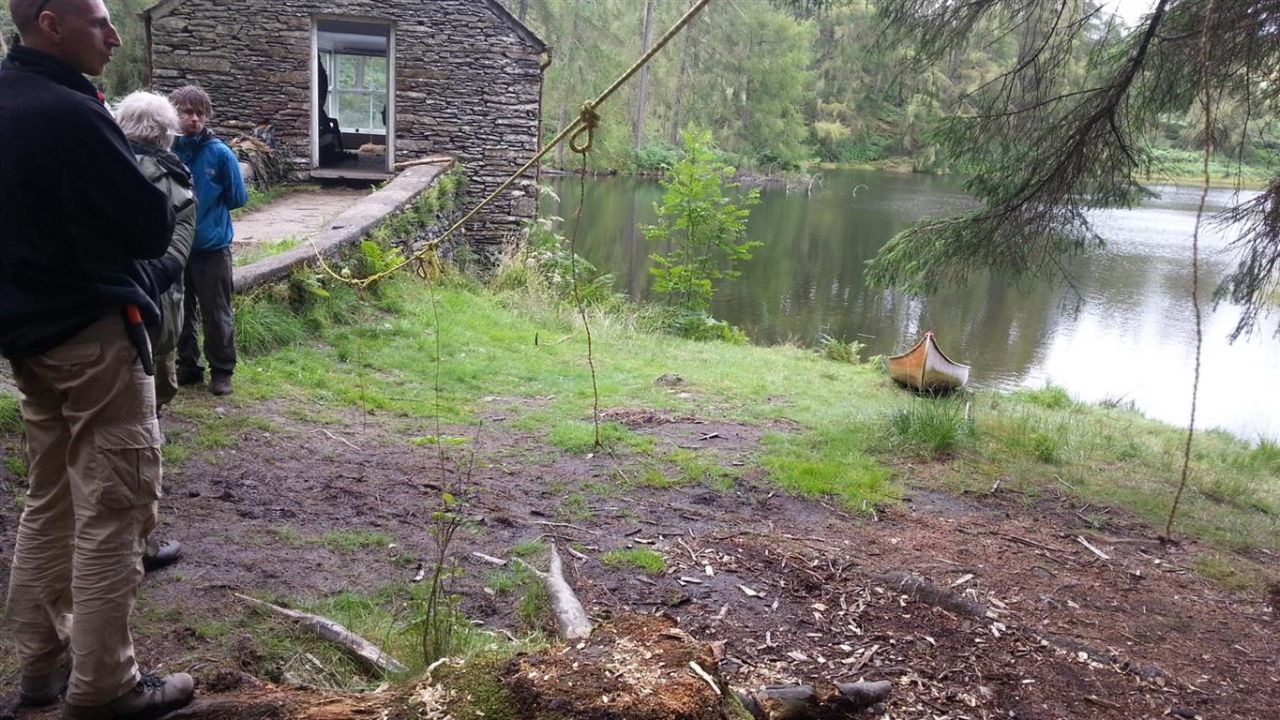
The Lake House
Arriving at the lake house
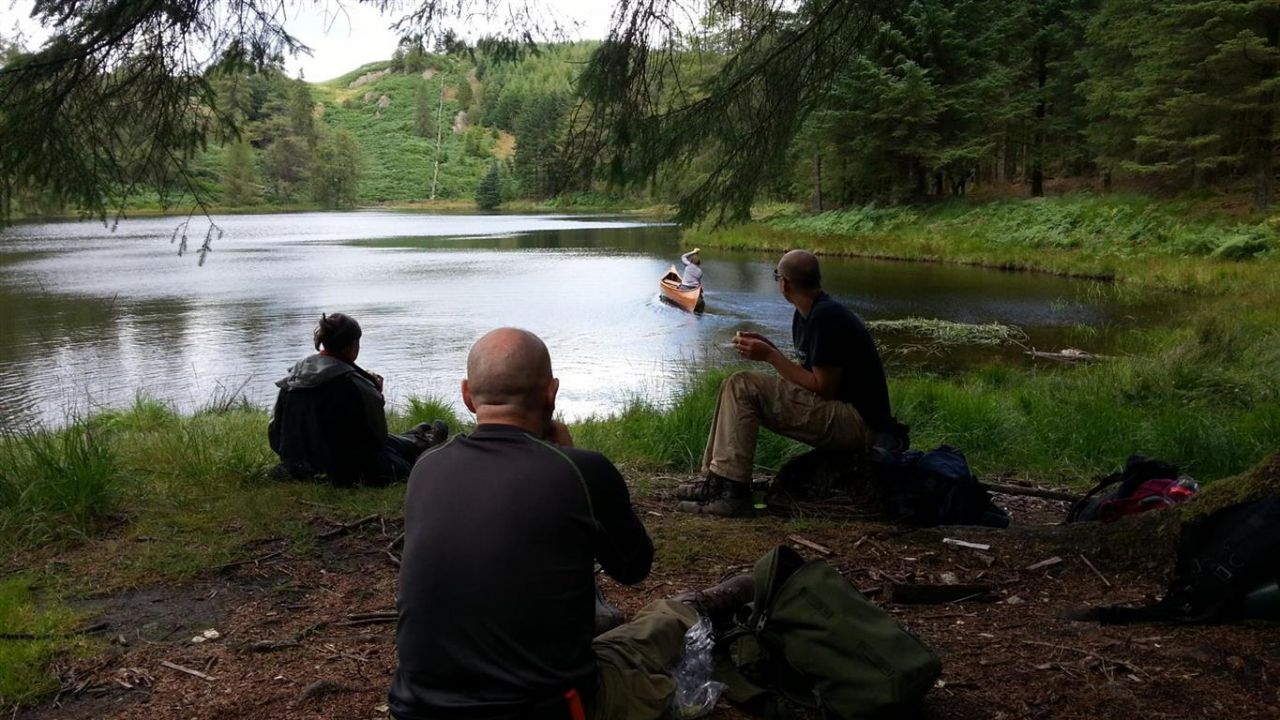
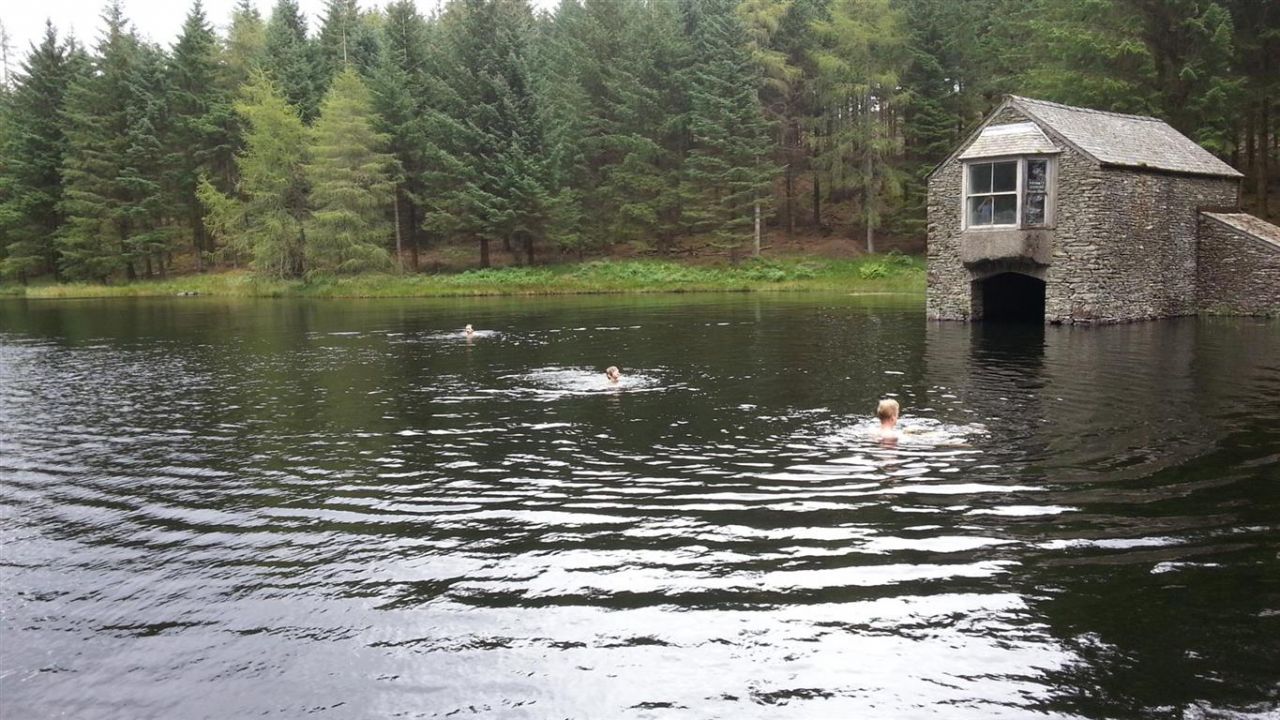
What a view! Just how I would imagine a Lake house to be. We had lunch here while enjoying the scenery. Michael took a little paddle on the canoe and showed us some of his skills. I really wanted to swim but found only 10 minutes left before we start the next class session. That didn’t stop Rob and Michael taking a dip! So gutted afterwards, could have done with a bath!
Lunch while Michael goes for a paddle
Rob and Michael bath moment
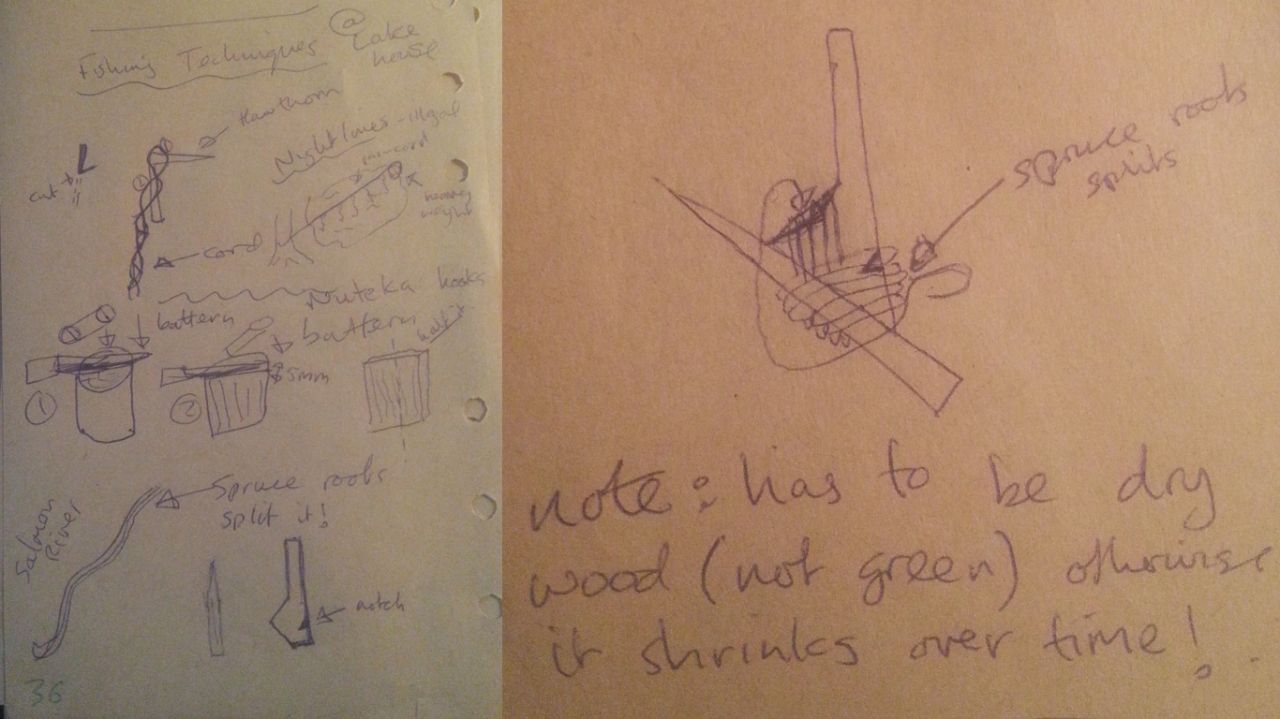
Fishing techniques
There were taught two kind of fishing lines.
Night lines
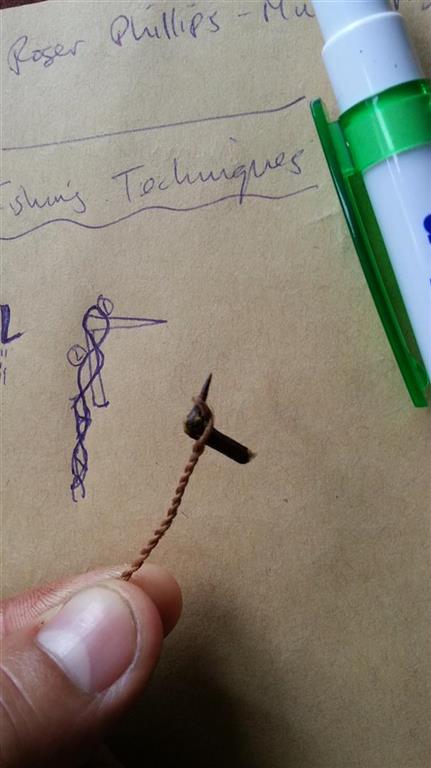
Hooks made from hawthornsThe first one was the multiple night lines, where you have a number of baited hooks on cordage that would be attached to a longer line and tossed into the water with a weight. These are extremely effective but also illegal! Using the hawthorn branch, we would cut parts of the thorn to make the hook then attach it to cordage the same way we make the nettle cordage.
Hawthorn hooks with cordage on a night line
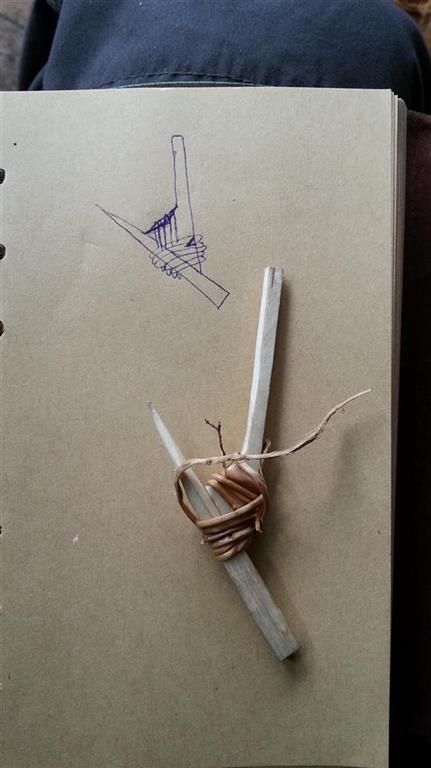
Nuteka hooks
Nuteka hookThese are like using a hook and line method for bigger fishes. To make the hooks, we would split a small dry log in half, split it again to get a flat plank, then split the plank in half down the center. We would then carve a flag like shape with one half, and the other half create a large needle. We would then tie the two parts together using spruce roots.
It is important to use dry wood instead of green wood for making the Nuteka hook because green wood will shrink over time.
Back to base camp
Along the way back, we needed to harvest branches from willow trees. Willow trees grows in marshy wet areas like near the edges of water banks, ponds, rivers, etc. They have long straight branches, single normal leafs, and the new branches are good for weaving. Willow trees also have medicinal properties that can cure headaches by chewing on the inner barks, with the effects like aspirin.
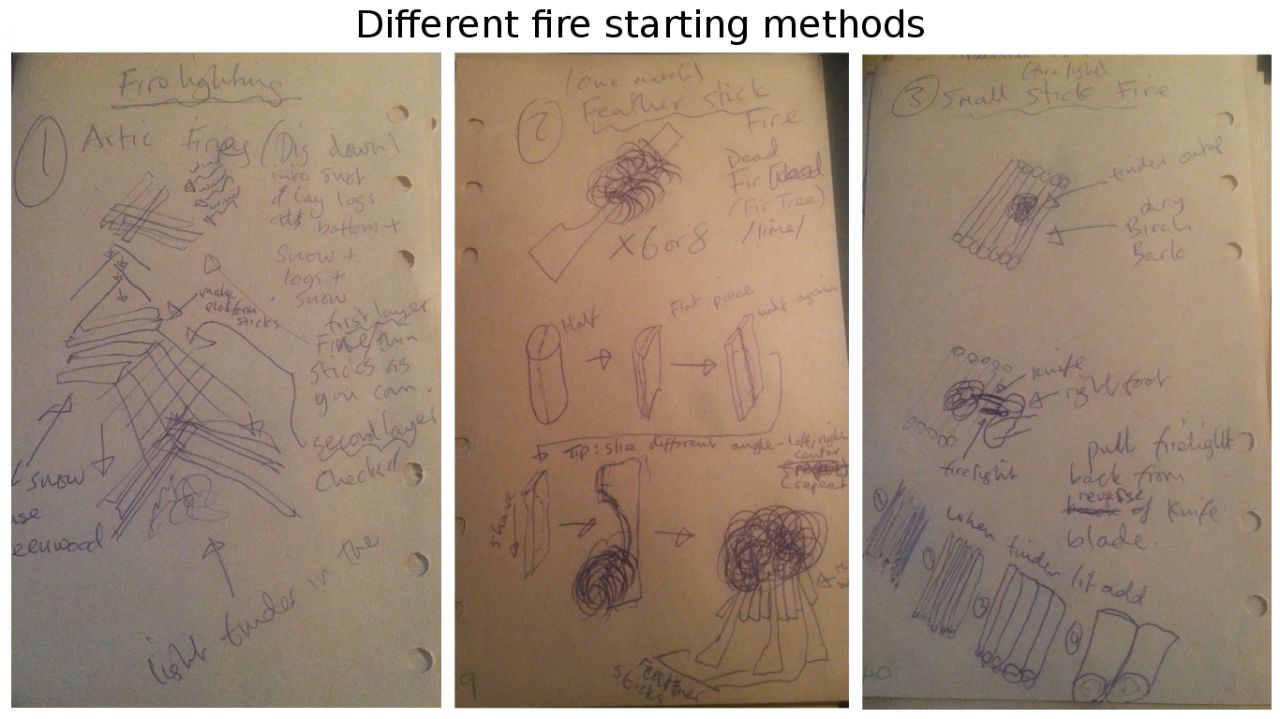
Firelighting
Other than bow and drill, we learned three other firelighting methods.
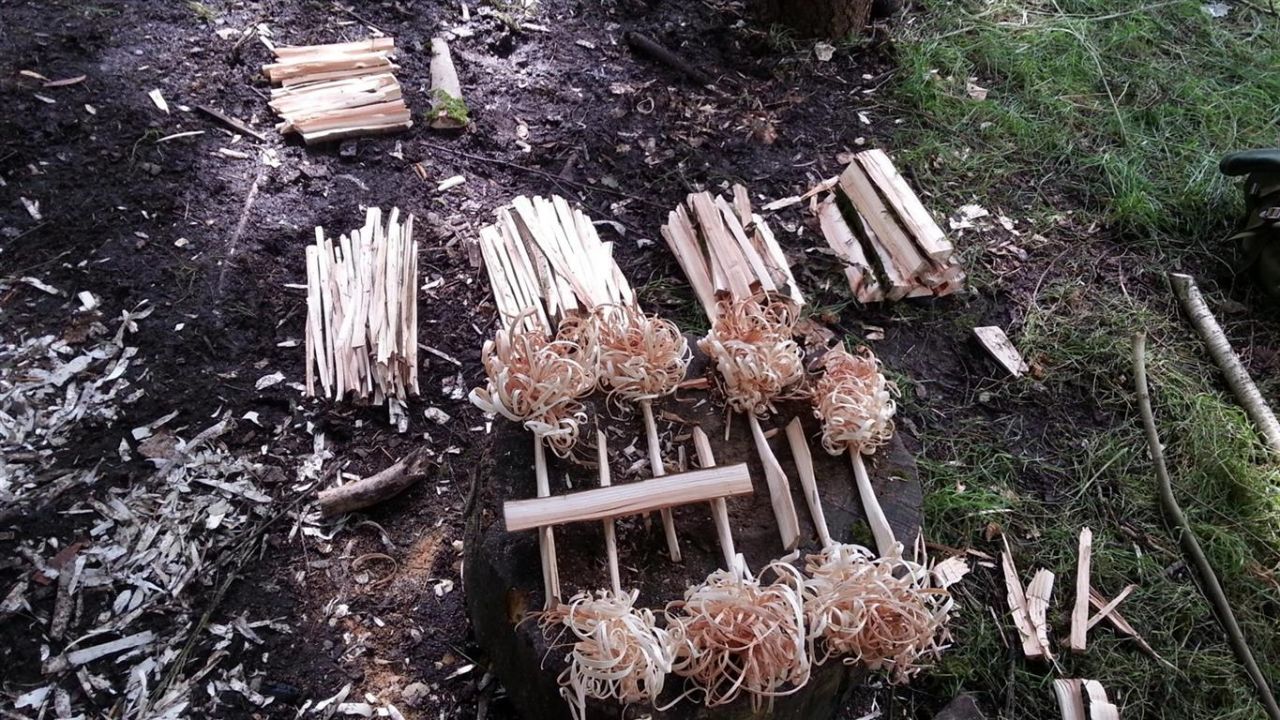
Feather sticks, Small stick and Arctic fire methods
Artic Fire - Dig down into the snow and lay green logs so it doesn’t burn, add some snow on top, add more logs across ways, so they be like checkered. Now you can stack your dry wood in a ‘V’ shape with the open ‘V’ facing to catch the wind. Within the ‘V’, add some tinder with twigs on top. Setting the tinder alight, the wind should help set the smaller twigs alight then eventually spread to the ‘V’ pile.
Featherstick - These looks pretty cool and takes some carving techniques to make. You would split a dry log in half, then split in into a plank then half the plank again. Somewhat like the Nuteka piece of wood but on a larger scale. Holding the knife in the right hand and leaning against on your leg while keeping the arm and elbow straight, drag the plank so it drives the blade while shaving the wood. If you try to shaving by pushing the knife instead, you will fail!
Small stick fire - To keep the fire off the wet ground, build a row of dry wood on the group. Place some tinder on top and set it alight with the firelight. When the tinder alights, place the smaller twigs first, then slowly add the larger dry wood, then large dry logs. This method means you would have to prepare and separate the sizes of wood in the order you will burn them.
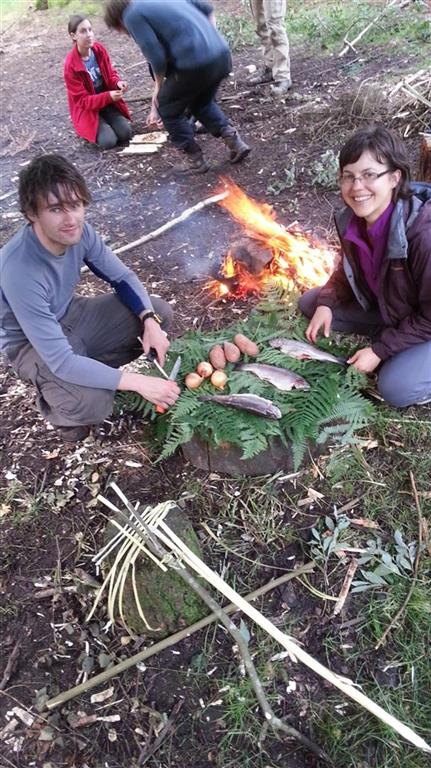
Fish without the chips
Fish for dinner
With no deep pan and oil, the only way to cook a fish would be over an open fire. So how would we do this if we caught a fish from a river or lake?
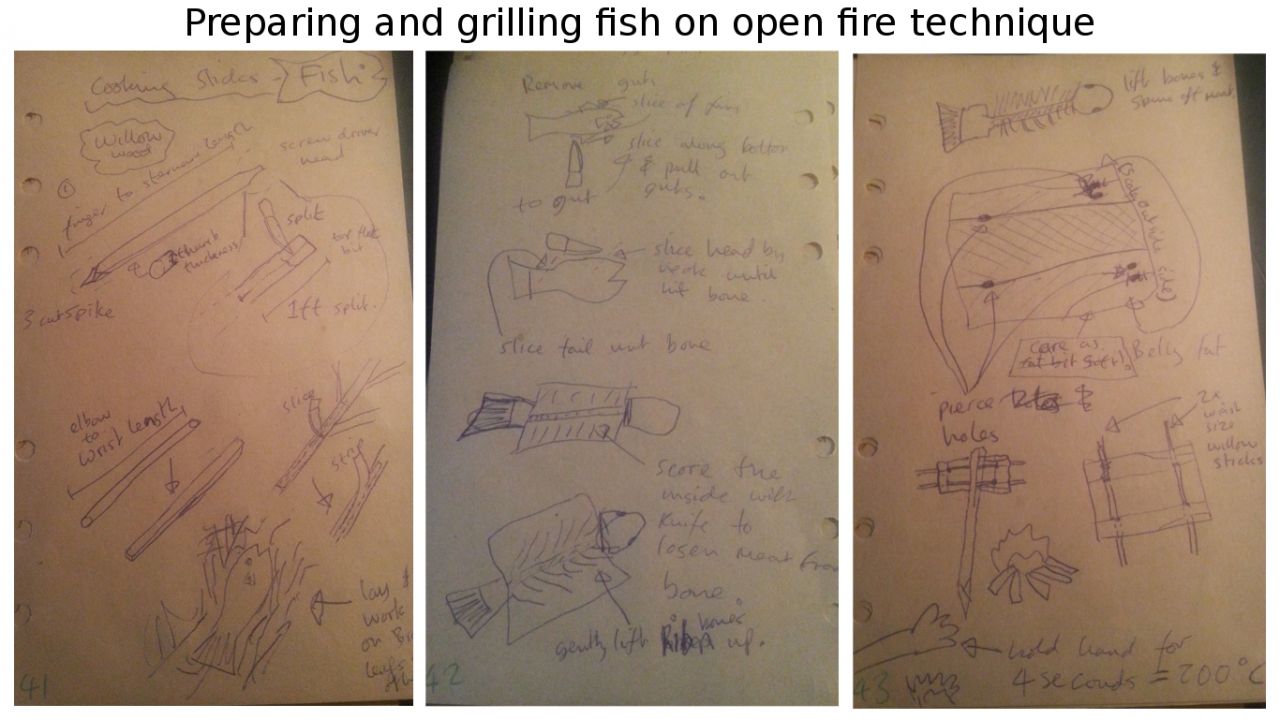
Firstly, lets make the cooking sticks with the willow branches we’ve collected. The thumb thickness stick that goes upright would be a single piece finger to sternum length rod with a screw driver head on one end and a 3 point cut to go that goes into the ground. Split down about 1ft down the screw driver end of the wood. Peel a strip off the bark so use as cordage for later.
Cut two small sticks about wrist length. Shave them both to become flat instead of a round stick.
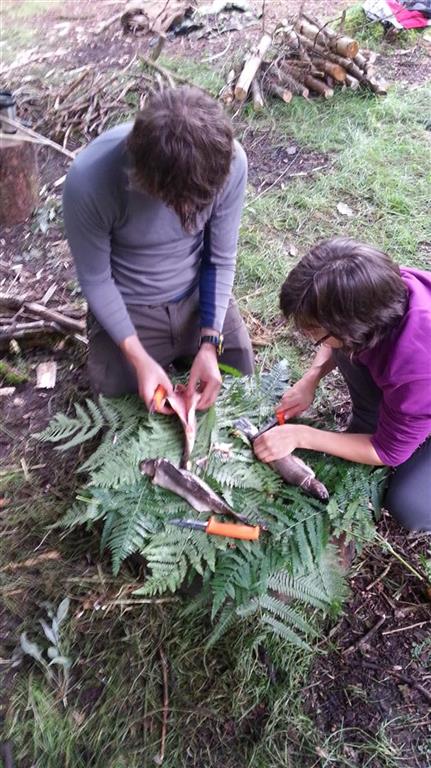
To prepare the fish, we need a clean surface. Using a pile of fresh Fern leaves, this provide a clean enough area for us to prepare our fish.
Michael and Anna preparing the fish
We was told that the gills should be removed first to prevent bacteria from growing in the fish and to help keep the freshness for longer (No idea how to do that!). To de-scale a fish, you would scrape it with a knife in a back forth motion until all the scales are gone.
Cut off all the fins off.
To gut the fish, you would cut along the belly all the way from it’s ass to near it’s head. Pull out all the guts. slice all round the head so the knife stops at the spine. Do the same with the tail.
Open the the belly up exposing the spine and bones, using the knife, make lots of small scores between the bones all the way along on both sides. You should now be able to gently lift the fish steak of the bone. dispose of the head, tail and bone parts.
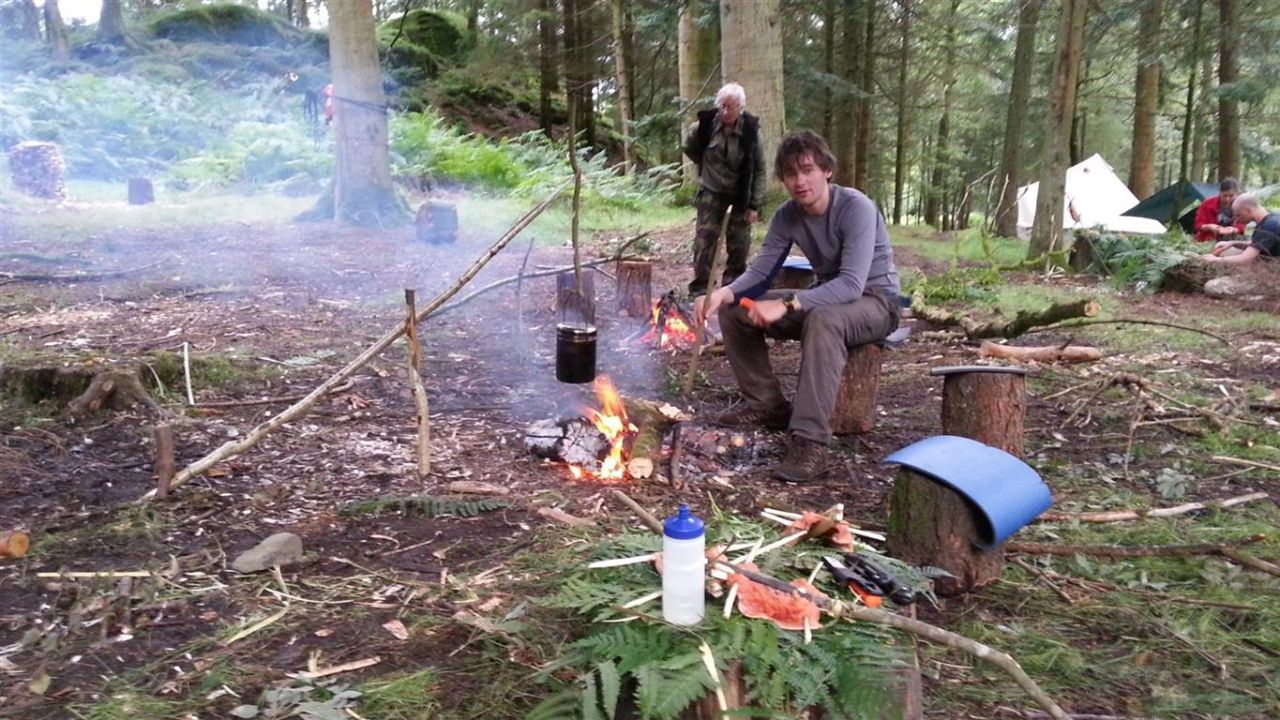
Cooking rice with our pot holderMake 4 holes about an inch from each corner. Weave the 2 small sticks through 2 holes each so it spreads the fish open. With the sticks horrizontal, slide it down the middle of the stick through the long pole where we’ve cut the 1ft slit.
Press the slit together at the stop and tie it with the strip of bark.
Place your hand over the fire where you plan to position the fish. If you can hold your hands over the fire for 4 seconds, then the temperature is approximately 200oC.
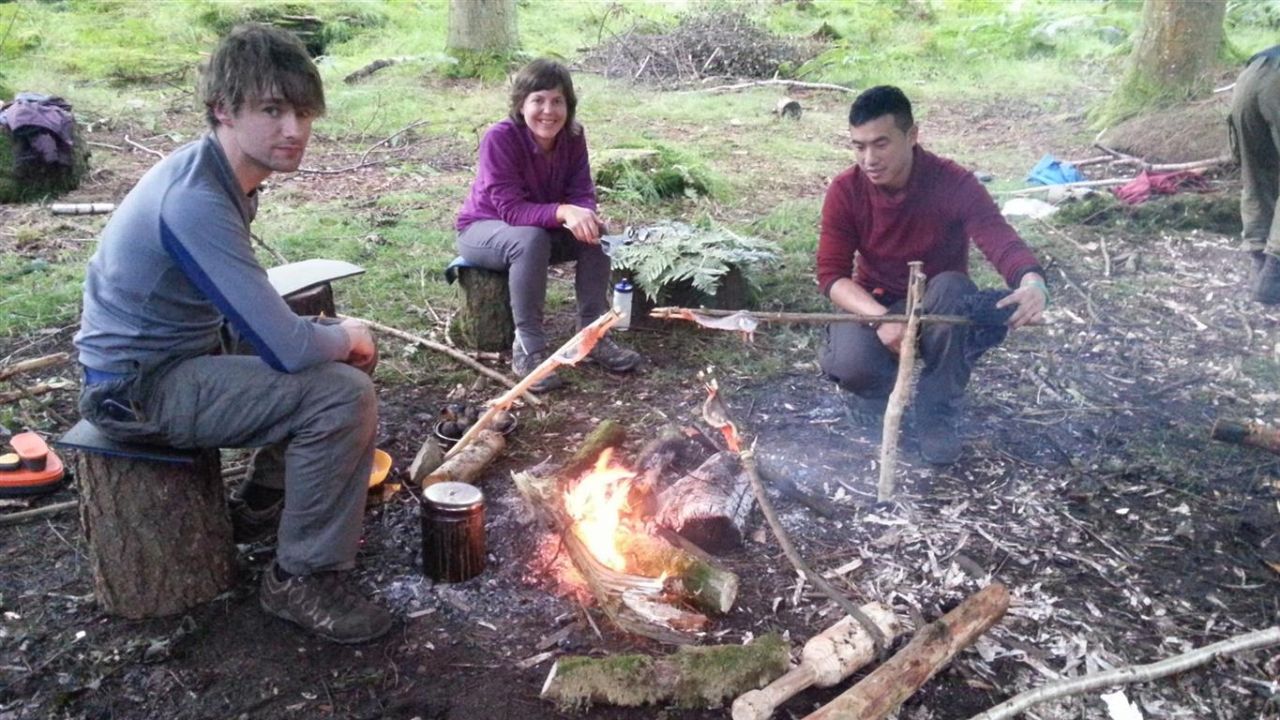
Angle the pole diagonally above the open fire position and stab it into the ground. Make sure the meat side and not the skin side is facing the fire!
Grilling the fish
The fish should be done in the next 15mins. we also threw in some sweet potatoes, whole onions and cooked rice using our pot holder we made the other day over the open fire.
Dinner was amazing, even better when making it yourself in the wild. Kind of cheated by adding some seasoning I’ve brought from home. Spicy!
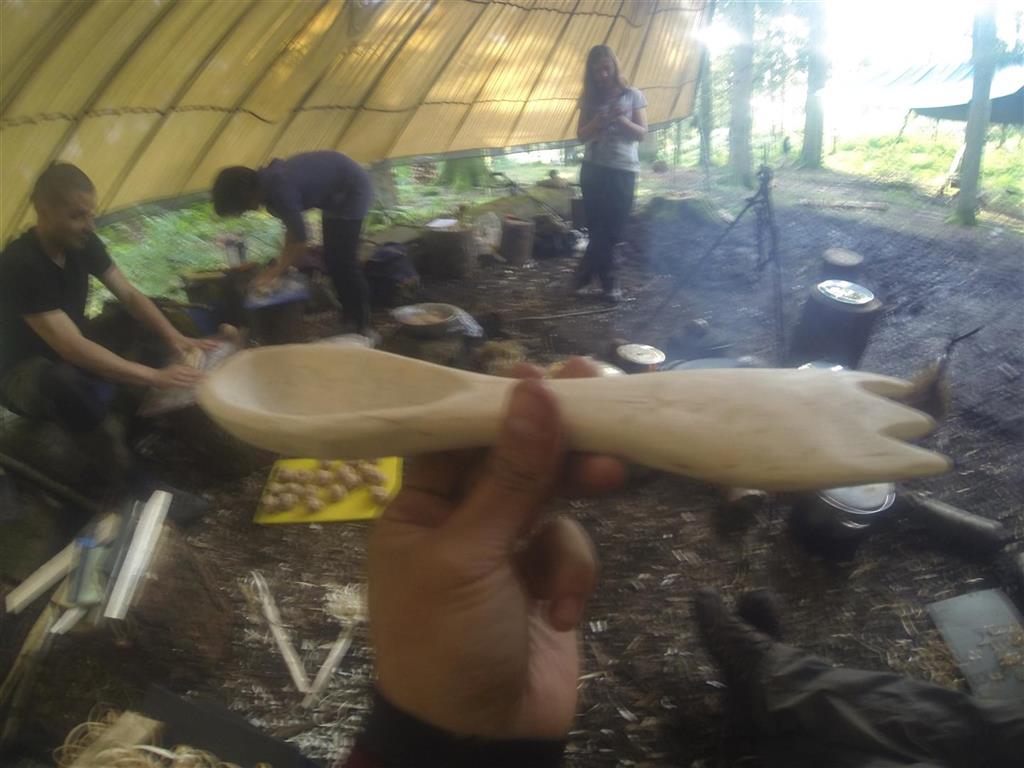
Birth of the Spoon King
The one spoon that will rule them all
It was a chilled evening around the fire but smelled like fish all over. I’ve finally completed carving out my spoon, sanded and smoothen… It turned out better and bigger than expected! Check this out!
The Spoon King! The real thing is much bigger. For real :)
Around the evening fire
In the evening we had a guest. Ross is an instructor from other courses and been doing Bushcraft for over 12 years. He was one of the people who helped with the Bear Gryll’s show “The Island”. Ross was contracted to find a suitable island with the right conditions for the show to take place. They found a suitable island off Panama then had to assess and train the participants for the show. During making of the show, Ross had to reside at a neighboring island as support and emergency help as and when required.
Day 5
Treating the Spoon King
I had a little tip this morning from Ross about treating my spork.
- Wait until dry.
- Soak in hot boiling water or pour all over it.
- Let it dry again.
- Sand the fluffy bits off.
- Repeat steps 2 to 4 for 2-3 times.
- Soak or cover in Almond, Peanut, Linseed(raw), or most other nuts/seed oil.
Do not use pre-boiled Linseed oil because the substance they use to boil contains toxic metals making it poisonous. Now you don’t want to be eating with that!
Out in the woodlands
The MillerWe went for a walk again to learn more about the wilderness.
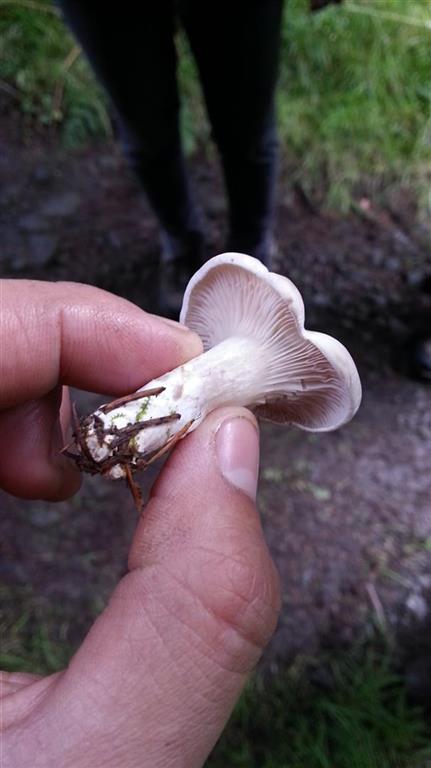
We stumbled across a fungi called “The Miller”. The most distinctive feature for this fungi was it’s smell. It is said to smell like sperm! Smells like what!? Ladies please confirm this :)
Fungi that grows on poinsonous plants/trees, do not eat! Yew is the most poisonous tree in the world, so if you find some fungi growing on the dead wood… Don’t touch it!
Fungi vs Mushroom
Mushroom is classified in the Fungi kingdom! So Fungi, is NOT a mushroom and every mushrooms is under the big umbrella of the Fungi Kingdom. A Fungi is the general name for all non-plant photosynthesis.
To eat or not to eat
Eating unknown fungi can be dangerous and lethal, never attempt it unless you are 100% sure! If you are put in a situation where you have to eat, then check there are no blue when cut and no red parts anywhere else.
Useful way to remember Tree Identification
- Spruces - Single
- Pines - Pairs
- Larch - Lumps
- Furs - Flats
Tracking vs Trailing
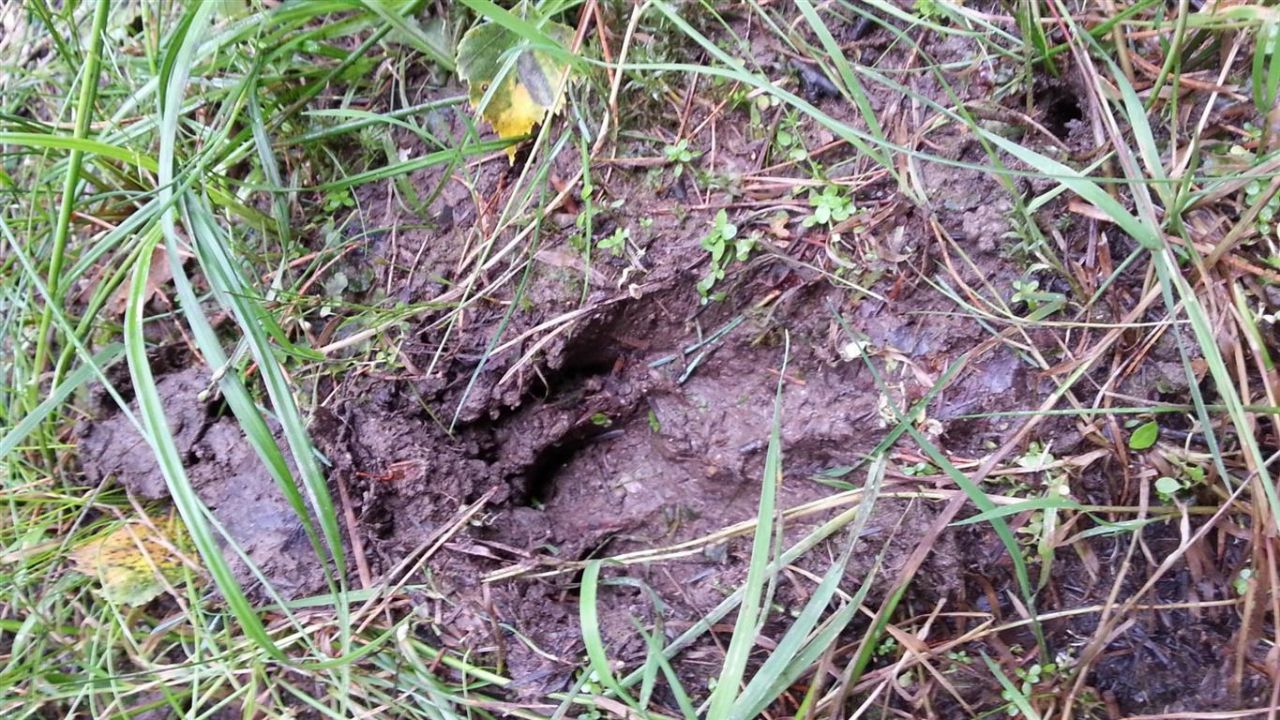
Hind leg print overlapping front leg print of a Red Deer
- Tracking is the method used to identify an animal.
- Trailing is the method used to follow an animal’s track.
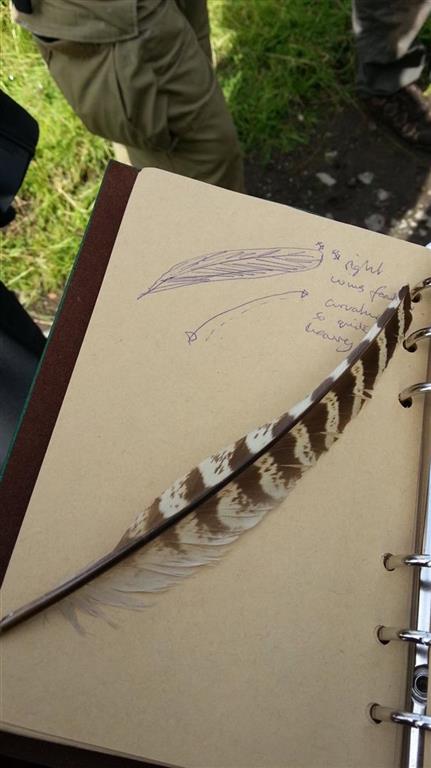
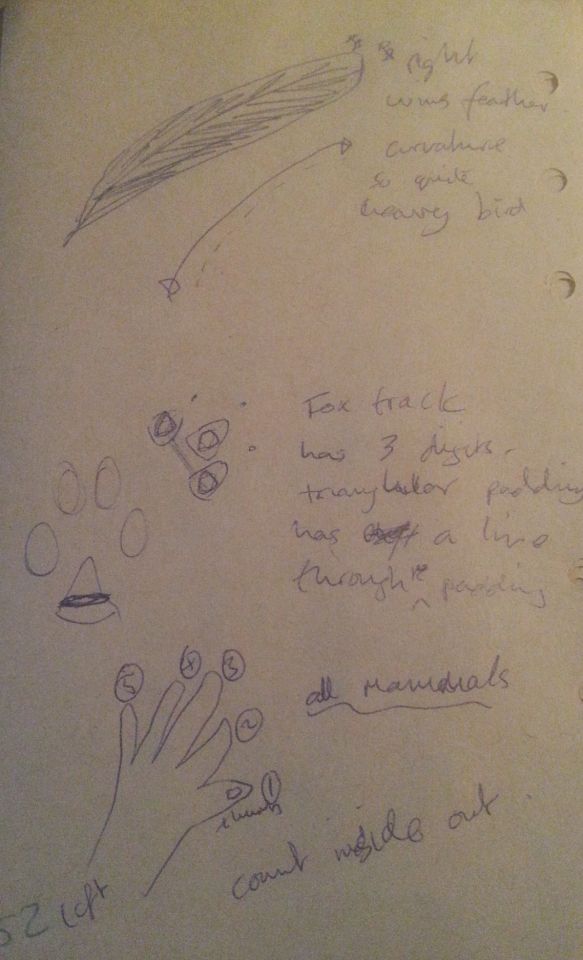
Right wing primary feather of a pheasant
When it comes to tracking, force yourself to think of 3 possibilities the track could be. Keep an open mind even if you think you know what animal is and eliminate from there. In colder environment, breathe on the tracks (slodges, faeces, etc) as this would help bring out the smell. Look at the big picture, Analyse the surrounding, time of year, environment, etc. The smaller picture (close analysis), smell, colour, consistency, bits, make up, shape.
All mammals have 5 toes. The reason why some tracks looks like 2 or 3 toes is because they have evolved where some of the toes are further up the leg. This allow them to be faster on their feet with less surface area!
When looking at a print of an animal with four legs, you should note that the print could be a double print. Four legged animals with same front and rear length legs tend to place their rear feet on the same spot as the front footprints.
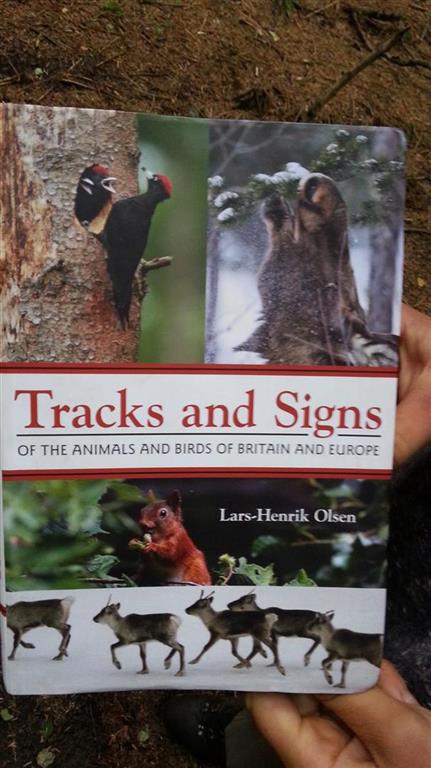
Hannah’s tracking bookBadgers are in the weasel family and all of them have 5 toes on their feet! Weasel family has long straight toes with large nails/claws.
Mustelids (Weasel) family: Otter > Badger > Minx > Stote > Weasel (In size large to small)
How to tell male or female for Red Deer family
You can measure the length of the front toe pads and hind leg toe pads. If the difference is greater than half an inch, then it is a male. You will need a clear track to do it!
Raining Cats and Dogs
Finger socks + Sealskinz waterproof socks comboMid August, can’t believe the amount of rain! It felt like a Monsoon season in Asia! Time to head back to base camp! My legs and shoes were soaked because I didn’t have waterproof trouser covers. Luckily I wore finger socks with sealskinz waterproof socks. They were like the perfect comfort combo, no blisters and kept my feet dry.
Making Traps
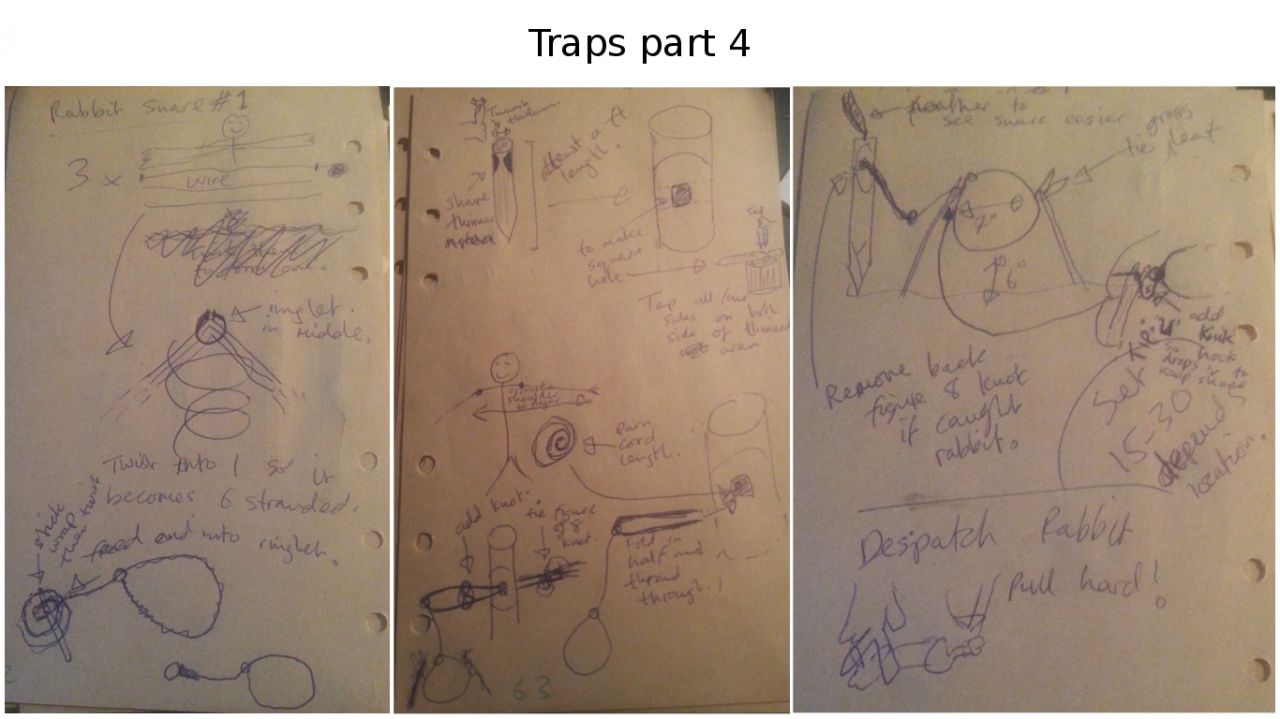
Rabbit Share #1
Some people may find these cruel, skip this section if it makes you uncomfortable! The techniques we learn here are for practical uses. Some may be illegal in some countries or part of it. Exercise cautiously and never leave your traps active unless you plan on catching food.
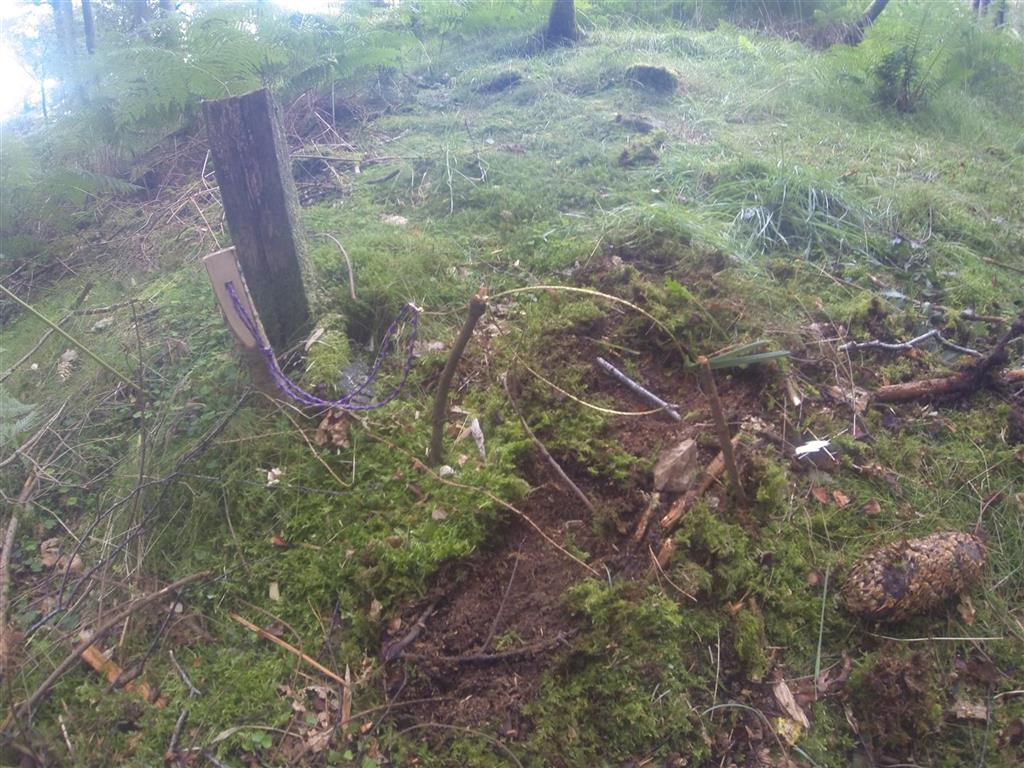
Rabbit snare trap #1
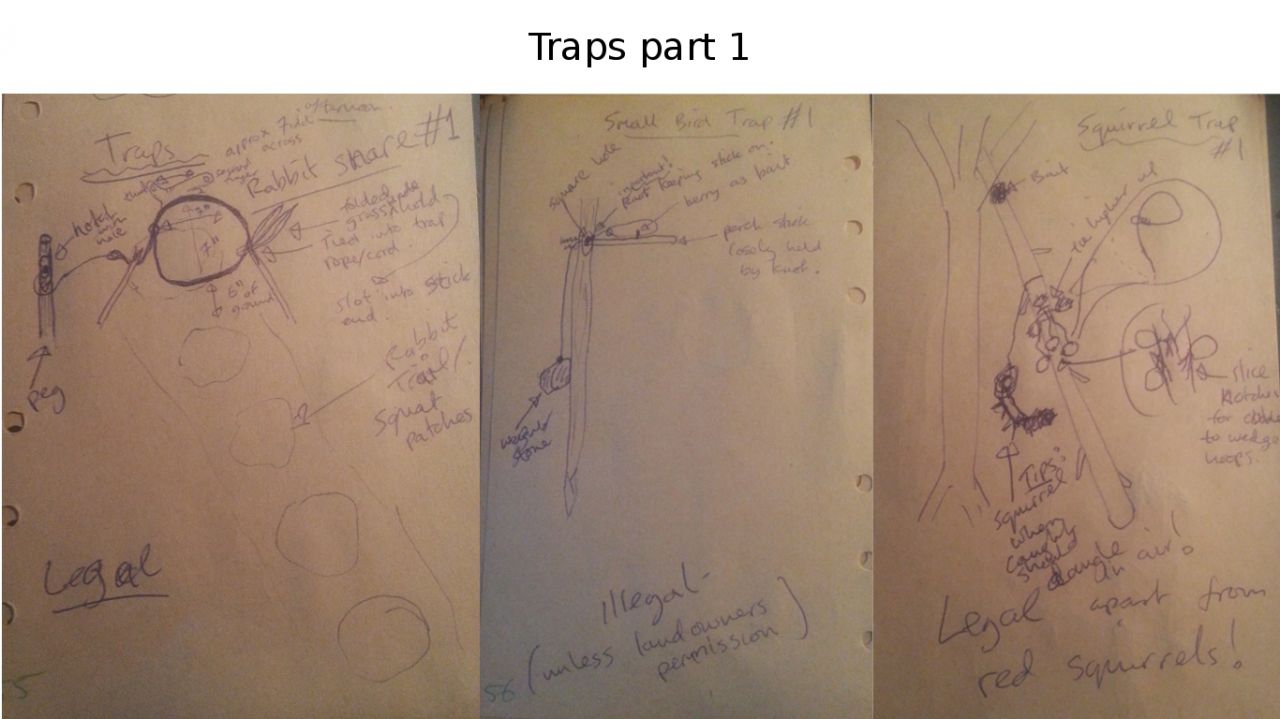
Simple to make, legal in UK. A hoop that tightens around the rabbit’s head as it tries to jump through. You will need to set up around 30 traps to have a good chance of catching something. Set the trap up between rabbit trail hopping spots., the squat patches should be very clear as rabbit has a habit of using the same paths and trails. The rabbit will most likely be alive when you find it, so you will have to do the killing yourself.
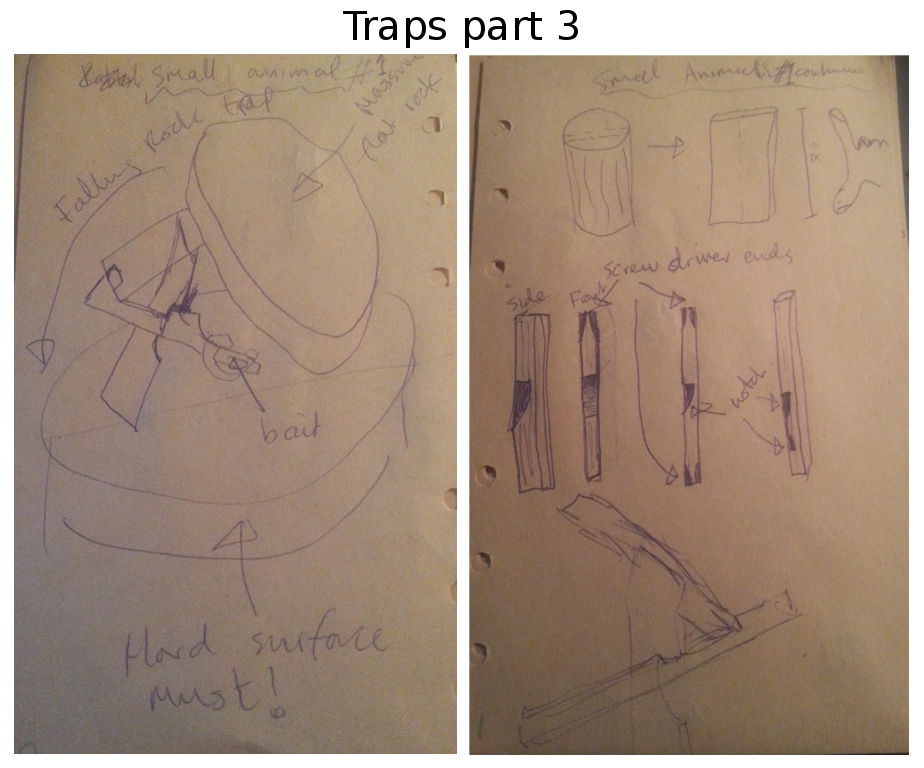
Small Bird #1
Small bird trap #1
Quite a simple trap to make. Illegal in the UK unless with land owners permission! This uses a weight mechanism, and as the bird tries to perch on the horizontal stick that has a bait on it. It will fall, the loop will snag the birds legs as the weight drops. Very likely the bird caught will be alive with broken legs.
Squirrel trap #1
Extremely easy to make. Legal in the UK apart from areas that has the endangered Red Squirrels! 3 hoops to cover 360degree as the squirrel likes to climb in a rotation with bait at the top. Once snagged, the squirrel will struggle then eventually drop and it’s weight will cause the hoops to tighten more. Hopefully the squirrel would be dead by hanging.
Squirrel #1
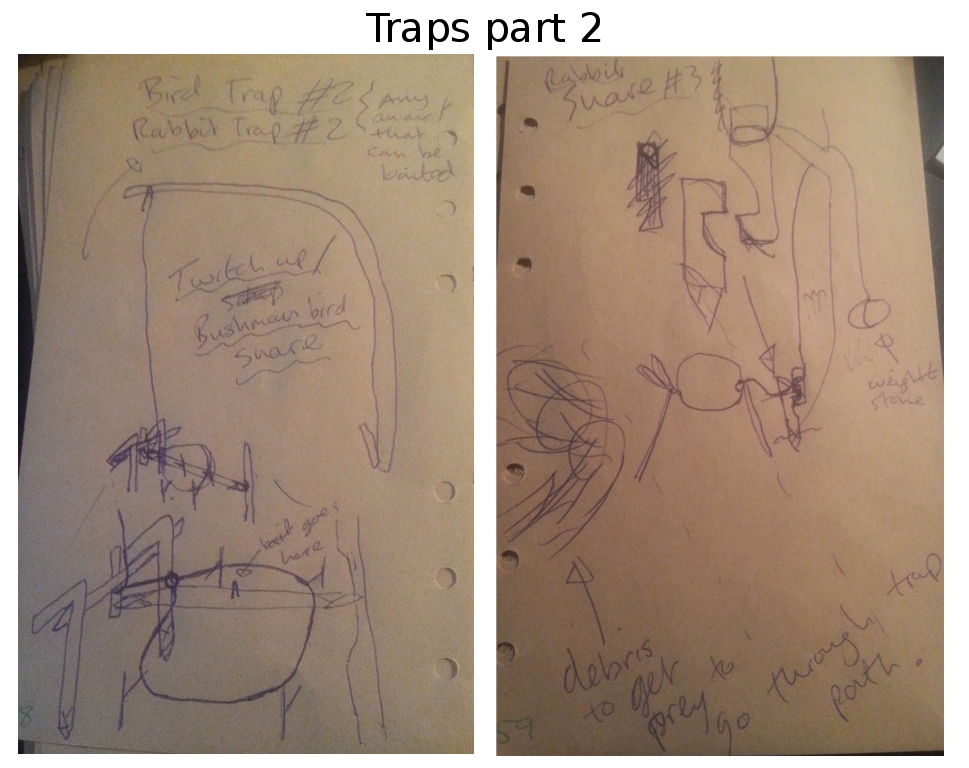
Bird Trap #2 / Rabbit trap #2 / real name is Twitch up or Bushman bird snare
This trap is much more complex, but it will work both on numerous creatures because it’s baited and depending on the size of the trap! I’m not sure about the legalities of this trap. This uses a flexible pole with wire hoop, when triggered will pull upright snaring it’s prey. Very cool trap but requires some effort to make and set it up! Quite likely the animal will still be alive.
Rabbit snare #3
Fairly simple to make too. No idea about legalities. Uses a weighted system when triggered will pull and hang the rabbit. Much more cruel than Rabbit trap #1, but the animal will most likely be dead if hung in the neck.
Small animal #1
Small animal trap #1
Fairly simple again, don’t think it’s legal. Uses a heavy rock to fall on it’s prey when triggered. Make sure the surface you set the trap on are solid because soft ground, the animal could dig or wiggle itself out. If landed right on top, most likely the animal be dead, but it has a chance you will have caught part of it’s limbs in the trap and it be alive.
Dinner time
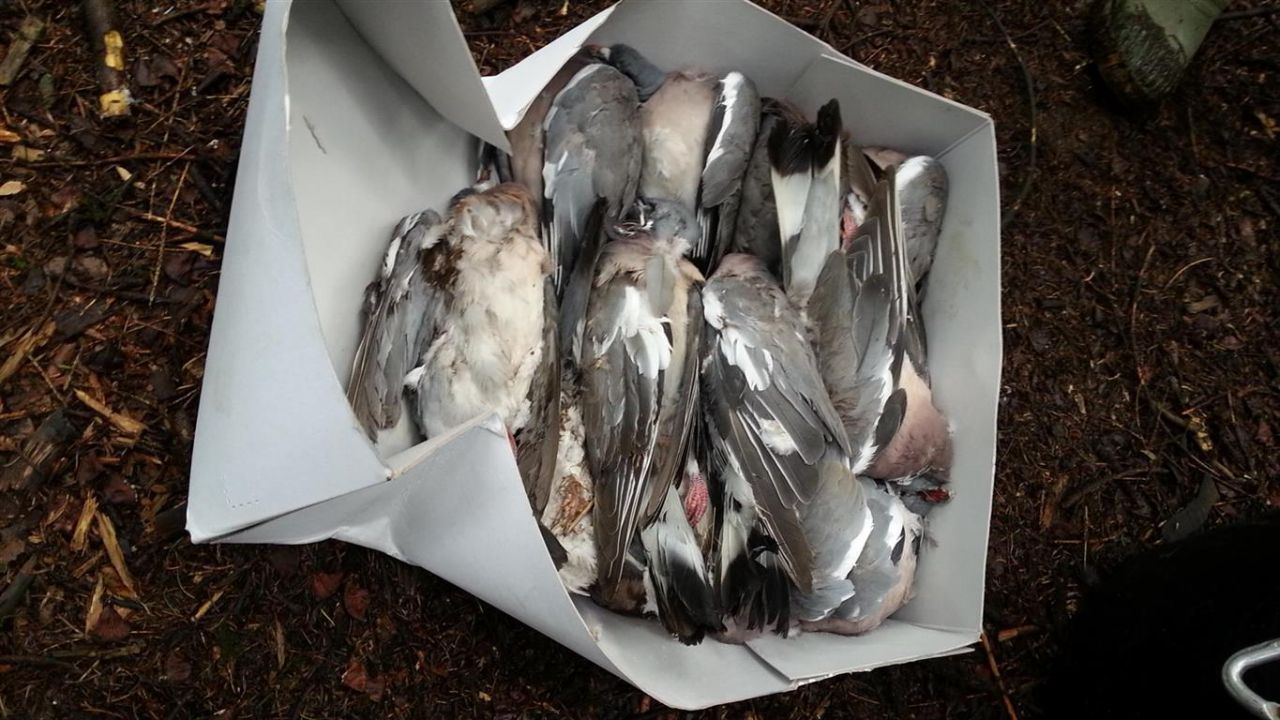
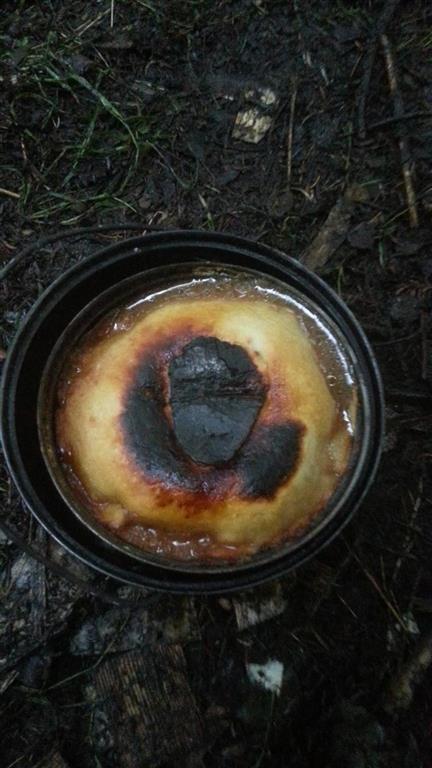
Turning this into Pigeon pie
Today we will be making our own pigeon pie! I have ate pigeon at home before, texture and taste some what like quail meat. We’ll be harvesting only the breast meat as the other meat area are too little and not worth the effort.
Preparing the pigeon
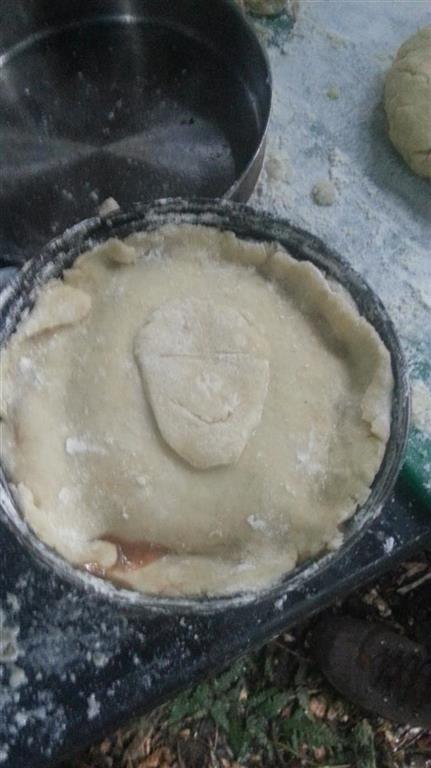
My pie with selfie emblem
- Push several times the chest up to the neck to get out any lumps.
- Hold neck (close to breast as possible).
- Twist until it breaks off.
- Twist wings opposite direction to snap them both off.
- Push both thumbs down the neck between the breast where we have snapped off earlier.
- Feel the breast bone on the thumb and spine as deep as possible.
- split open the pigeon by ripping opposite directions from thumb.
- Push all guts away from the breasts.
- Pull back breast plate until breast meat falls away from the other parts of the pigeon.
- Dispose of the other parts apart from the breast meat.
- Push thumb between breast meat and breast bone to separate just the bottom.
- Use knife and slice breasts into cubes while one side still attached to the breast bone.
- Add chopped mushrooms, green peppers, onions and cubes of the breast meat into frying pan.
- Add oil, stir fry over open fire.
- Add minestrone soup powder and a little water.
- Simmer for about 5 minutes.
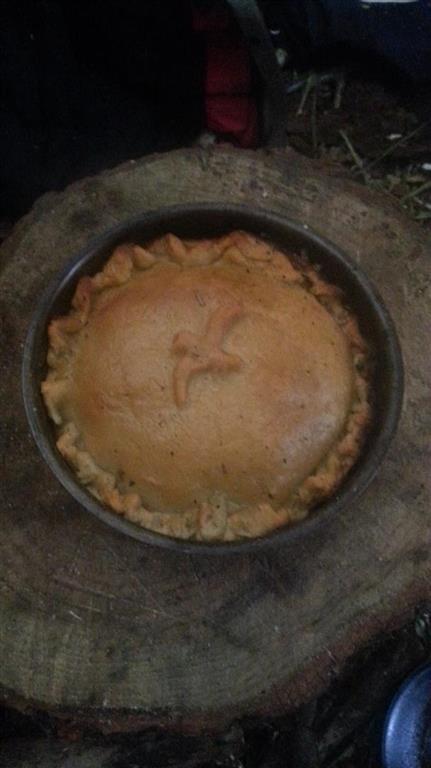
Making the pastry
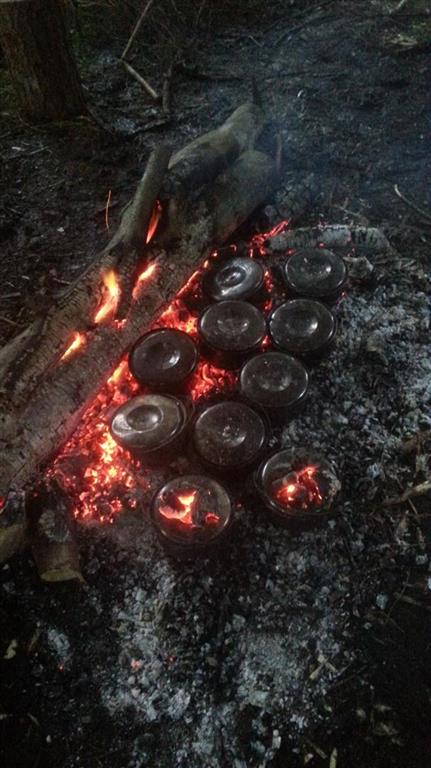
Long fire cooking our pies
- 2 scoop flour.
- 1 scoop milk powder.
- 1/4 oil, 1/4 water.
- Mix in bowl until it forms a dough.
- split dough into 3 different size pieces.
- The largest piece, flatten until 2mm thick all over. (don’t forget to sprinkle flour on worktop)
- Lay the large piece into inner pot while shaping it into the pot.
- Pour cooked pigeon stew/stock we’ve prepared early into the pot.
- Roll some dough balls to make dumplings into the stew! optional but who doesn’t like dumplings?
- Use medium size dough and flatten to make the pie lid.
- Place dough life on top and press the sides together.
- Use the final piece of dough and make your personal emblem. (I’ve made a self portrait! Talk about vanity :D)
- Stick the emblem to lid using a finger and water.
Cooking time
NooOoo! My selfie turned black
- Place stones into the larger pot around sides.
- Place the pie pot into larger pot on top of stones to create a gap.
- Put lid on and place the pot on top of spread ember on a long fire.
- Every 10 minutes, do a 1/3 turn of pot until 360degree. 3 x 10 minutes
- The final last 10 minutes for a total time of 40 minutes, but the pie further from the heat & place a few embers on top of the lid.
- Remove the ember and blow off any ashes.
- Remove lid, use knife and slice the outside between the pastry and pot.
- Replace lid on top and turn upside down.
- Remove outer pot and tap the pie pot until you feel it dropped.
- Lift off the pie pot and place a plate on top of pie.
- Turn pie upright , take a picture and serve!
Ellie’s perfect pie! nice emblem!The pie itself was perfectly cooked, but I think I put too much ember on top of the lid and my self portrait turned blackinese! If I was to make this again, I’d probably add more water to my stew, made my dough much thinner and not cook it as long in the fire, and certainly not put too much ember on top of the lid! But for first attempt, it was good! Ellie made a really good looking pie! Check hers out!
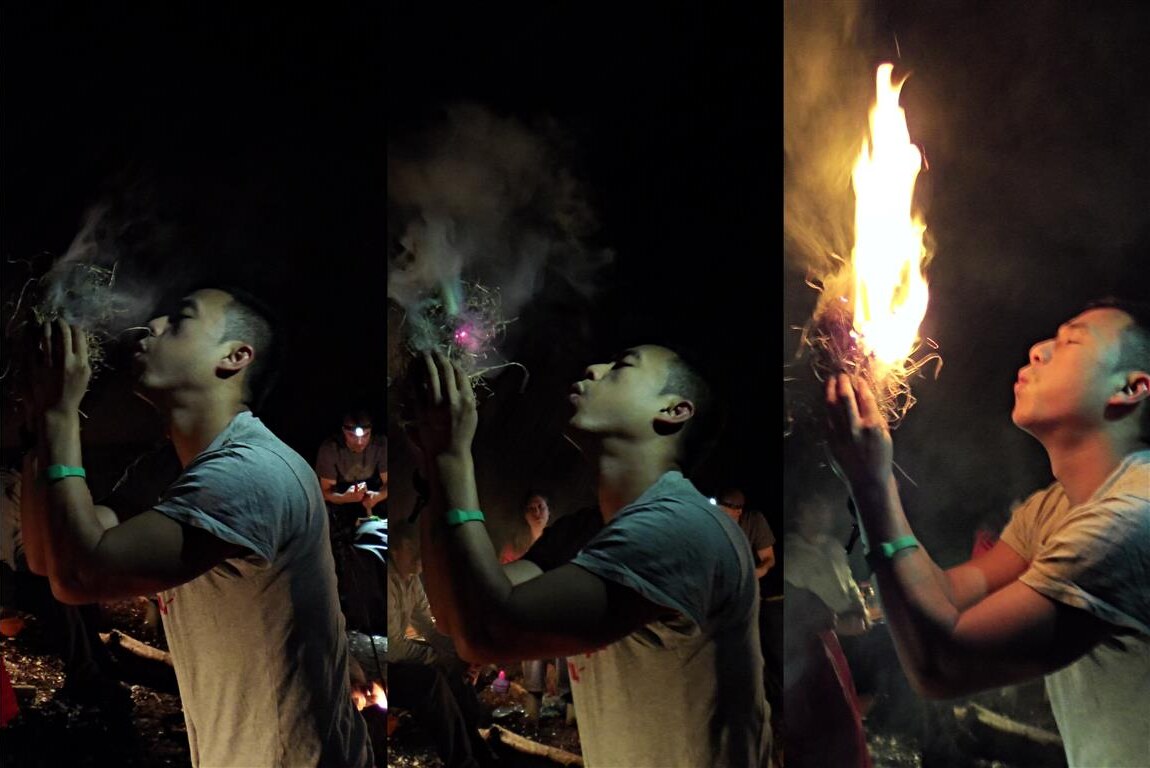
I have made FIRE
Remember Tom Hanks expression in Castaway when he first made fire as he danced around screaming “I have made FIRE!”? I think I can relate to that…
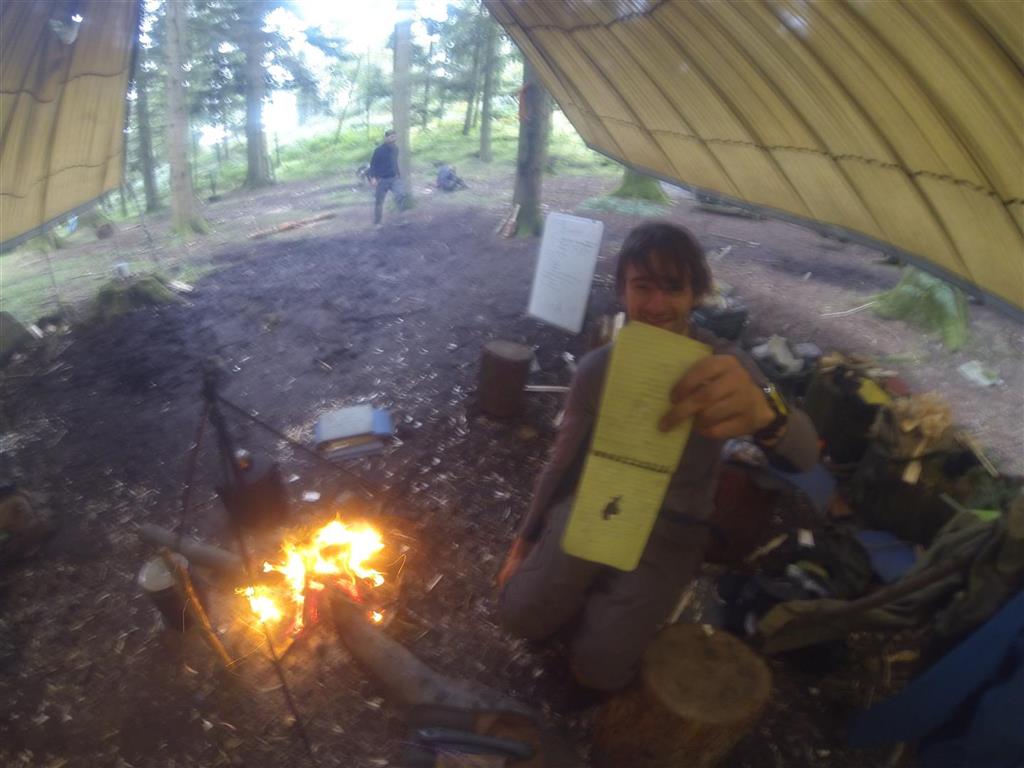
Tonight was the first time I have attempted to use my drill and bow to make fire. It took some getting used to, and the technique. Will gave me a lot of help, correcting my mistakes and helped my body remember the feeling. When seeing that ember for the first time, it was amazing! Like a child who is about to win his first soccer game! The game hasn’t finished yet, I’ve still not got a fire going. Sprinkling the dust particles on top of the ember, and waving my hand gently to get it to grow. Hoping it doesn’t die out, it was a patience game. Eventually when it was the size of a pea, I placed my stack of hay on top and tipped it over onto it. Closing my hands and blowing into the gap, I can smell the burning and see the smoke. Waving the haystack down, then back up while breathing in ready for the next puff of air, it’s growing! I can feel the heat in my hand, smoke thickening and hear crackling in the straws. One long last puff! As it bursts into flames, the joy on my face was captured by Stu. The aching arms did not bother me no more, just a sensation of achievement that I have made fire with a few wooden sticks!
Flame on!
Day 6
I have made FIRE! Han Solo style
Bow drill hour becoming part of our daily lives. Behold! I can make fire! Another successful attempt, this time I did it all all by myself! My arms must have gotten stronger, bow drill hour for the win!
Two new faces
In the morning we had two others tagging along. Lisa, who is the co-founder of woodsmoke and Sue, who is writing a feature for a nature magazine.
A walk in the woods
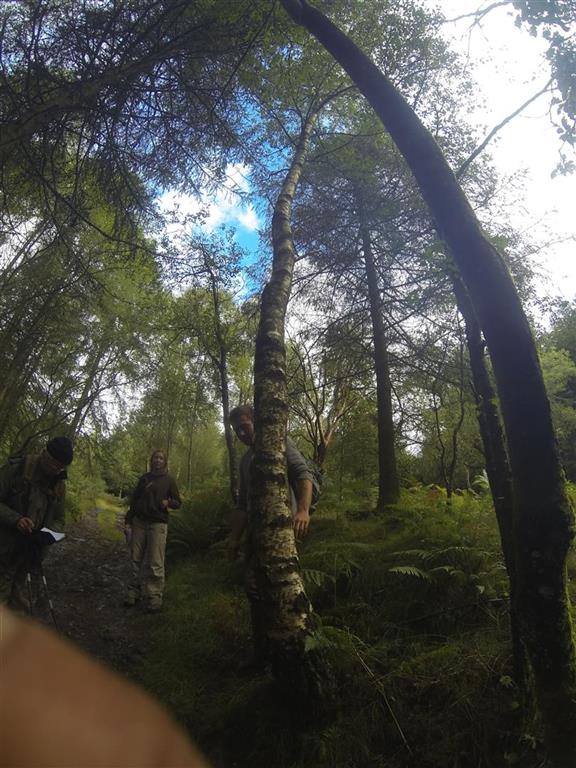
Silverbirch - Lady of the WoodsSteve lead the walk today and was extremely knowledgeable.
We first came across a type of tree called Silverbirch. They are white/silvery color, with horizontal bark if peeled. It stands very tall, and small air bubbles on the surface. The sap is useful for fighting cancer and contains a lot of medicinal properties. It can be made into wine and syrup, but quite pointless because it contains very little sugar. It’s good for tinder and carving. The leaves makes natural soap and can cure aches or pains. The twigs can be used to make brooms. The bark contains a lot of oil that can be extracted into black tar and used as glue, burning, etc.
Silverbirch are known as ‘Lady of the Woods’.
Elder - Sambucca Nigrai
The next tree we came upon was the Elder, known as Sambucca Nigrai. It has insectacidal properties, anti-viral properties. It’s characteristics are lots of bunches of small berries on red stems. Single leaf-normal shaped. Really solid wood making it great for carving also because of the little piff to wood ratio. It’s overall shape and growth are more shrub like than a tall standing tree. The berries can be green when immature, and when mature should be deep purple in colour. The berries can be used to cure sore throat, cold flu and act as a laxative. If you use 3 fresh tea spoon per cup, or 1 dried tea spoon per cup it can help get rid of snot and boogies!
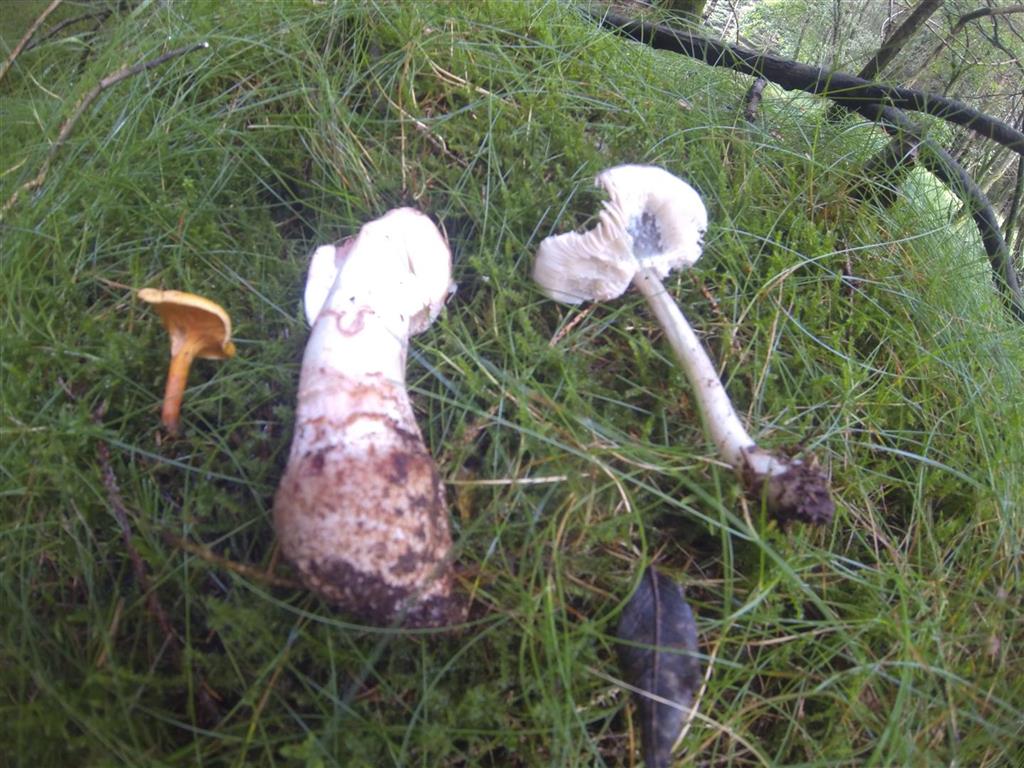
False Chanterell, Blusher & GisetteFurther in, we found some False Chanterell, a type of fungi that is orange in colour and has gills. We also found some Blushers, Gisettes, Slippery Jacks that has slimy mucus on the top of the cups, Brittle Gills, Amathust Deceivers which is deep purple in color all over.
Slippery Jack
When learning Fungi’s, best to learn which will kill you. There are 8 that will kill you, and 30 that will make you ill. Learn the families of Fungi and when plucking them, make sure you pull them out from the roots! Separate Fungi’s into two baskets, one which you know for sure is edible, and another for unknown! Last thing you want is to be doing is contaminate poisonous ones with the edible ones.
Spore Print Identification. An effective way of identifying Fungi’s. It’s difficult to do in the field and will need to take back home or base camp to do.
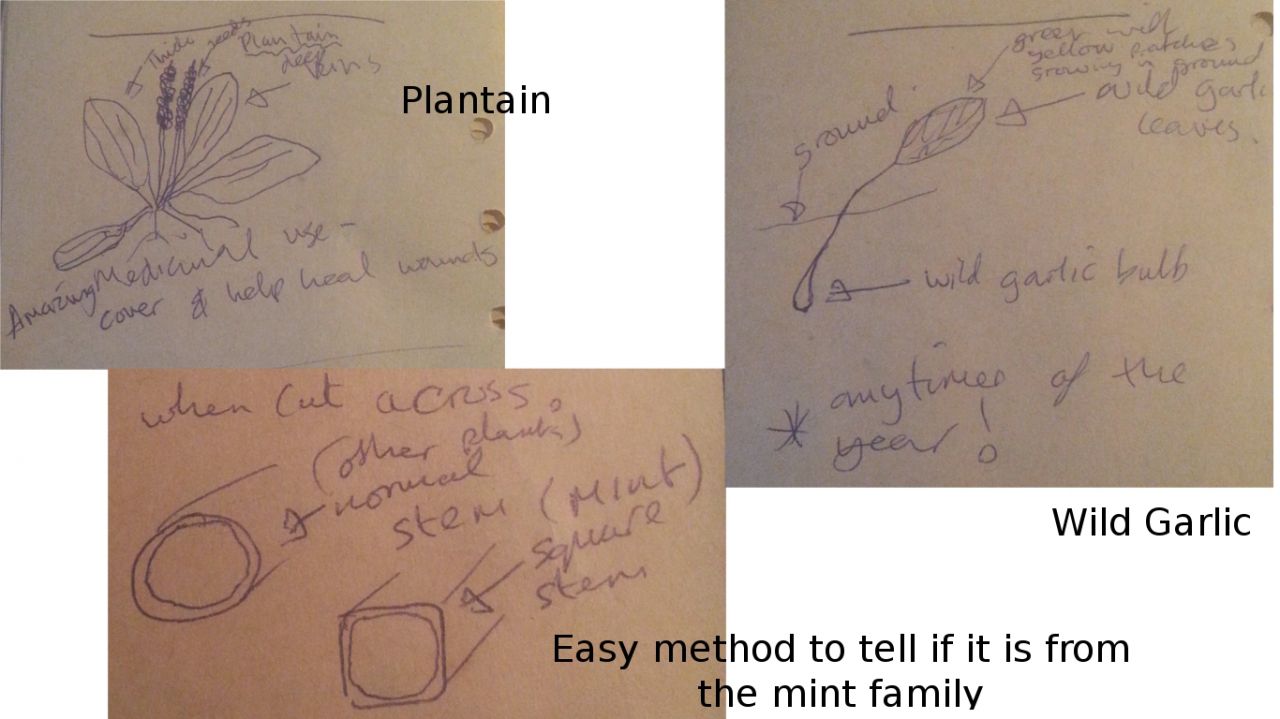
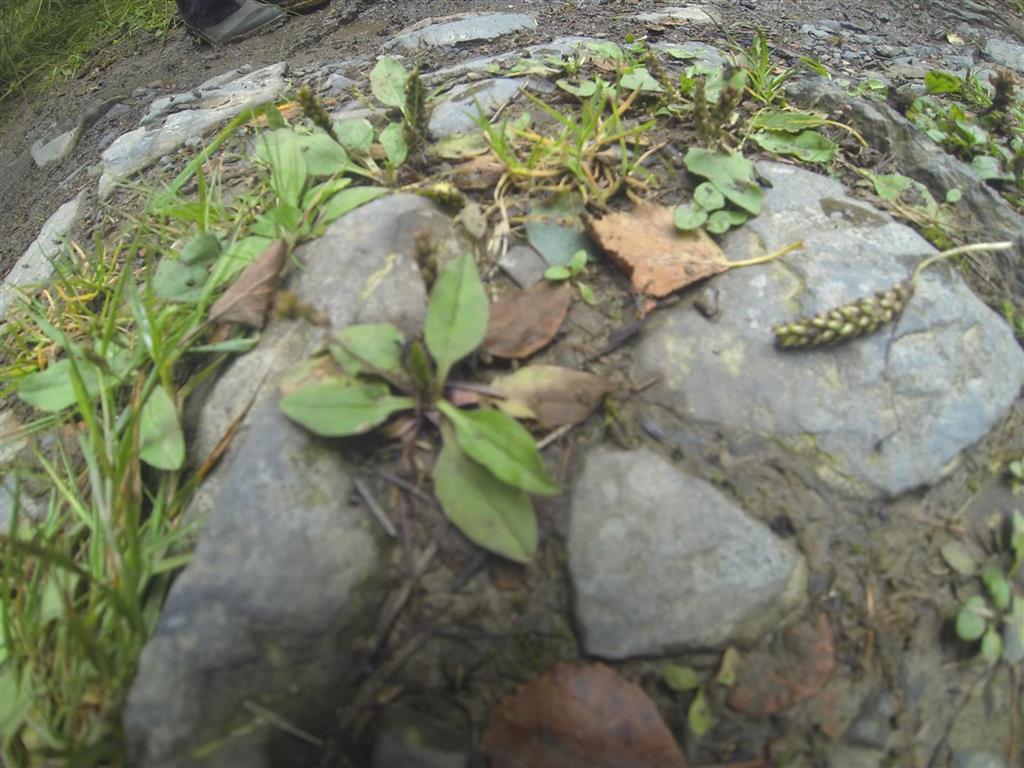
By moist, damp or swampy regions, you can find plants called Plantains. These has amazing medicinal uses to help heal wounds. If you grind them and then cover a wound, it will help prevent infections, anti-inflammatory to relieve pain and speeds up the healing process!
PlantainsAlso in regions you can find clusters of small 3 leaved plant called Wood Sorrow that are easily mistaken for Clovers. Wood Sorrow has a distinct lemony flavour to it and would go well as a seasoner, with fish, tea or in a salad.
Brambles are thorny bushes that can be found all over UK. Their fruits are Blackberries and the young stems are edible or can be made into tea.
Various Mint specimens were found, and all are edible.
It’s easy to identify a mint, roll your finger and thumb on the stem. All mint variaties have square stems! When making Mint tea, do not use boiling water. wait for 5 minutes for the water to cool down a little then add the leaves. Cover with lid to keep steam and oil from evaporating away.
A type of Mint
Acorns comes from Oak trees, and it can be used to make flour. It has a nutty flavour but has to be processed to remove the tannin taste.
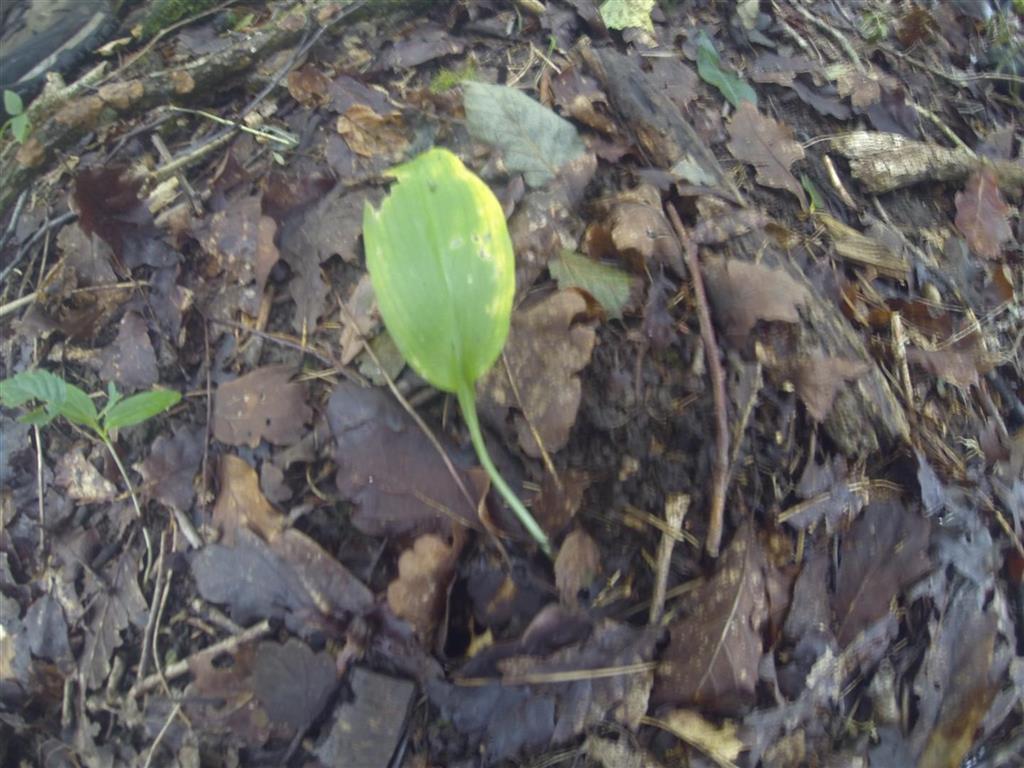
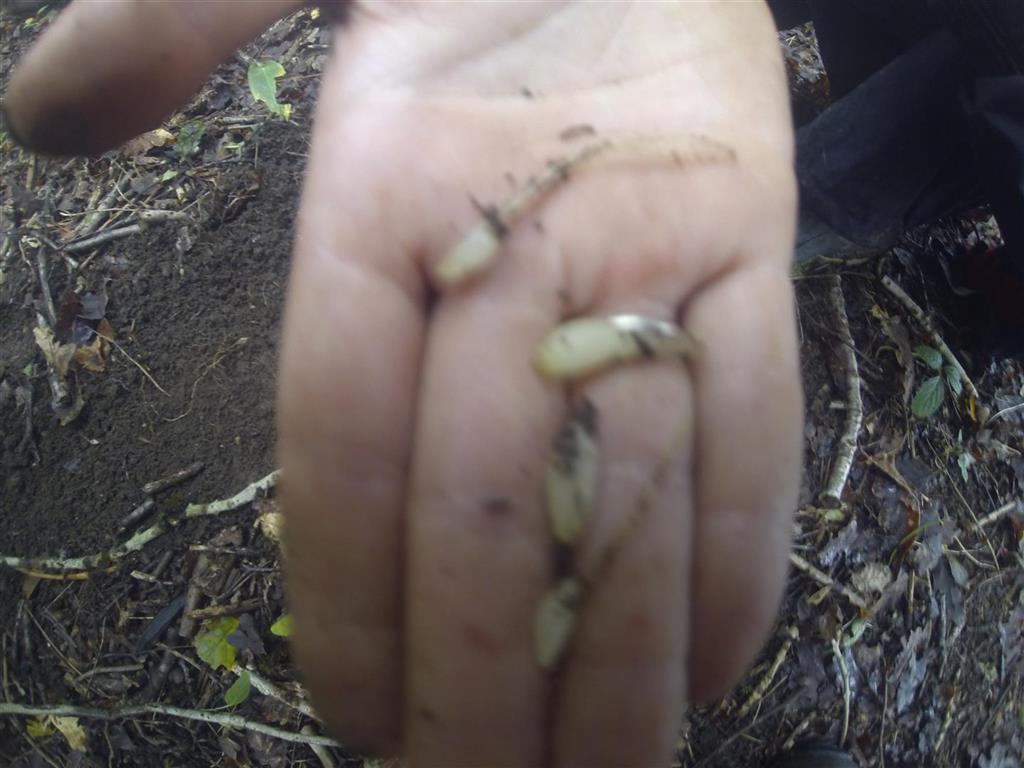
I never knew that wild Garlic can be found! To my amazement, they taste like… Garlic! These wild Garlics are not like your conventional multiple bulbs you find in the supermarkets, but are small loose bulbs and single leaf growing out the ground. They can be found anytime of the year!
Wild Garlic single leaf sprout from ground
Wild Garlic bulbs dugged up
Damsons are shrubby like tree and bears plum fruits.
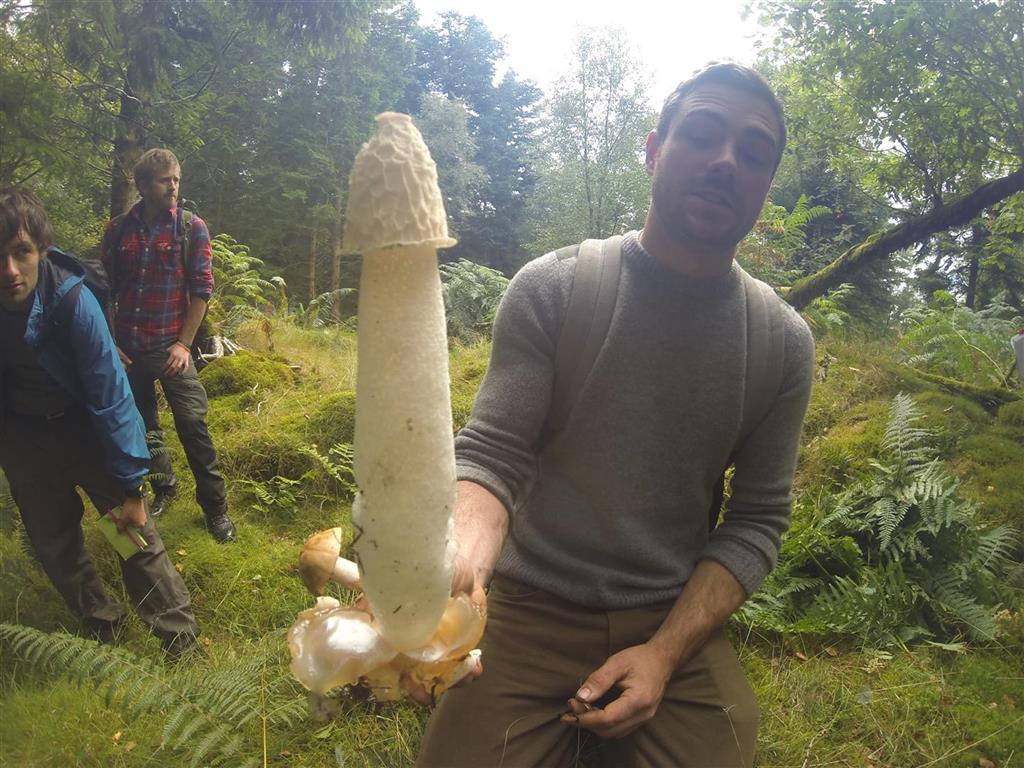
Big Daddy
The Stink Horn - Size of a horse’s…On the way back to base camp, we all smelled a pungent rot like aroma in the air. It could be smelled within 10 meter radius! Steve followed the scent and found what he was looking for. The Stink Horn! I was like “WHOA!”, it looks like Stallion’s Penis! This huge Fungi has a hole at the top of the knob, deep veins and a thick hollow sponge stem. The base was covered in some sort of jelly and I’m guess that was giving off the smell. It was quite a funny find to end the walk.
I want a Tarp
Lisa was setting up her Tarp and Hammock and asked if we would like to see how it works and the set up. A few of us could not refuse! There are so much advantages of using this set up, can’t wait to get my own!
Here’s some tips Lisa had given us when setting up the Tarp, Hammock and other jungle tips.
- Pre-soak ropes/cords in Premethian (stops ants and bugs walking along the ropes/cords)
- Make sure you check surroundings, look up to see if anything likely to fall. You can shake the trunk to see or hear for loose branches. Tropical storms in jungle causes things to fall. There have been high cases of fatalities!
- You can tie an extra safety rope above and across the Tarp to break the fall of any objects from above. This isn’t full proof, especially if a tree falls on top of it!
- Flatten the ground below and around the area. Snakes and some creatures doesn’t like open areas so they will likely avoid your space.
- Look after your feet, it’s easy to suffer from problems if uncared for.
- Don’t buy Diamond shape Tarp because it doesn’t protect from side blown rains.
Free time
End of the evening, Rob drank Chinese tea and complimented how nice it tasted, only to find at the very end a slug had crawled into his cup. Boiled slug tea, nice!
We finished earlier than usual early today to allow us more time to finish off all our projects. During the free time, I was able to finish:
8 x Feathersticks and tested to light on using the firesteel successfully.
Making all the parts for Rabbit Trap #1.
Finally 5 Meters of nettle cordage.
Day 7
Attack of the slugs
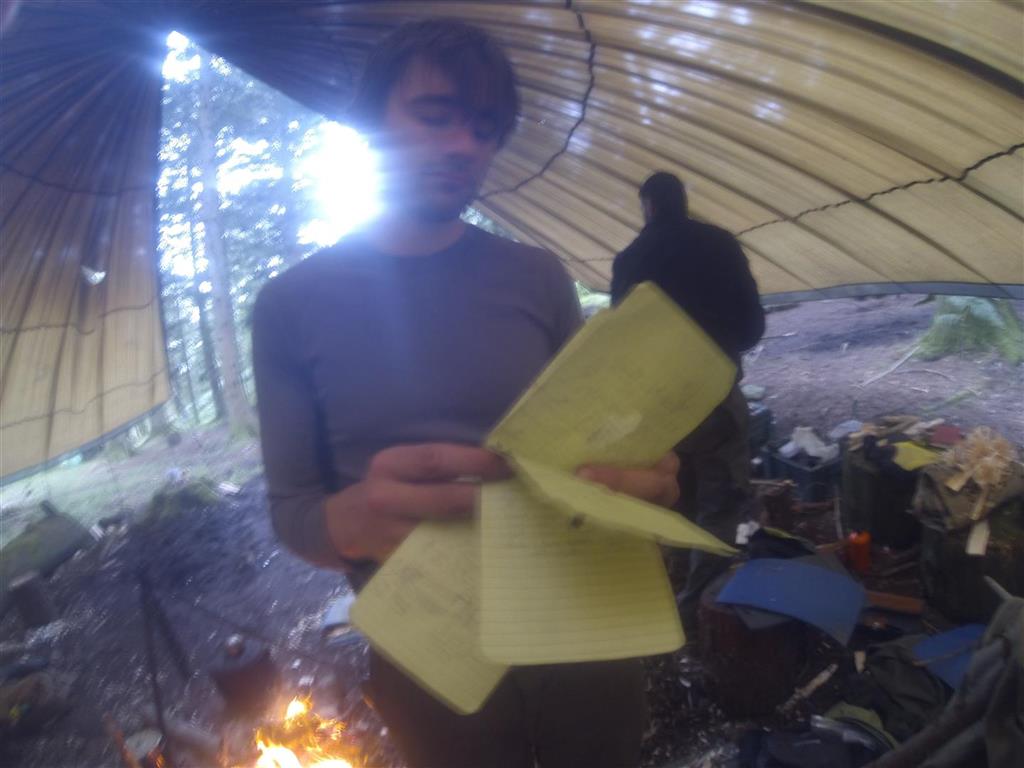
Michael was the unfortunate one to find his notebook had been munched on by a slug. It even shaped like a slug! Keep your notebook in a ziplock bag overnight!
Too bad Michael! Notebook eating slug
Numerous pages now have the shape of a slug’s body
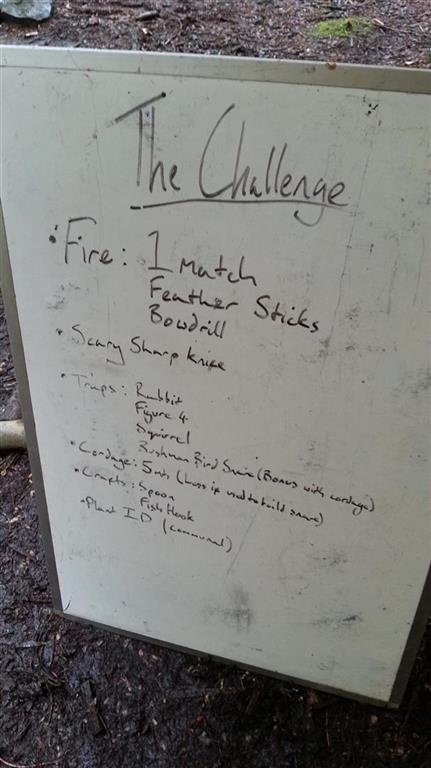
The Challenge
The ChallengeThe final day involves an optional informal test. We must demonstrate a list of things we’ve learned. I did mine in the following order to complete the ones I am most comfortable with or already completed.
Scary Sharp Knife
First thing in the morning was to sharpen my knife before it gets blunt while using it on the other challenges. PASSED
Cordage
Completed using all my nettle fibers last night. Got about 6 meters of cordage! PASSED
Crafts
Spoon - they made me fit the spoon in my mouth before it can be considered a path! Lucky I have a big mouth! PASSED
Nuteka fish hook - PASSED
Fire
Bowdrill - I made sure I did this one first while my body is fresh. Did it in first attempt, the results of bowdrill hour practice everyday! I’m getting good at this! PASSED
Here is Raj completing his bowdrill challenge.
Feathersticks - I chose to use firesteel to ignite this as I was able to do it last night. The trick behind getting it working with feathersticks is by making sure the final shavings are sliced very finely and thin. It will ignite with ease by rapidly striking the firesteel by the fine shaving area. PASSED
1 Match on arctic fire fire - Taking out the matches we have coated in wax, we are allowed only one chance to light the fire. Use the knife to cut along the wax and prong out one single match. To make sure you don’t snap the match and keep it well shielded from the wind. Stay low on the ground and use your body to block the wind. hold the match within the thumb and fore finger angled like holding a pen. To ignite the match, it will require several fast mini strokes on the striker on side of the match box. The wax will slow the burning of the match, so do not be hasty! Keep it burning up the handle, and when big enough flame, then move it to light the tinder. PASSED
Traps
My Rabbit Snare #1 complete!Rabbit - Having constructed the parts the previous evening, setting it up was simple! PASSED
Squirrel - At first making this, I thought it’d be as simple as it looks! I made a few errors which was corrected but eventually got it right! PASSED
Small animal falling rock - I had to carve out the 3 wooden parts, was a bit of a rush but eventually completed it! PASSED
Bushman bird snare (bonus with cordage) - Would have loved to attempt to make this one, but ran out of time! INCOMPLETE
Plant Identification (Communal)
This was a group challenge and only 4 of us doing it. Rob, Michael, Stu and myself. Being only a few of us, we played it like an Ouija board! Pretty hilarious because we would find a hooked finger guiding the rest of us to the right specimen! PASSED
Debrief
The course is now finished! Results will be sent to us and we were proud to have Michael in our group who had a Distinction awarded! Distinctions are rare and only 2 others have had it in the past! Again, well done Michael!
Clearing the base
It is important we always clear up and hide our tracks, especially if we’re on someone elses land! The main thing that would give us away would be the open fire patches. To conceal these, we would wait until the fires are out and the charcoals are cold. Take handfuls of the charcoal and scatter to the surrounding. We would then brush the area to spread debris evenly. Done and dusted!
Packing up
With my tent looking like a bomb aftermath, it took some time to re-organise everything. Taking the tent and trying to fit it back into the original bag was a pain! End up being last man packing while keeping everyone waiting!
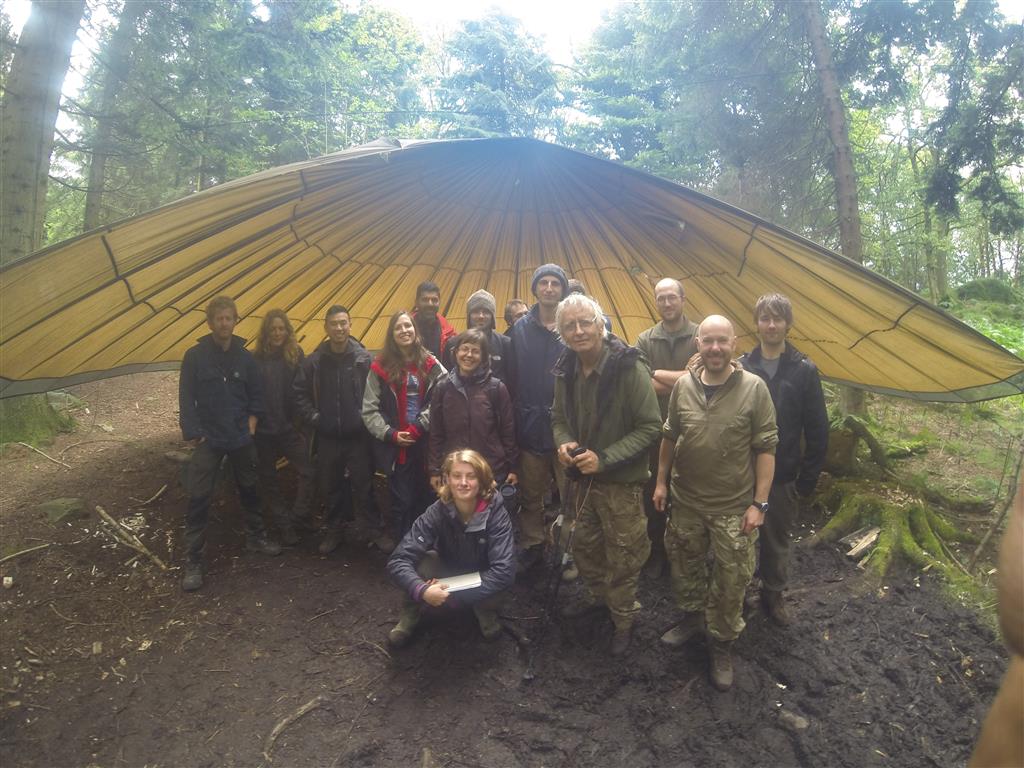
Final picture
Lucky I was able to capture one final picture of everyone together. Awesome!
Final Group Picture
The last leg
Time for the final part of the journey. 7 days without a proper wash and tons of used wet wipes, we must have reeked out the entire train carriage!
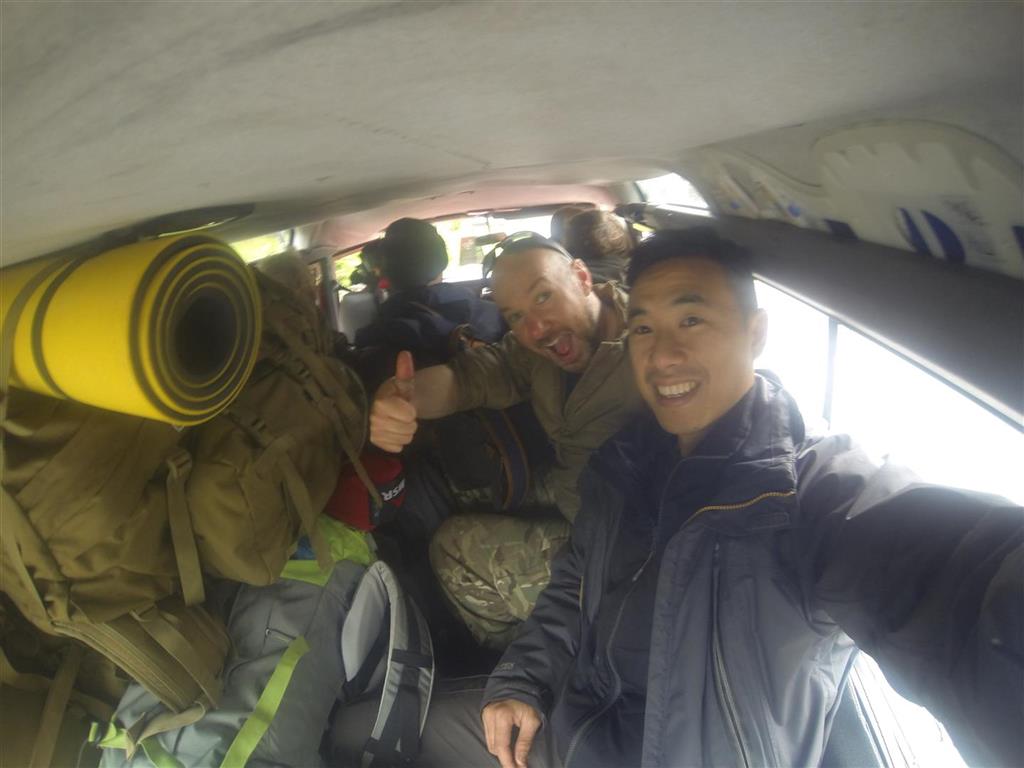
Goodbye to half the group!
Back of Jeep - Final selfie and Stu :D
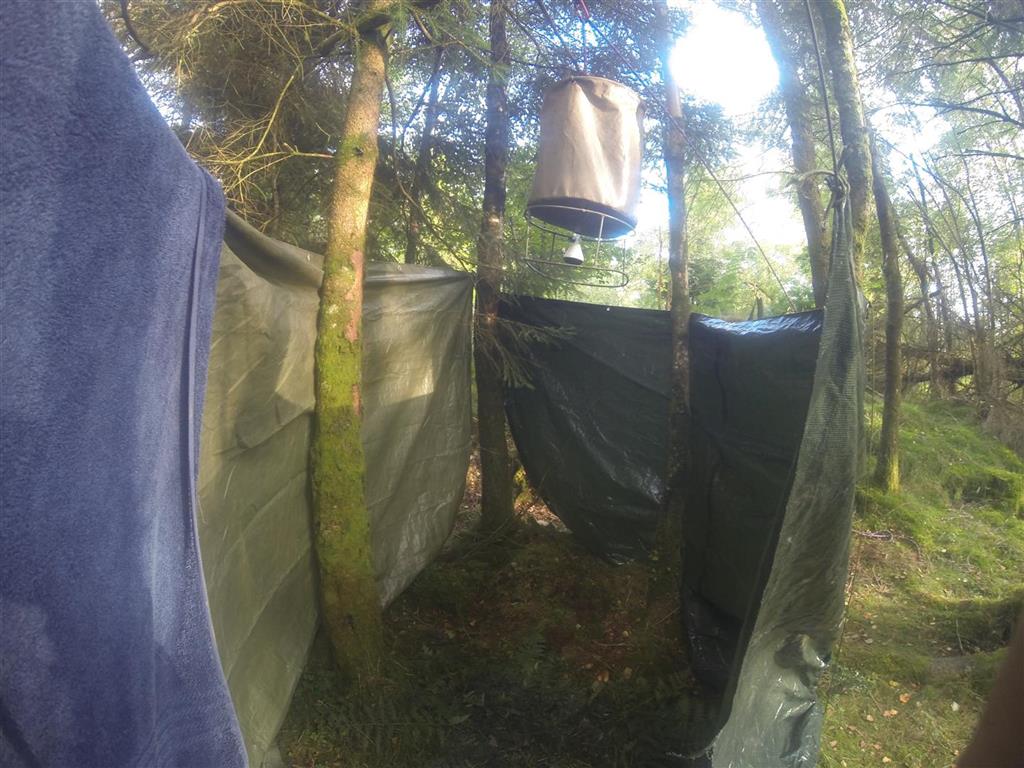
The shower I never used!
Further studies & additional kit list
Books
- Holistic Herbal by David Hoffman
- Readers Digest Guide to Herbal Medicine by Readers Digest
- Mushrooms by Roger Phillips
- Food for Free by Richard Mabe
- Tracks and Signs (of the animals and birds of Britain and Europe) by Lars-Henrik Olsen
Equipment to buy and reminder
- Waterproof tinder box
- Portable device charger
- Trousers (Hagloff)
- Head torch - Petzl or Black Diamond brand
- New & Spare battery for watch
- Second pair of sealskinz socks
- Bring my thermal mug
- Spray on plasters
- Tick twisters
- Tarp & Hammock set
- Small refill bottle to lighten and compact wash kit
- Waterproof trouser cover
- Lifeproof phone case - USA waterproof and shockproof
- Scarpa GTX boots
- Bring universal charger